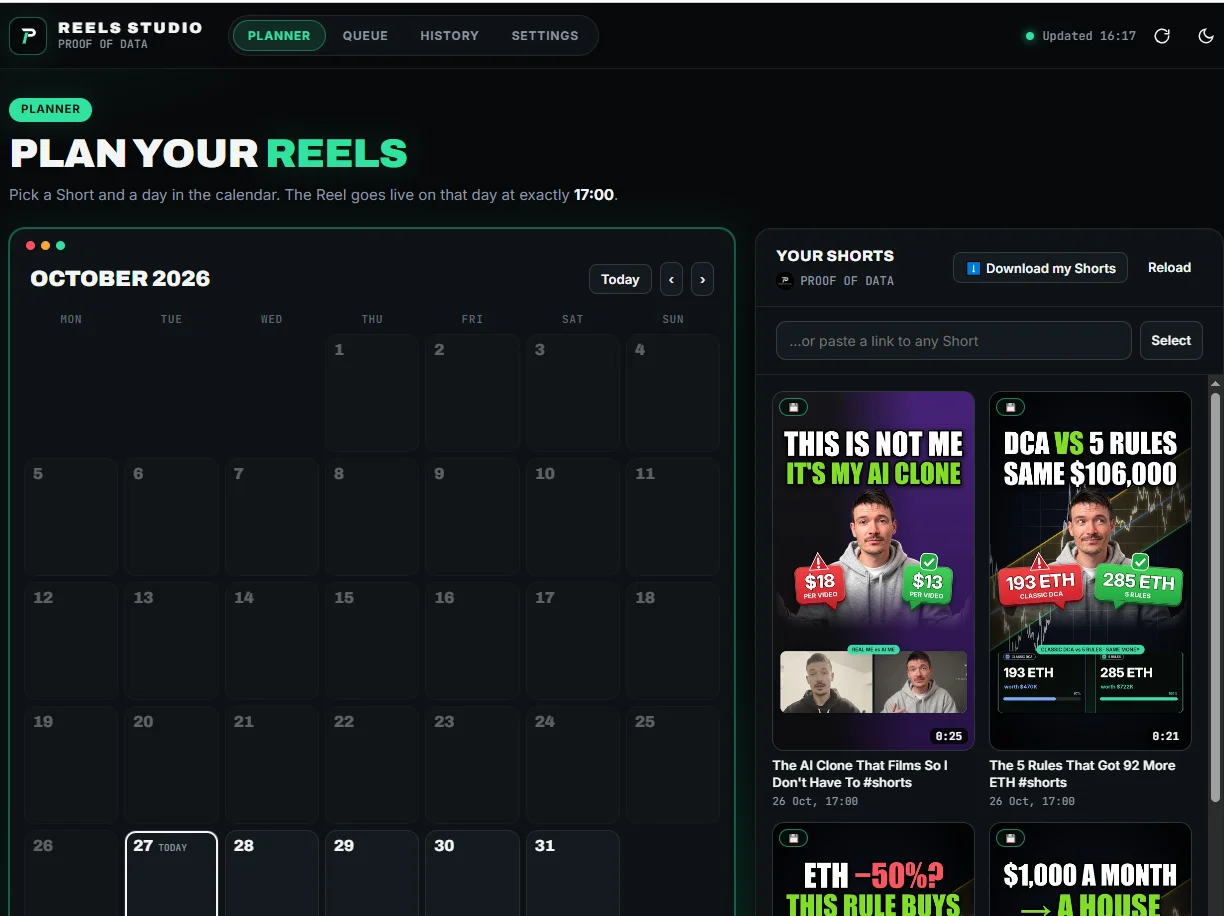
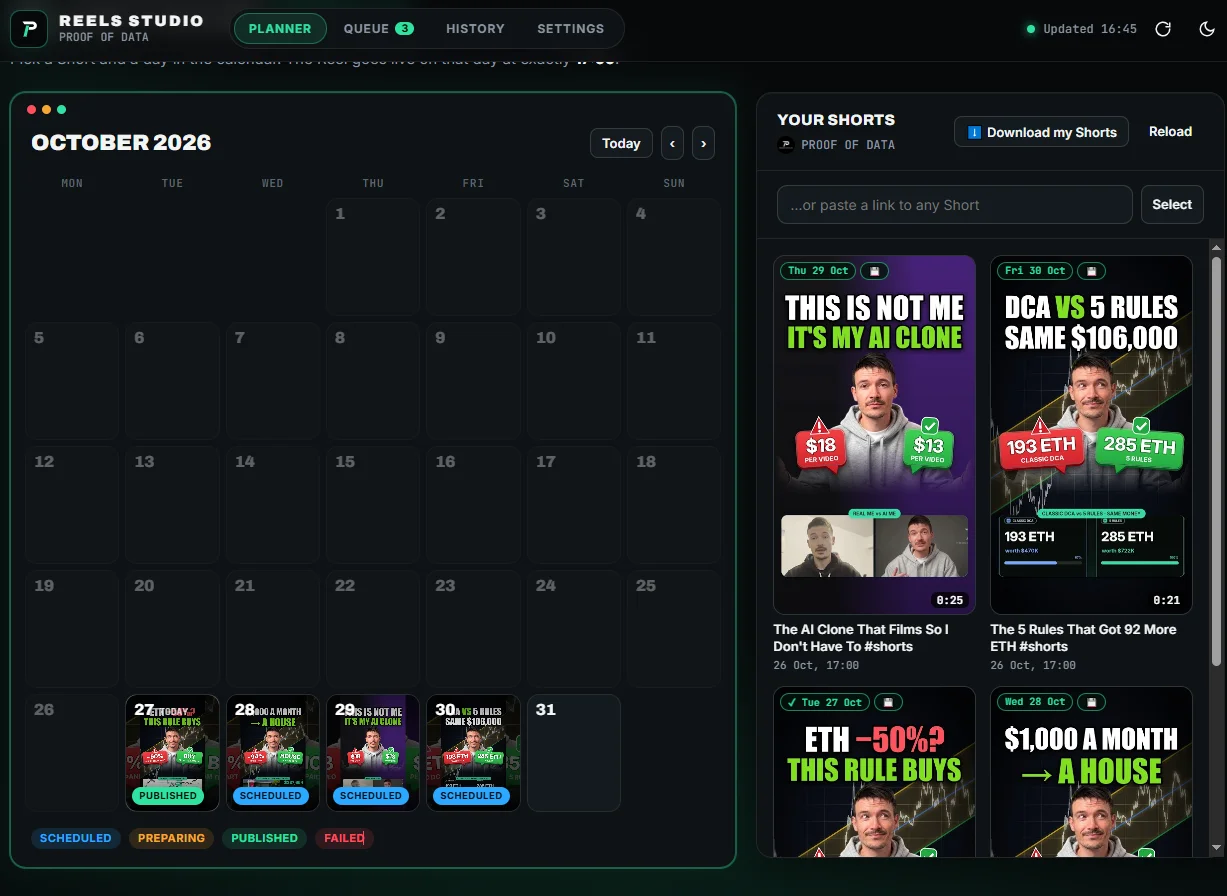
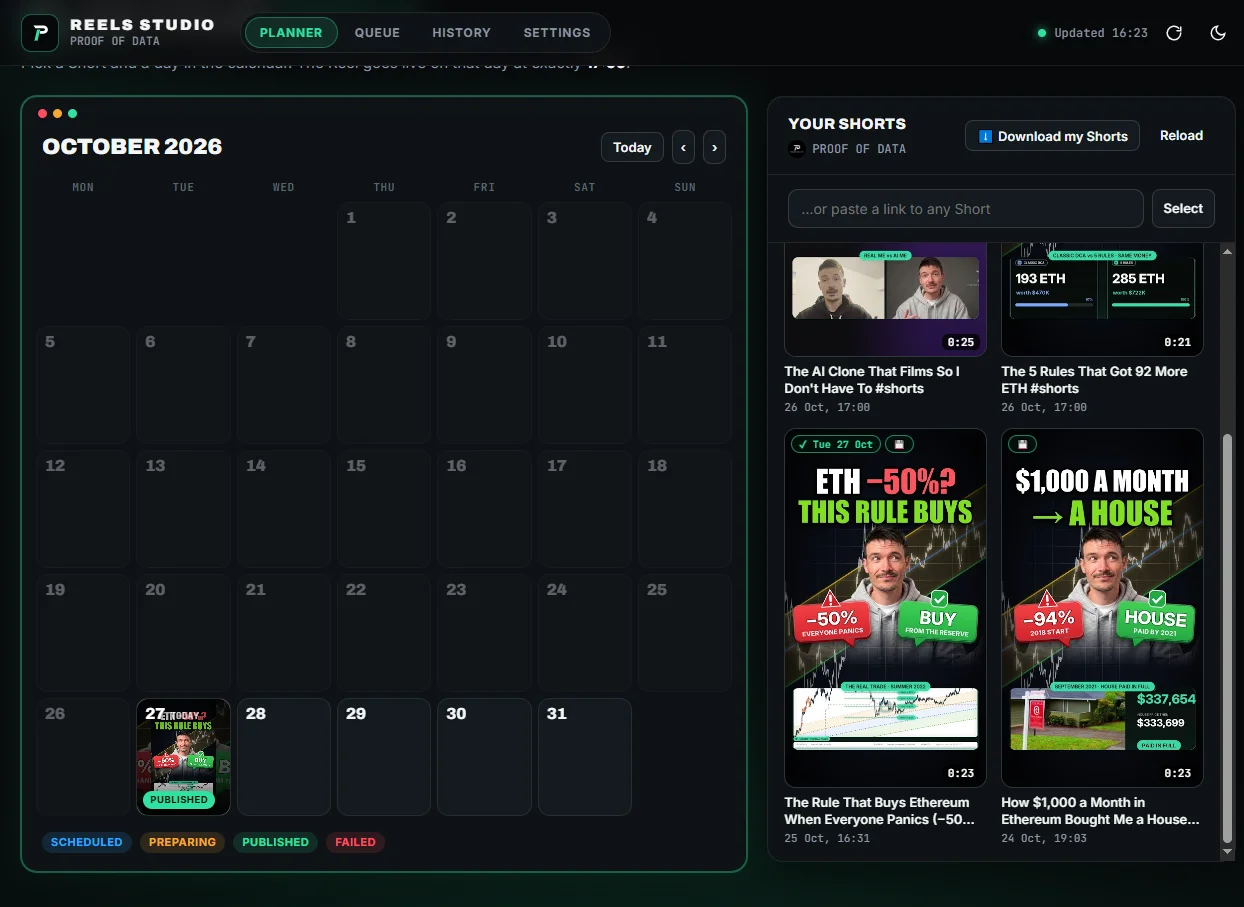
Pick a Short and a day. On that day the Reel goes live with your title, description, hashtags, cover and comment,
even with your computer off. Watch the setup step by step, every screen is also written out below.
2 · GitHubfetches title, description, tags, thumbnail and packs the video
3 · On the dayuploads to Instagram and publishes at your time
4 · +1 minuteyour comment goes under the Reel
Never at random, at most one Reel a day in the calendar (extra ones only with your own click), and the same Short is never posted twice.
#shorts is removed from the caption automatically.
Tokens and keys are passwords. Paste them only into Reels Studio. Never into a comment, a chat or a screenshot.
Tick Done on each step as you go: your progress is saved in this browser.
Part 1
Install Reels Studio
⏱ 5 min
Reels Studio is a small app that runs in your browser. It's where you plan Reels and paste your keys. On Windows one double-click installs everything.
Unzip it into a normal folder, for example Documents\Reels Studio.
⚠
Don't put it inside OneDrive, Google Drive or Dropbox. Synced folders break the Python environment.
1.2
Windows: run the installer
Open the unzipped folder and double-click Install Reels Studio.bat.
If Windows shows Windows protected your PC, click More info → Run anyway. The file is a plain text script you can open in Notepad to check.
It installs Python (if you don't have it), the packages (a minute or two) and a Reels Studio shortcut on your desktop.
When it's done, the app opens in your browser at http://127.0.0.1:48765.
💡
From now on, start the app with the Reels Studio desktop shortcut. It only listens on your own computer (127.0.0.1), nothing is reachable from the internet.
In a terminal, inside the folder: pip3 install -r requirements.txt, then python3 tools/studio.py.
No terminal? Double-click panel/index.html instead. Everything works, only the automatic download of your Shorts is missing (you attach the video file by hand when scheduling).
Part 2
Create a private GitHub repository
⏱ 2 min
GitHub runs the automation for free in the cloud, so your computer can be off when a Reel goes live. No account yet? Sign up free at github.com/signup.
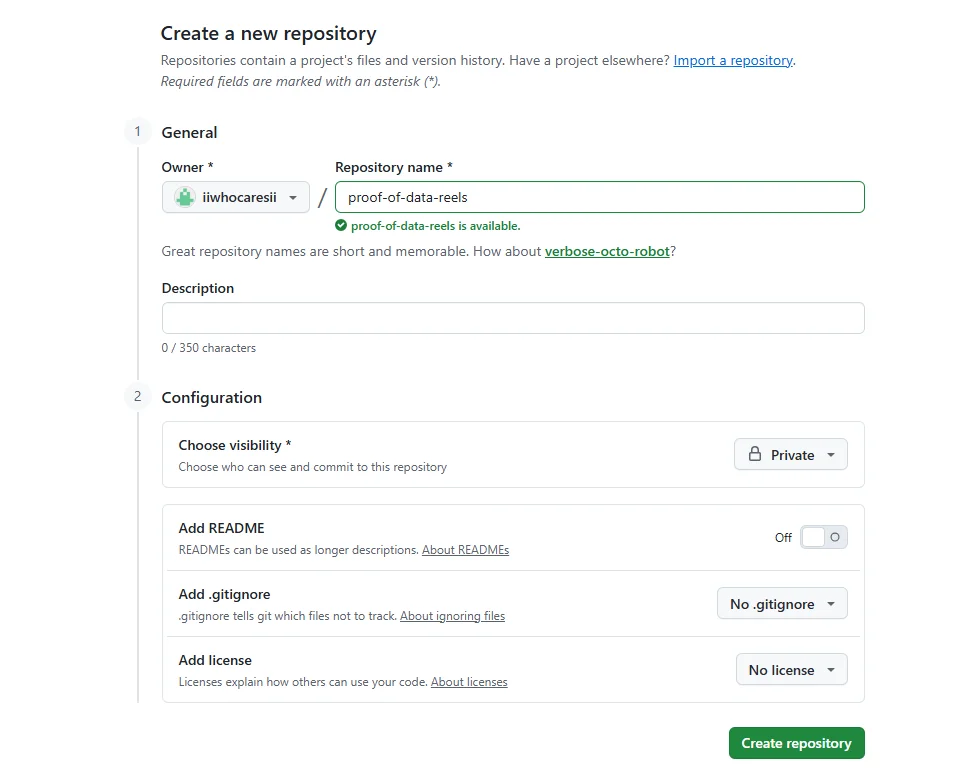
Repository name: type shorts-to-reels (any name works, just remember it).
Choose visibility:Private.
Leave Add README off, .gitignore = No .gitignore, license = No license.
Click Create repository.
💡
The screenshot shows another name (proof-of-data-reels); everything after it uses shorts-to-reels. The name doesn't matter, it just has to match what you type into the app later.
2.2
The repository exists and is empty
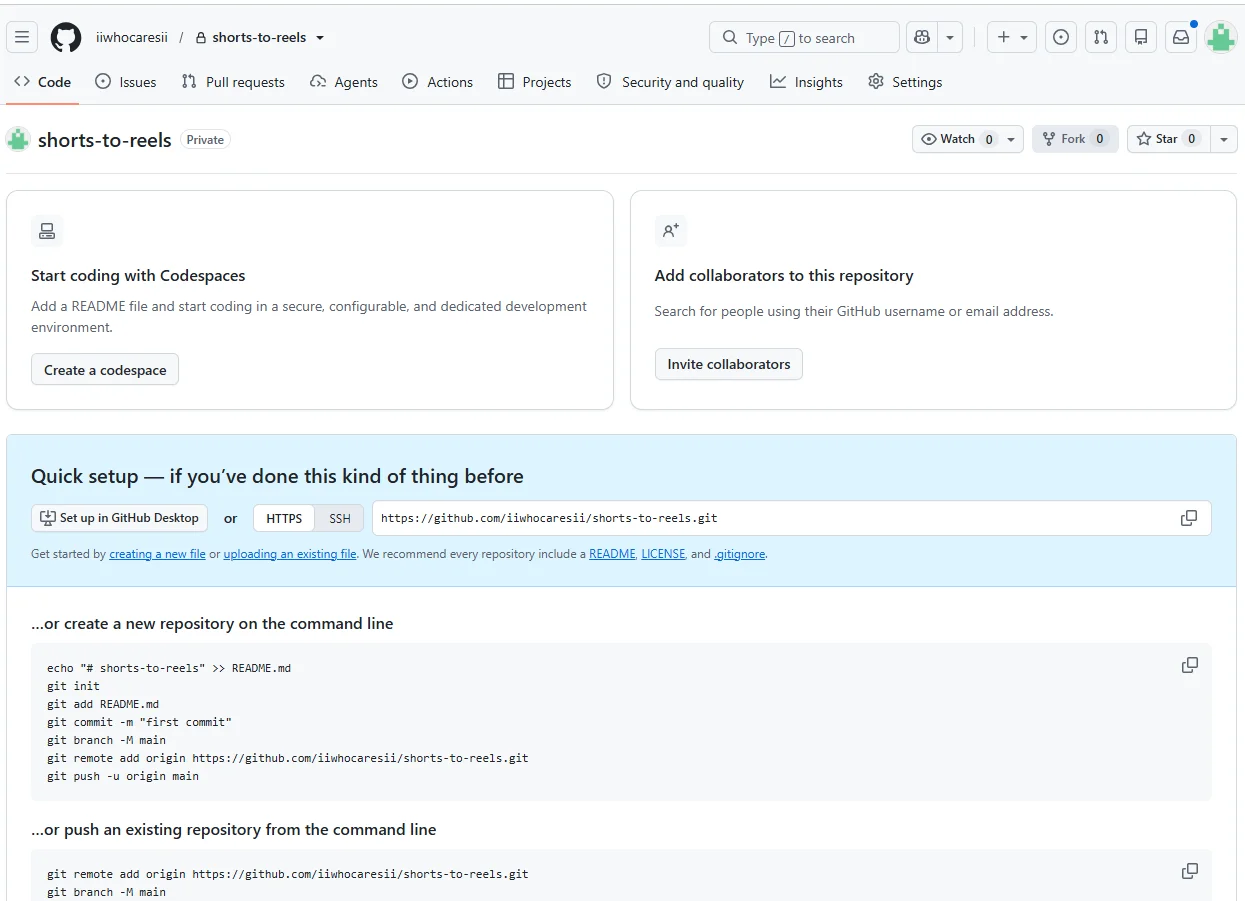
You see your new repository with a Private badge. That's it.
💡
Ignore the Quick setup box and the git commands. You don't need a terminal: the app uploads all the files for you.
Part 3
Create a GitHub token for the app
⏱ 4 min
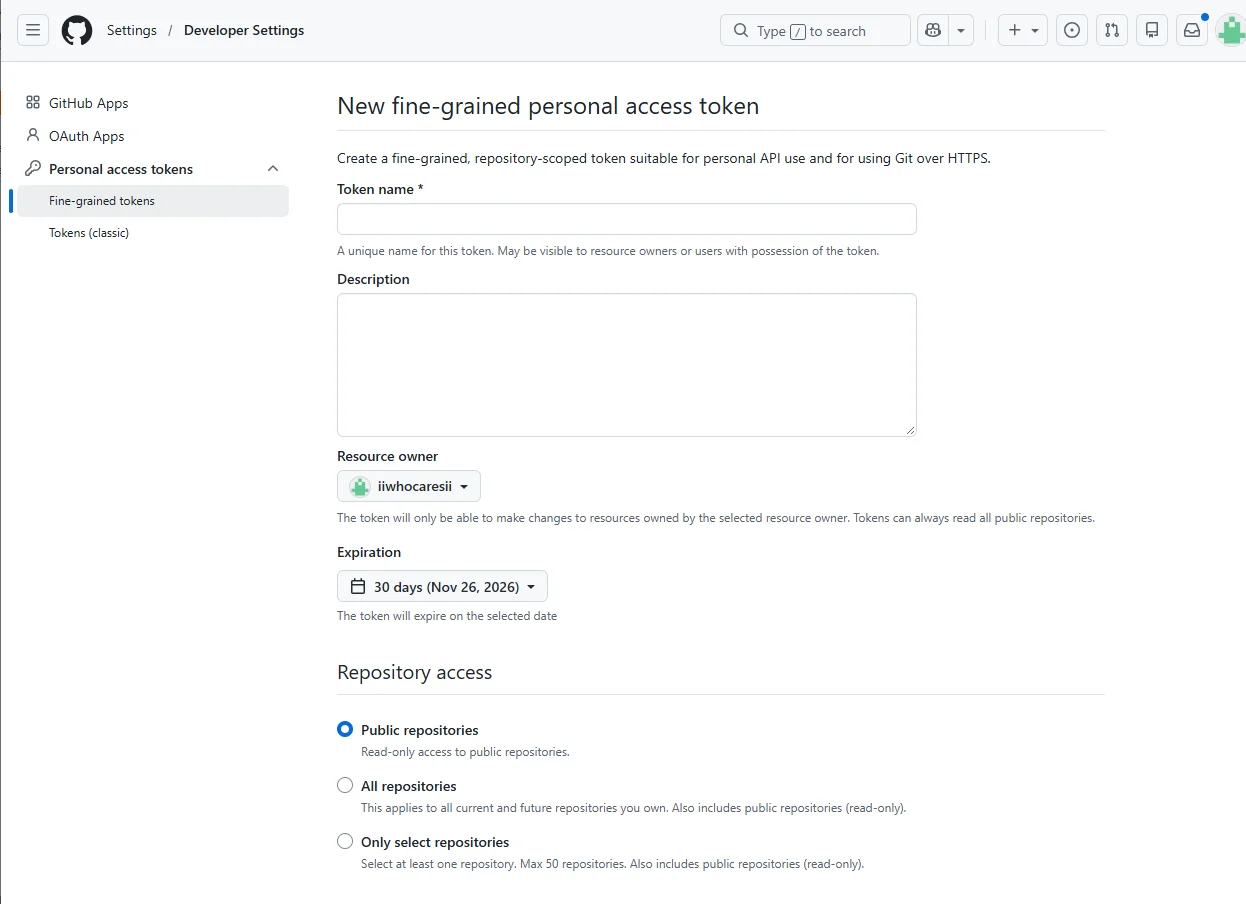
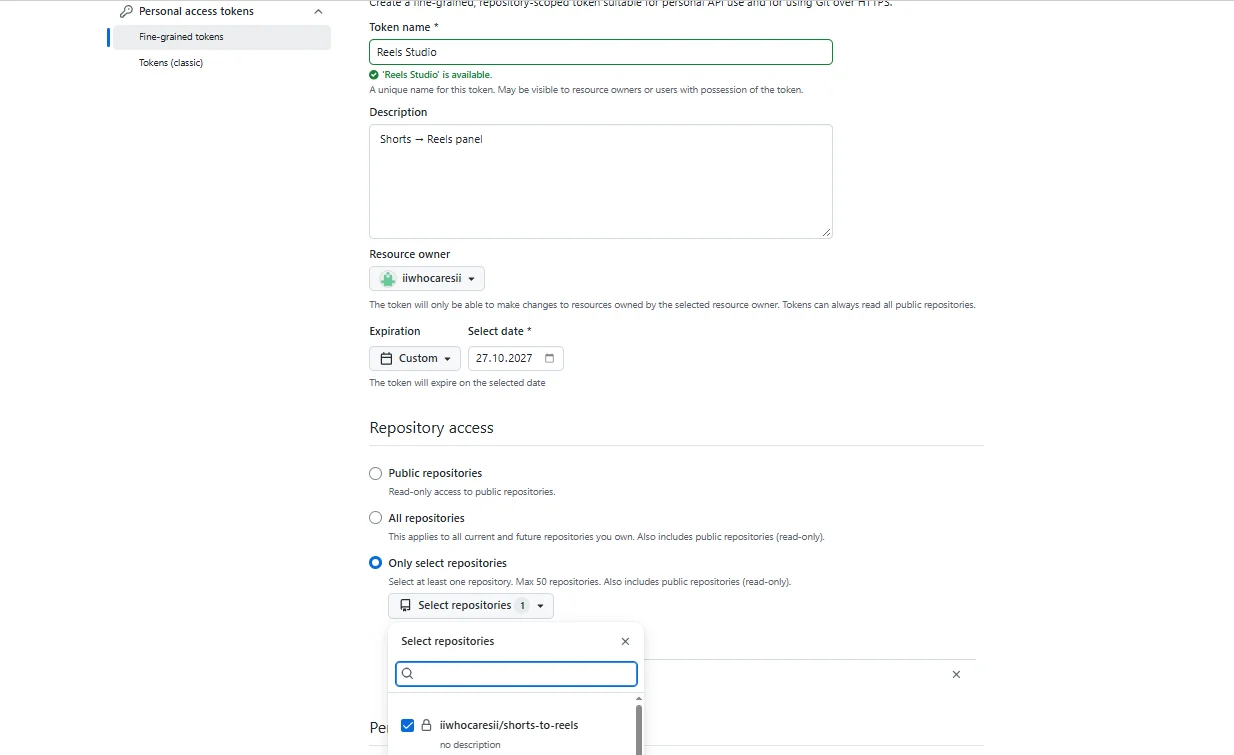
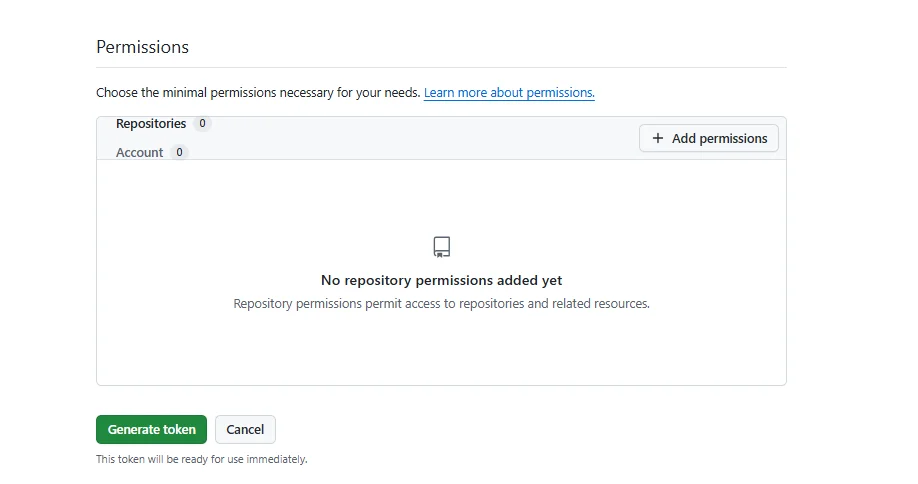
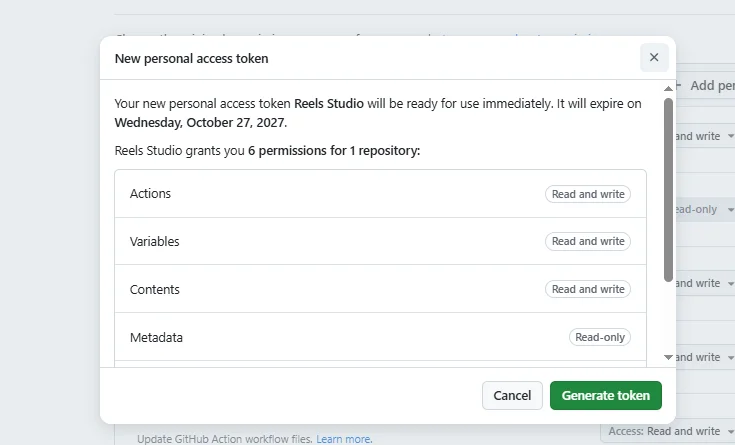
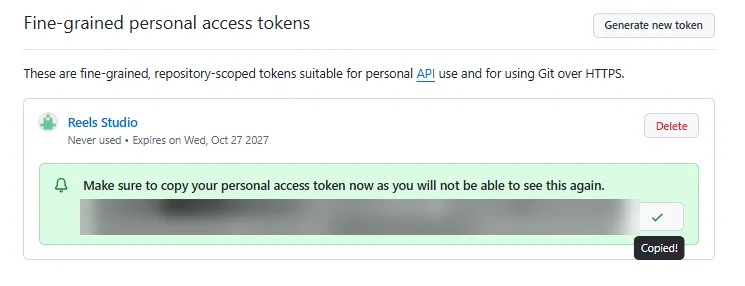
A token is a password that only works for this one repository. The app uses it to upload the files and to plan your Reels.
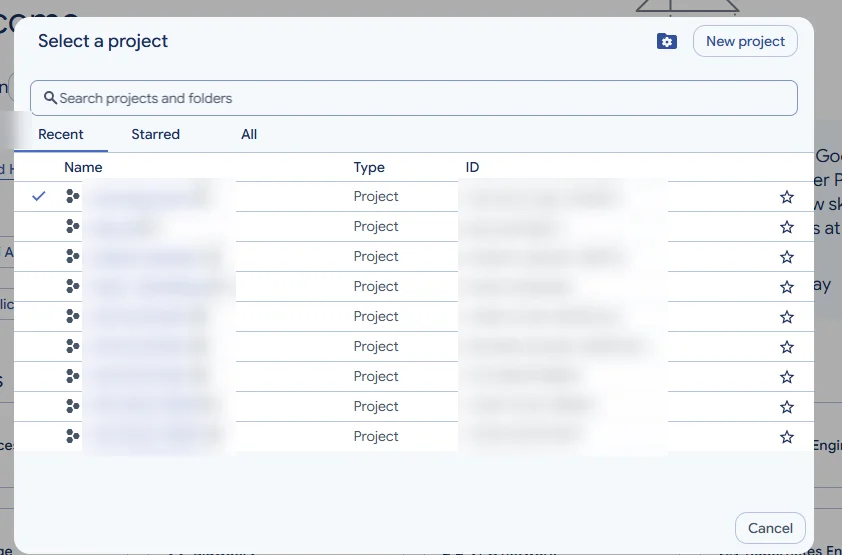
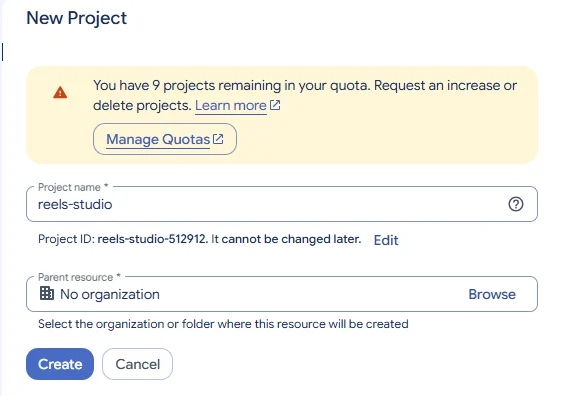
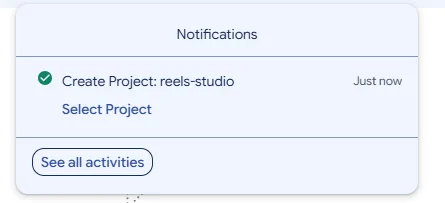
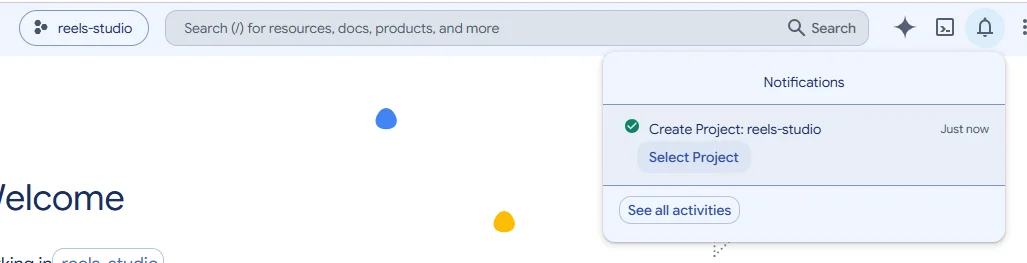
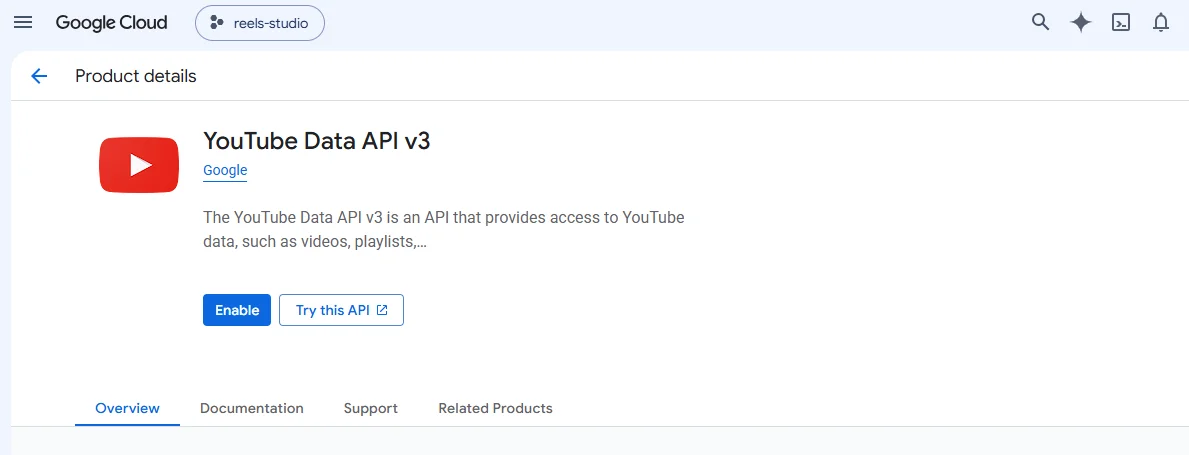
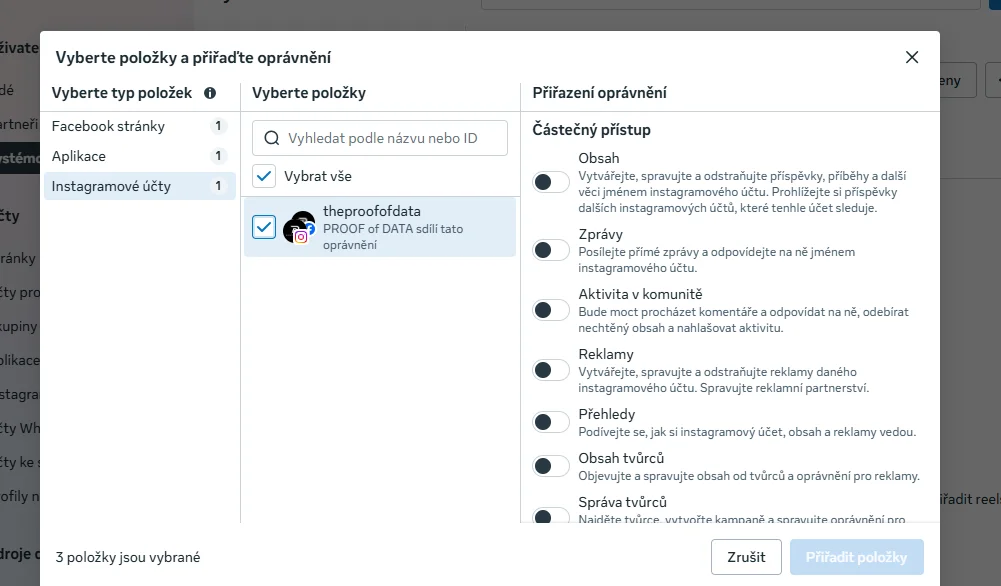
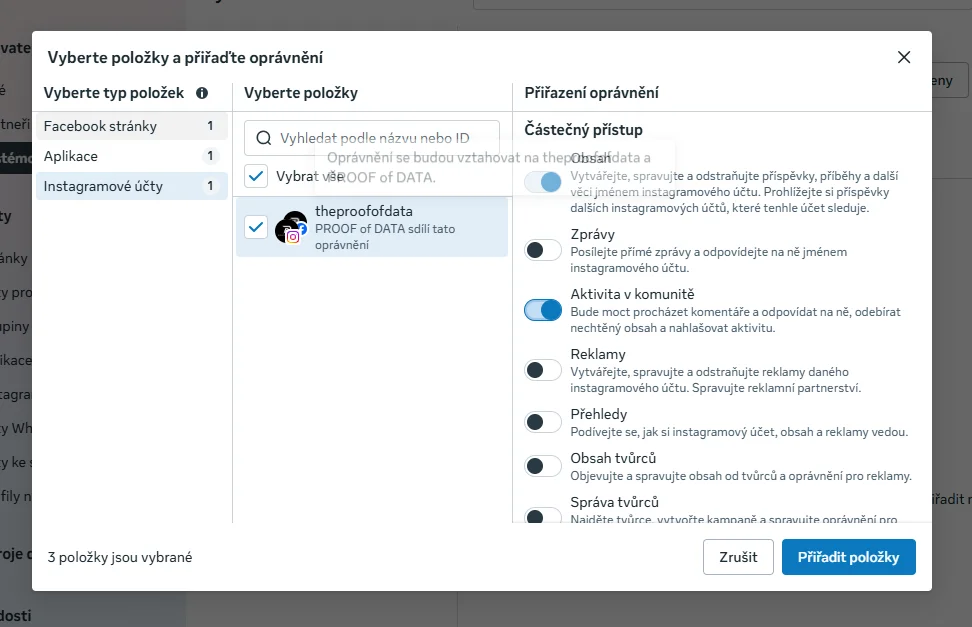
Check the picker says reels-studio and click Enable.
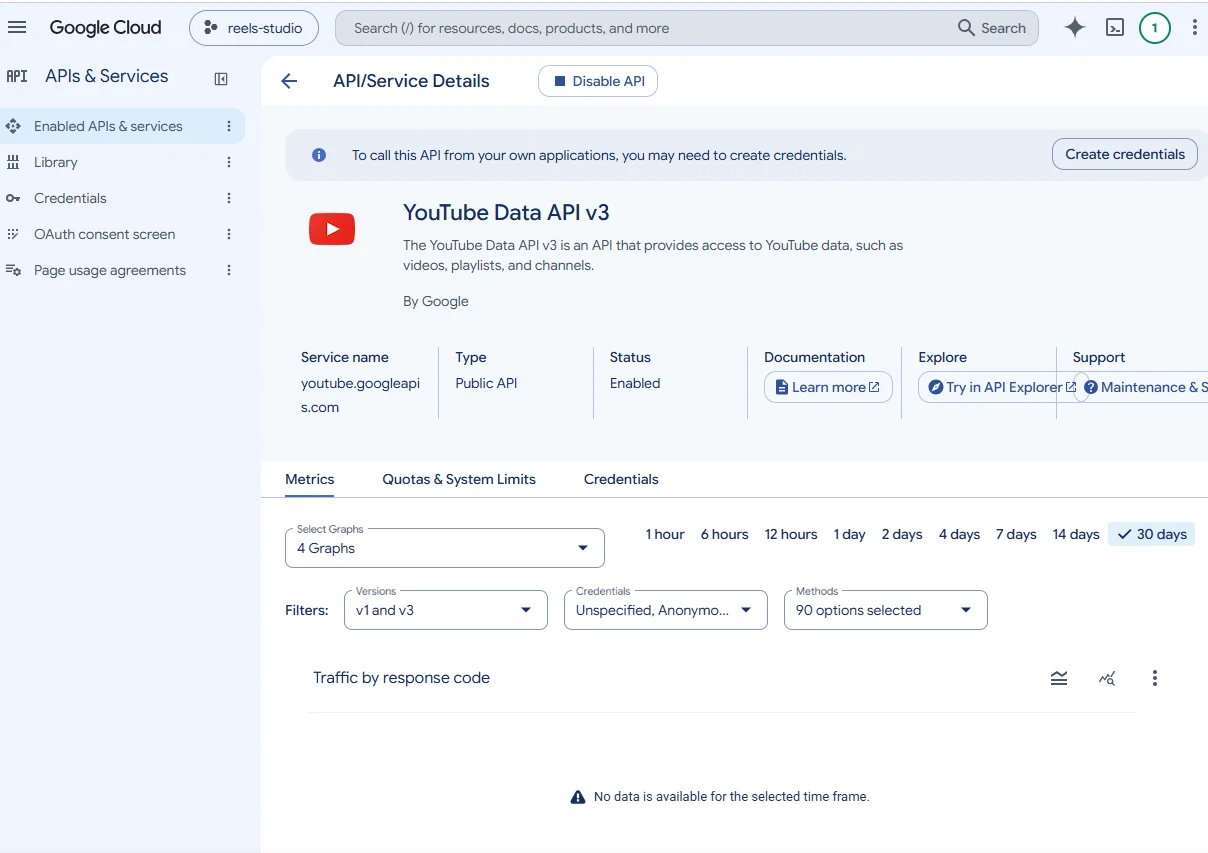
Status: Enabled. In the left menu click Credentials.
💡
Pick YouTube Data API v3, not the Analytics or Reporting API.
5.6
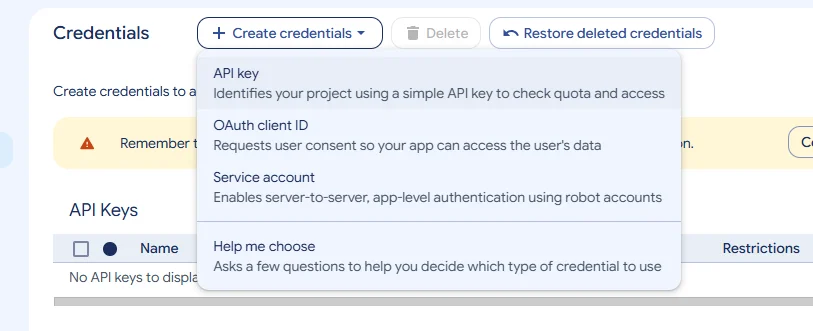
Create credentials → API key
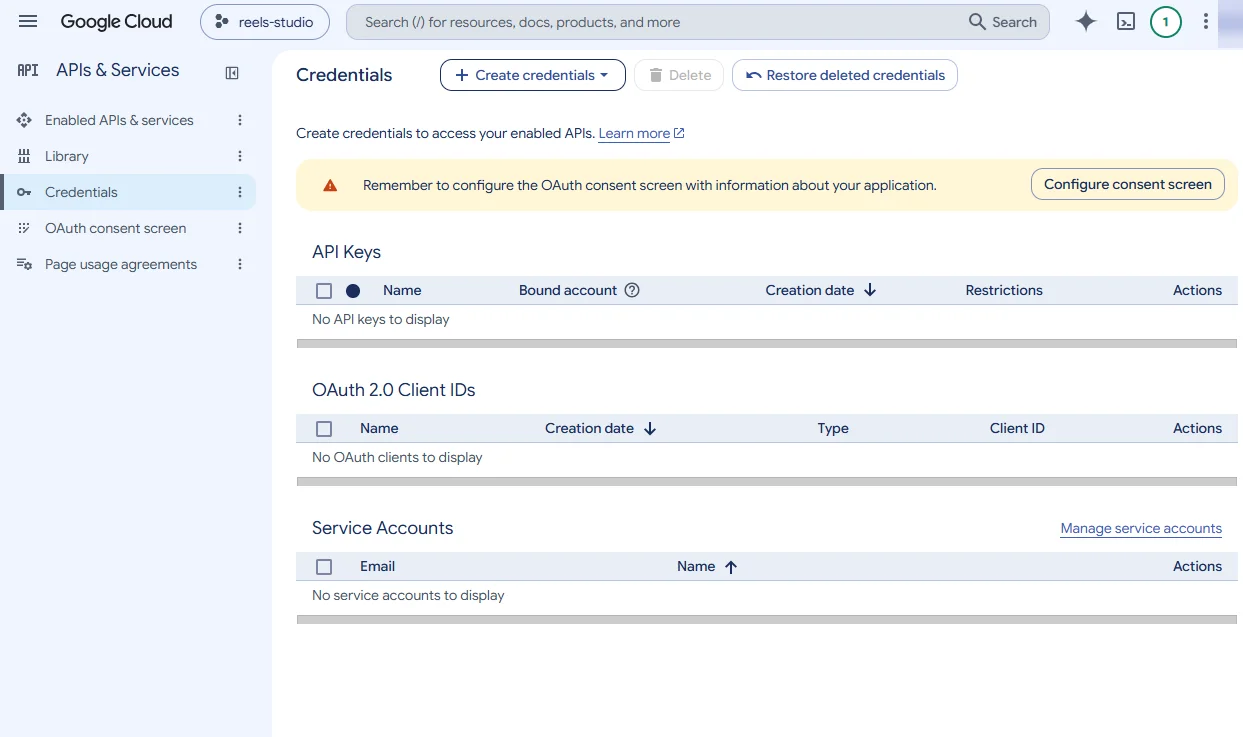
Click + Create credentials → API key (the first option).
💡
Ignore the yellow configure the OAuth consent screen banner. An API key doesn't need it.
5.7
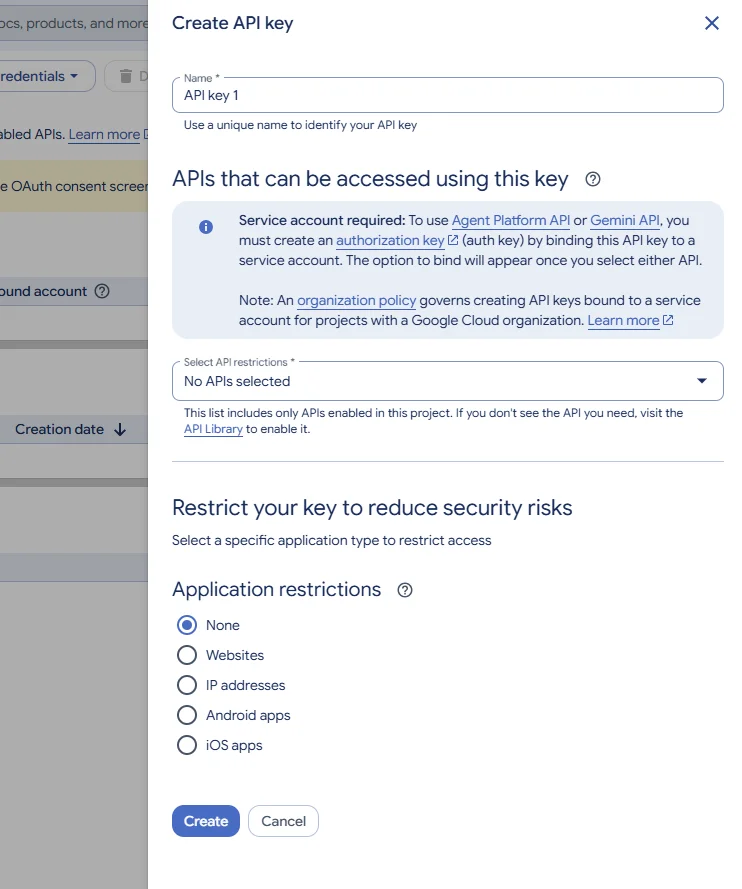
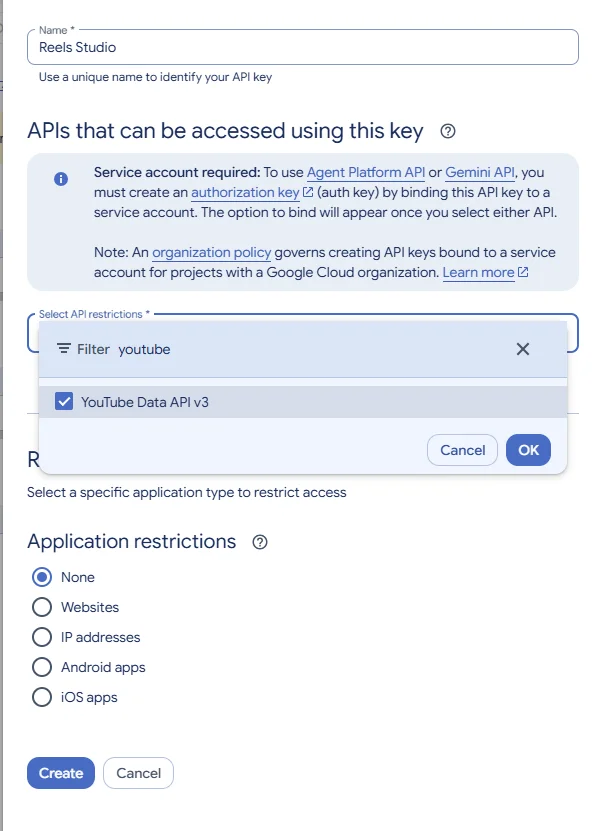
Name and restrict the key
Name:Reels Studio.
Open Select API restrictions, type youtube into the filter, tick YouTube Data API v3 only and click OK.
Application restrictions: leave None.
Click Create.
💡
None is right here: GitHub's servers have no fixed IP and the app runs on your PC, so website or IP restrictions would block the key.
💡
Ignore the Service account required box. It's only about Gemini.
5.8
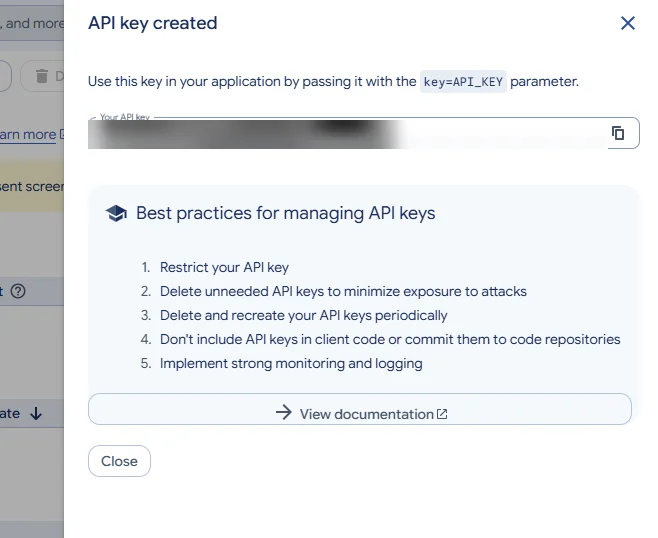
Copy the key
Click the copy icon next to Your API key (it starts with AIza) and close the dialog.
💡
Unlike the GitHub token, you can see it again any time: Credentials → API Keys → Show key.
5.9
Paste it into Reels Studio (twice)
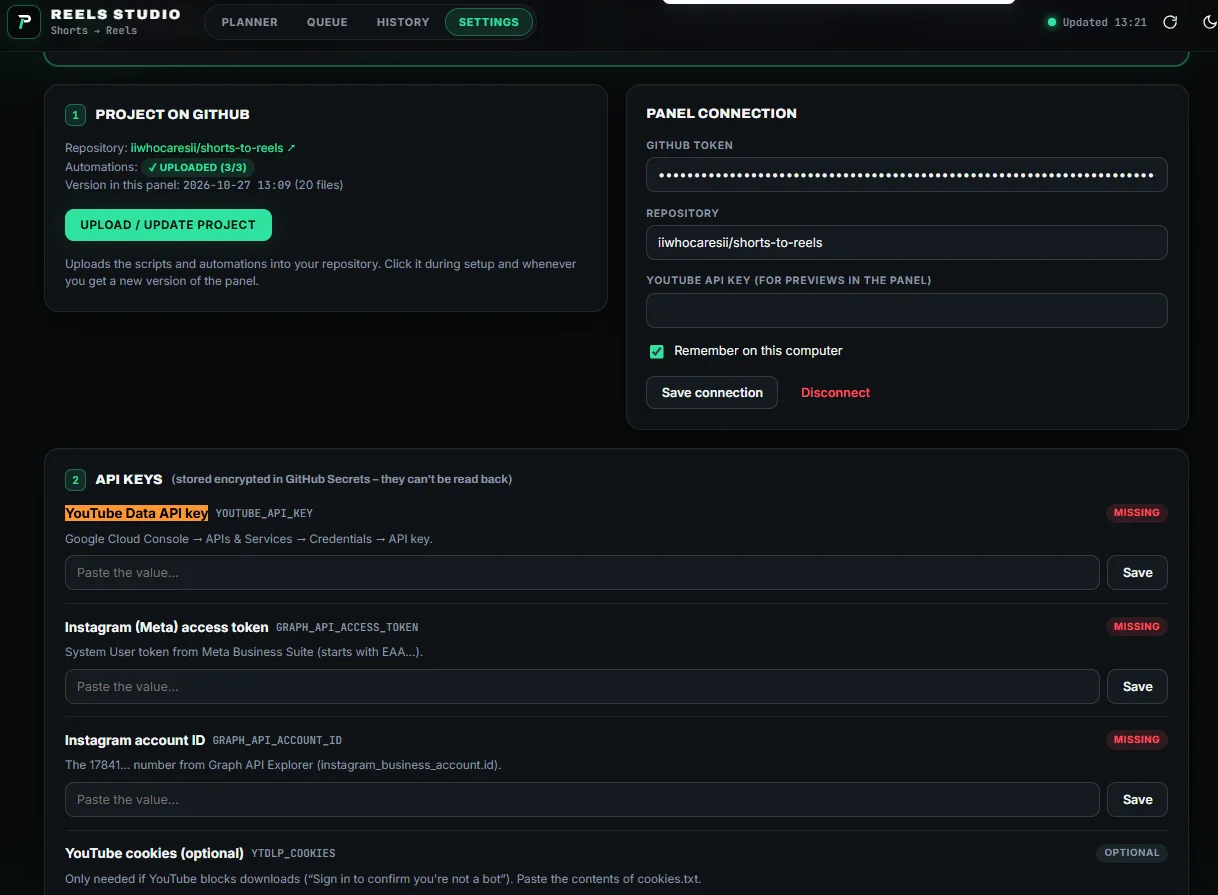
Settings → 2 API keys → YouTube Data API key: paste → Save. The badge turns into ✓ Set. This copy goes encrypted to GitHub for the cloud.
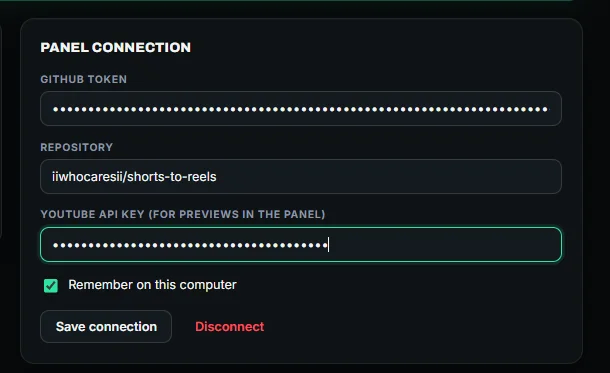
Settings → Panel connection → YouTube API key (for previews in the panel): paste the same key → Save connection. This one lets the app list your Shorts.
💡
After saving, the field is empty again. That's on purpose: keys are encrypted and can't be read back, not even by the app. The green badge is your confirmation.
Part 6
Pick your channel and publish time
⏱ 1 min
6.1
Find your channel
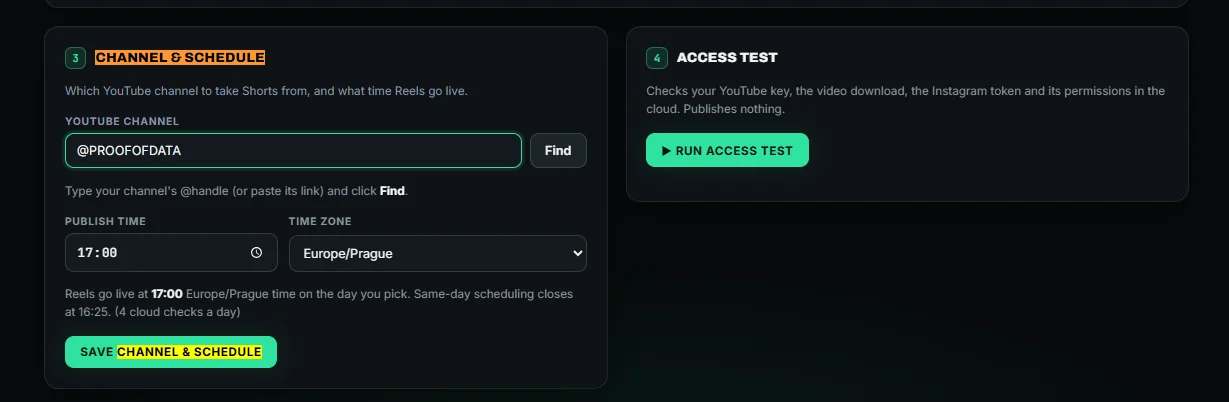
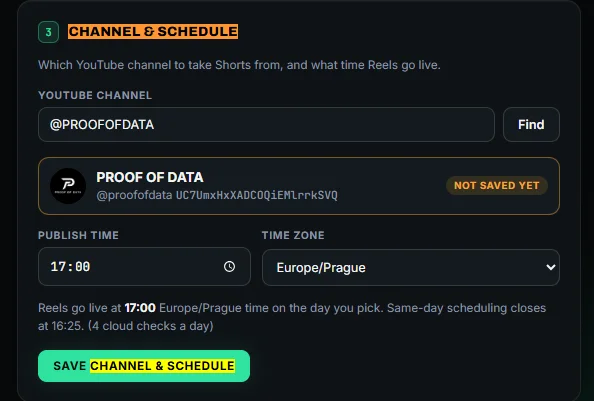
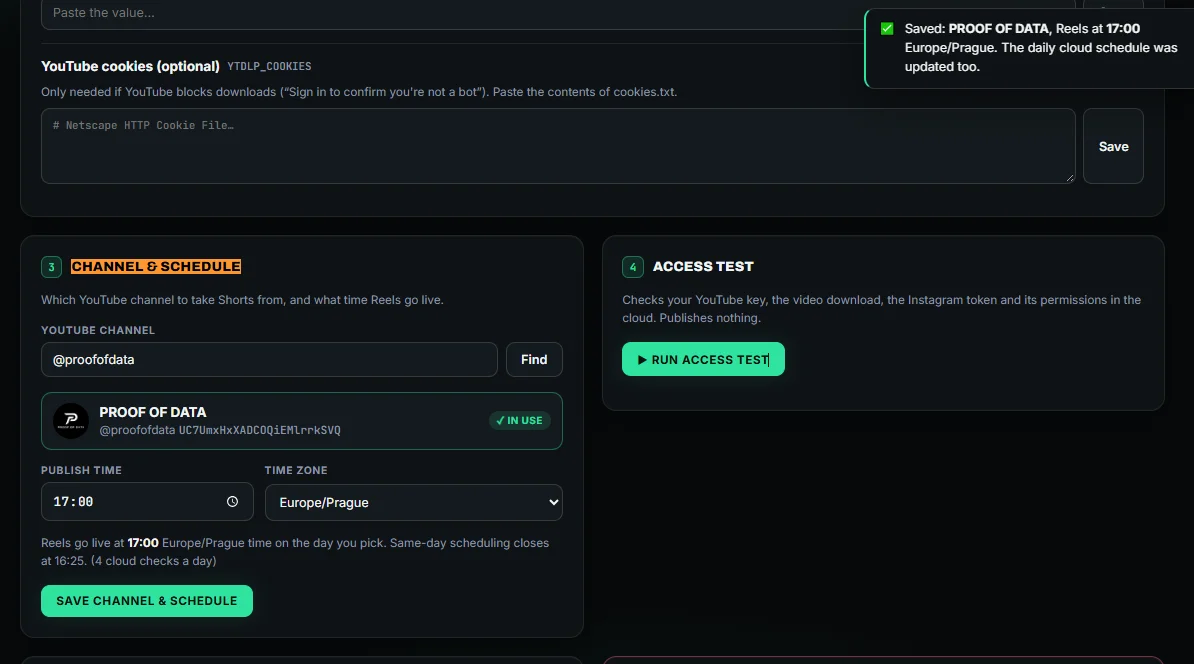
Settings → 3 Channel & schedule → YouTube channel: type your @handle (or paste the channel link) and click Find.
Check the avatar and name are yours.
Publish time and Time zone come from your computer. Change the time if you want Reels at another hour.
💡
Same-day scheduling closes 35 minutes before the publish time (the hint shows when).
6.2
Save
Click Save channel & schedule.
You'll see Saved: …, Reels at 17:00 … The daily cloud schedule was updated too. and the badge ✓ In use.
💡
Changing the publish time later? Save here again. The app rewrites the cloud schedule for you.
6.3
Your Shorts appear in the Planner
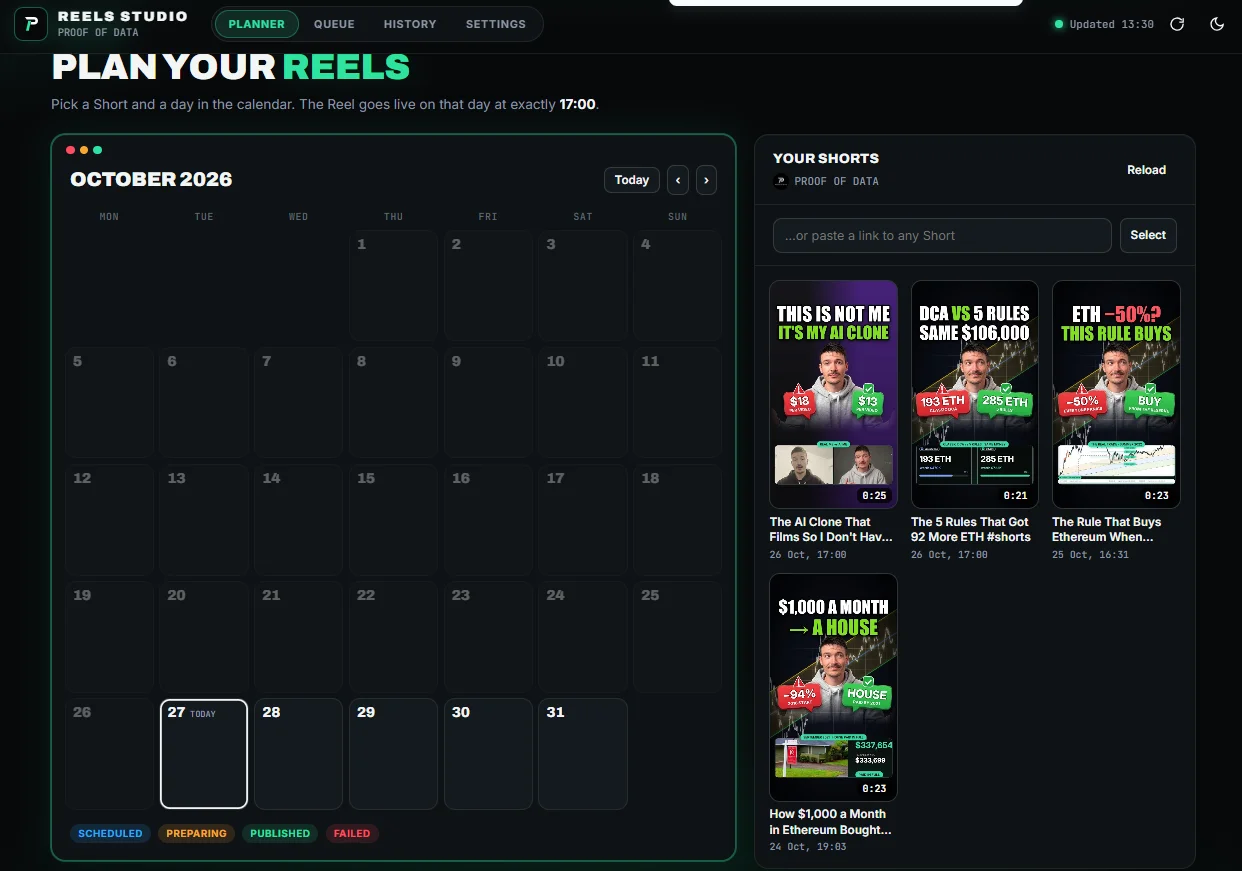
Open Planner. Your Shorts lists your channel's Shorts with thumbnails. That proves the key works.
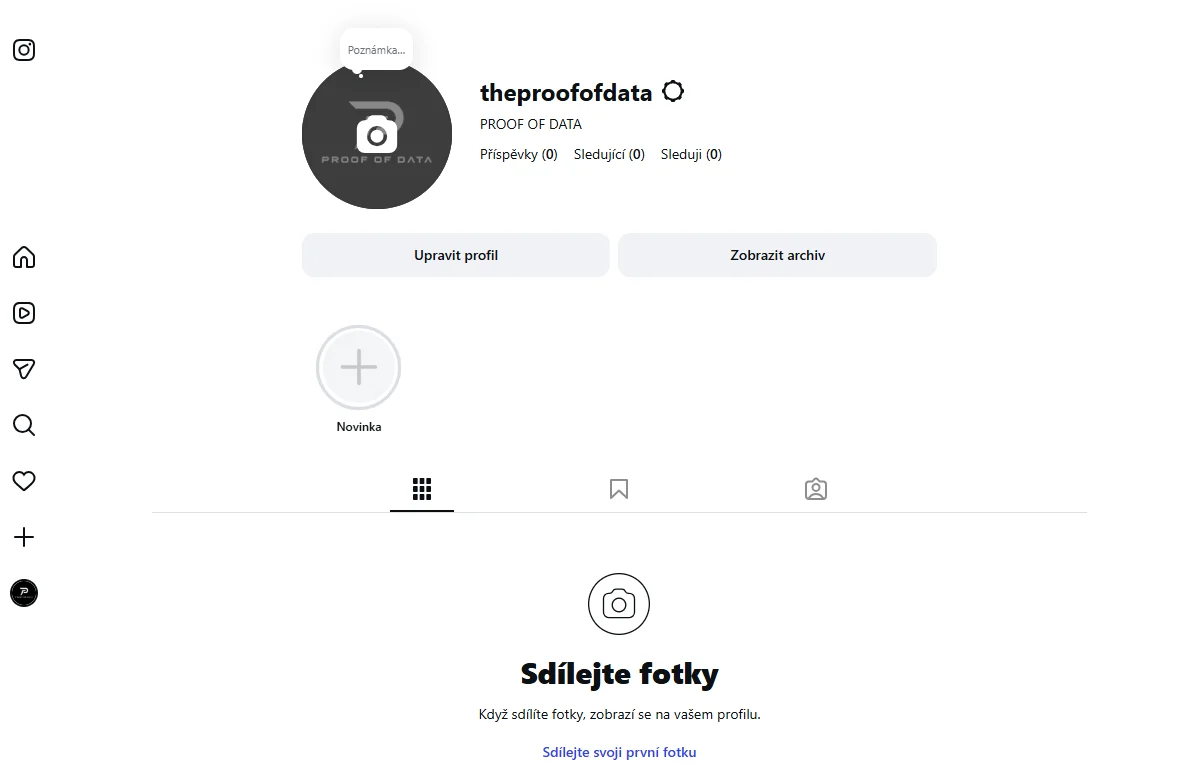
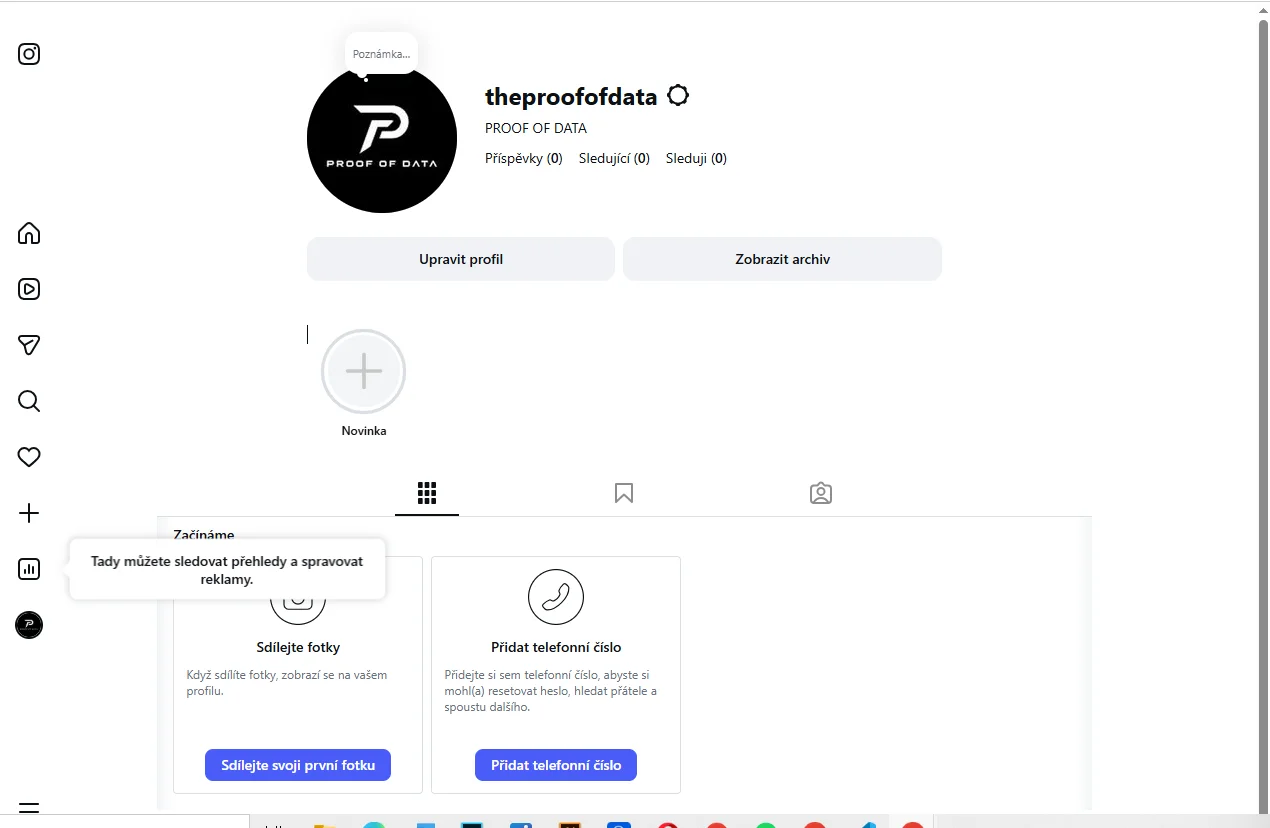
Set your channel logo as the profile photo and write a bio.
💡
Usernames can only use letters, numbers, underscores and periods for a name that looks fine usually means a hidden space. Clear the field and type it by hand.
💡
Post one or two things by hand before the first automated Reel. Brand-new empty accounts that publish through an API look suspicious.
7.2
Switch to a professional account
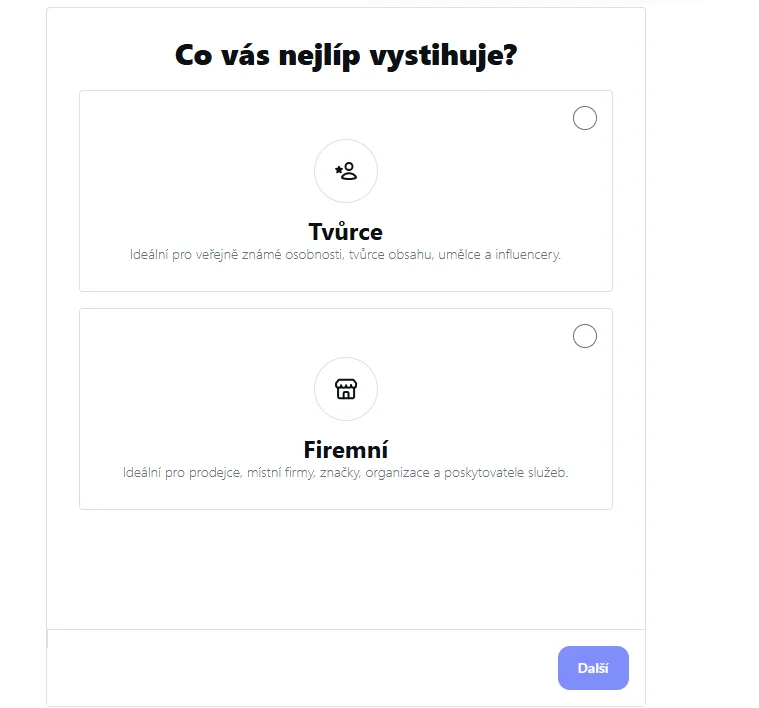
Screenshot in Czech. The button names in the text are the English ones.
Instagram → Settings → Account type and tools → Switch to professional account.
Pick Creator → Next, choose a category (e.g. Education) and finish.
💡
Creator and Business both work. Creator is the simpler choice for a YouTube channel.
7.3
Done: a professional account
Screenshot in Czech. The button names in the text are the English ones.
A new Insights (bar chart) icon appears in the left menu. That means it worked.
💡
Adding a phone number (Add phone number) helps protect a new account from being flagged.
Part 8
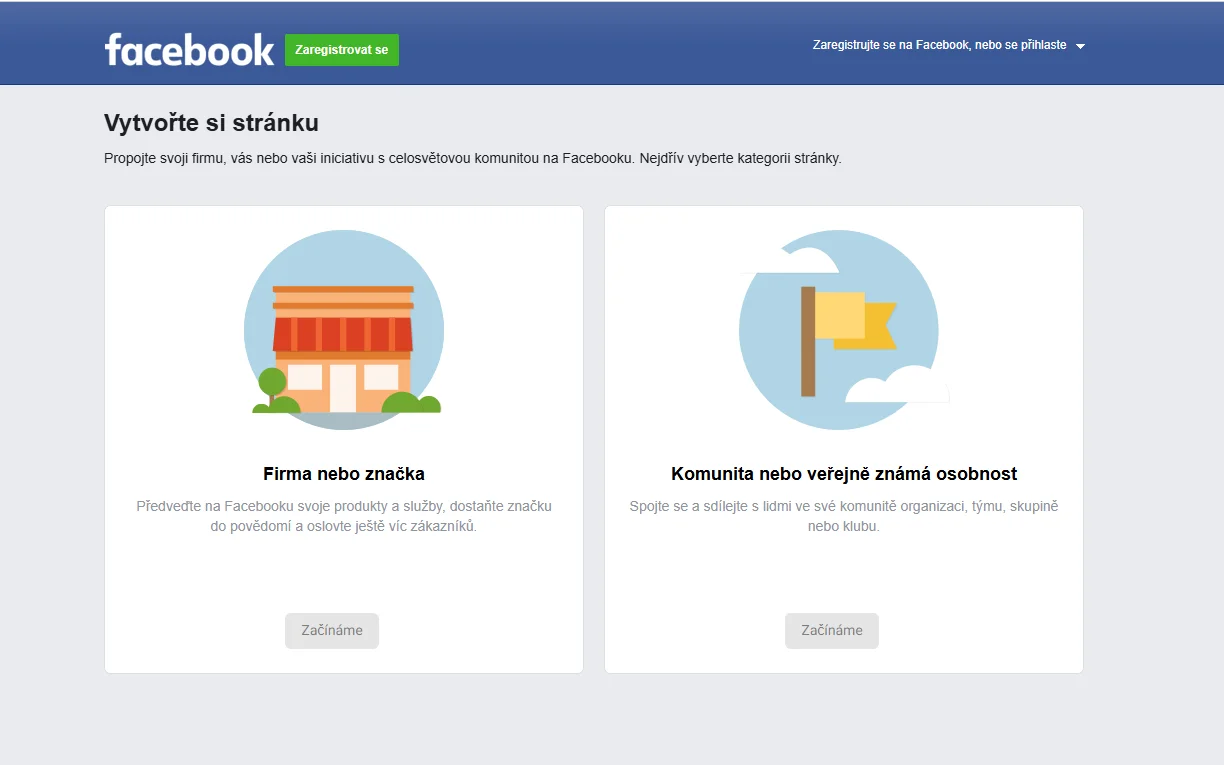
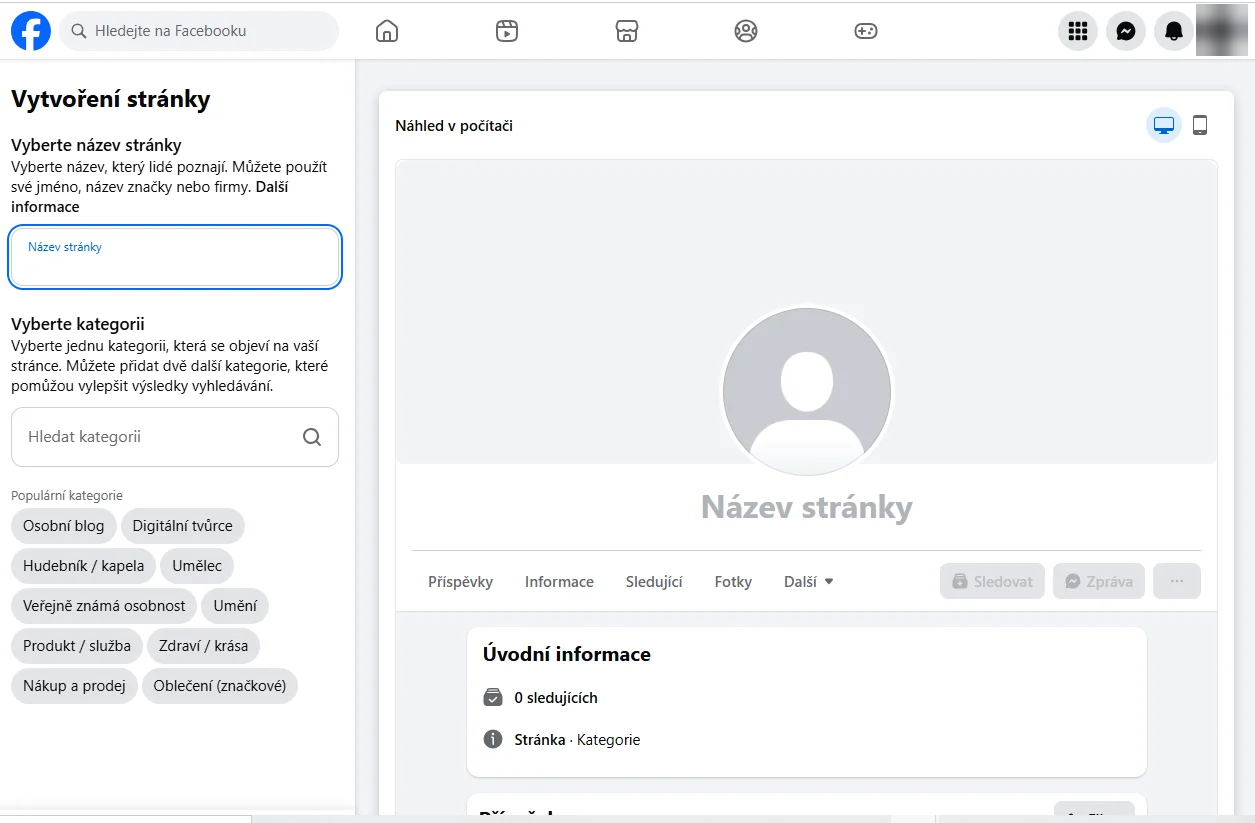
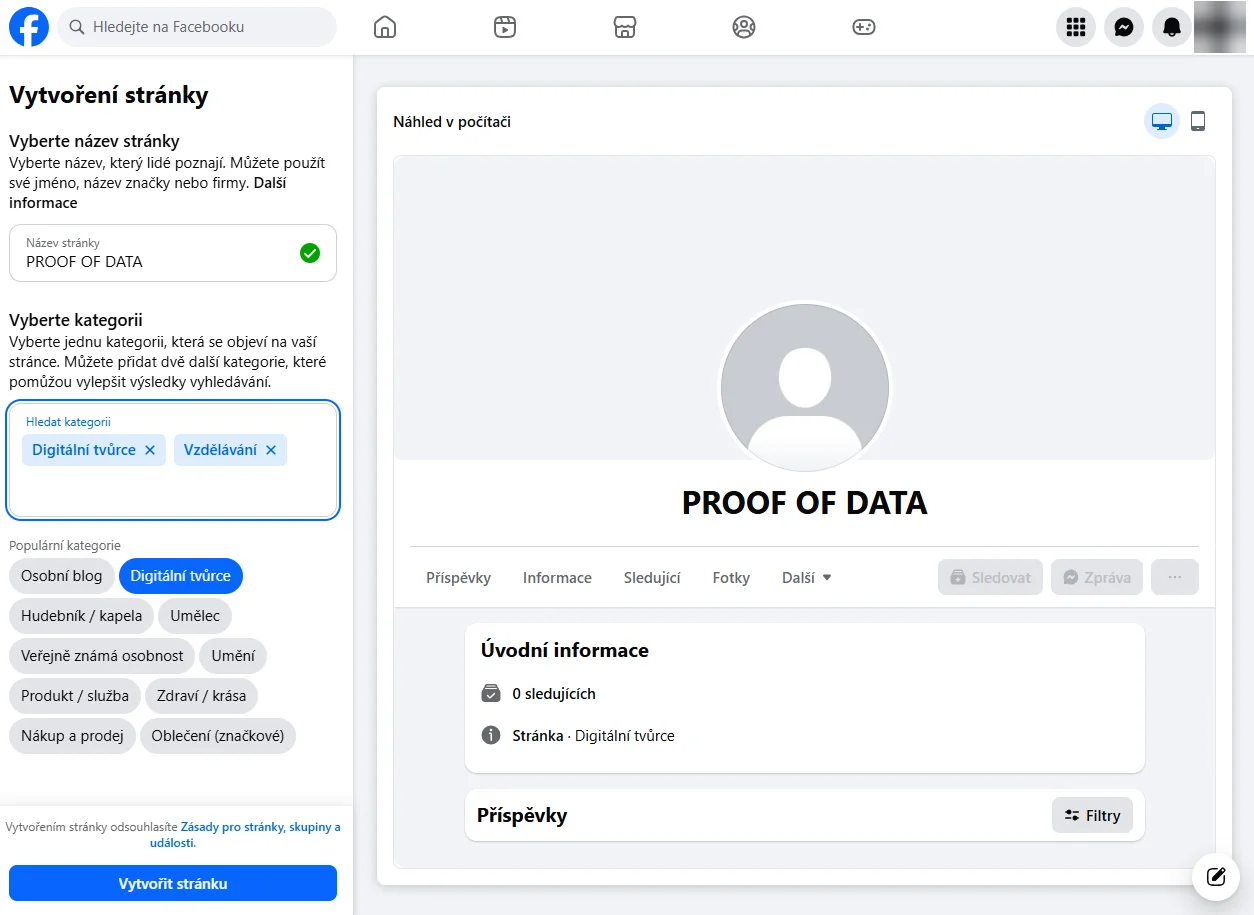
Create a Facebook Page and link Instagram
⏱ 5 min
Instagram's publishing API works through a Facebook Page. The Page can stay empty, it's just the connector.
8.1
Log in to Facebook first
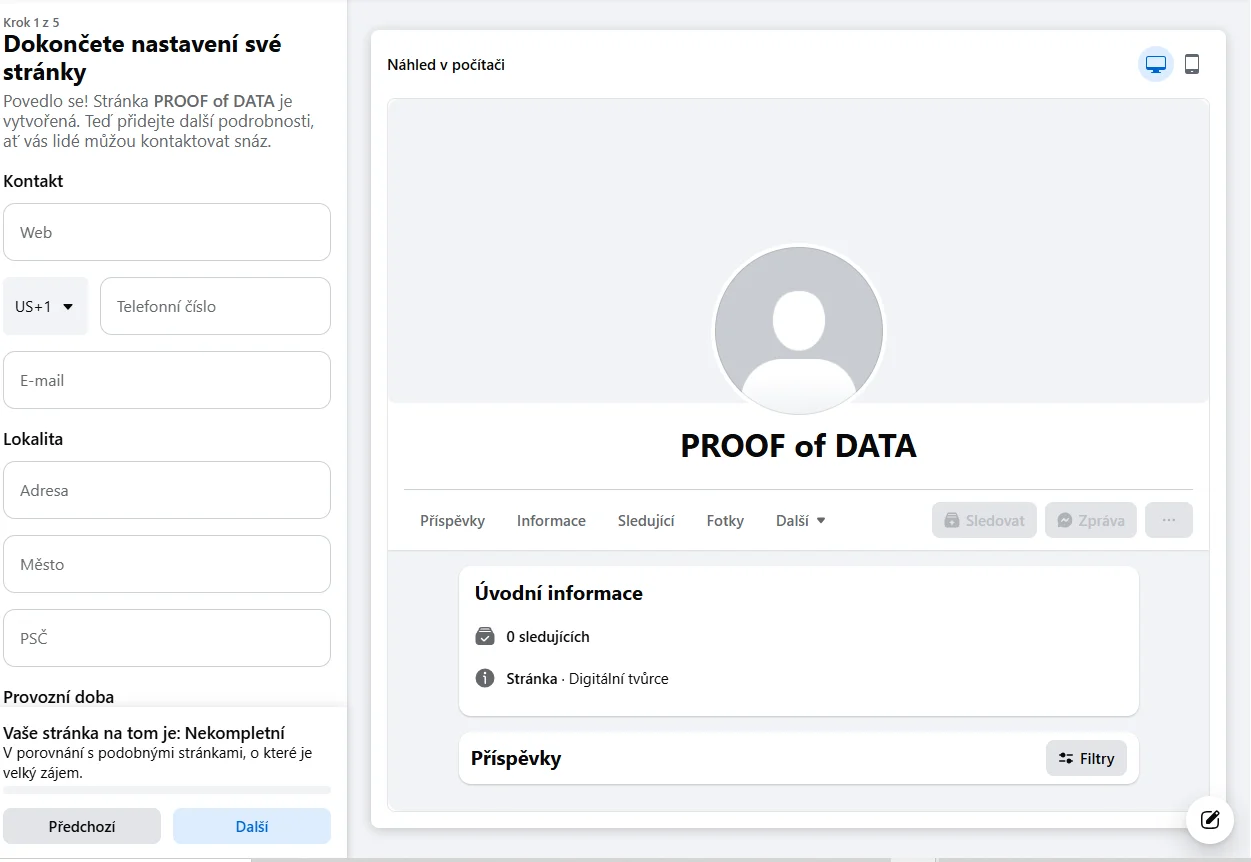
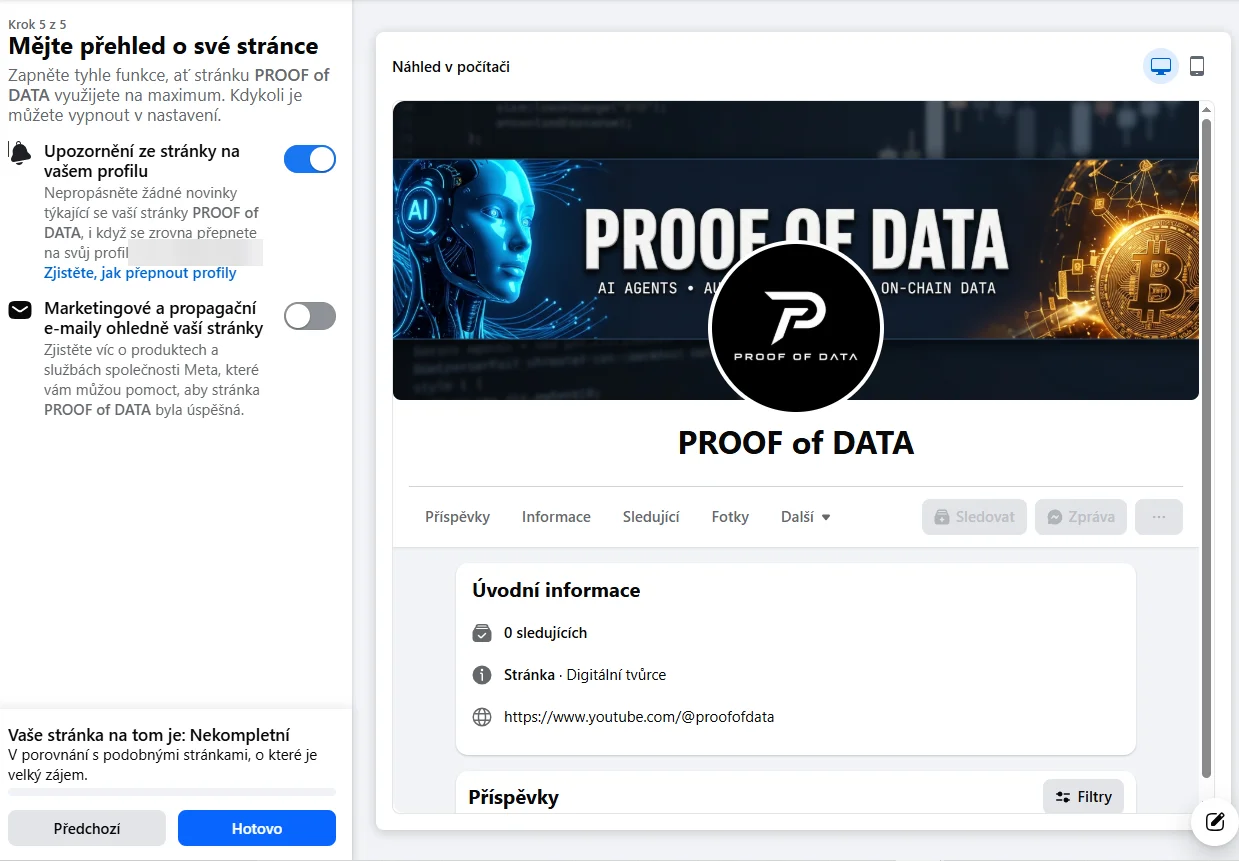
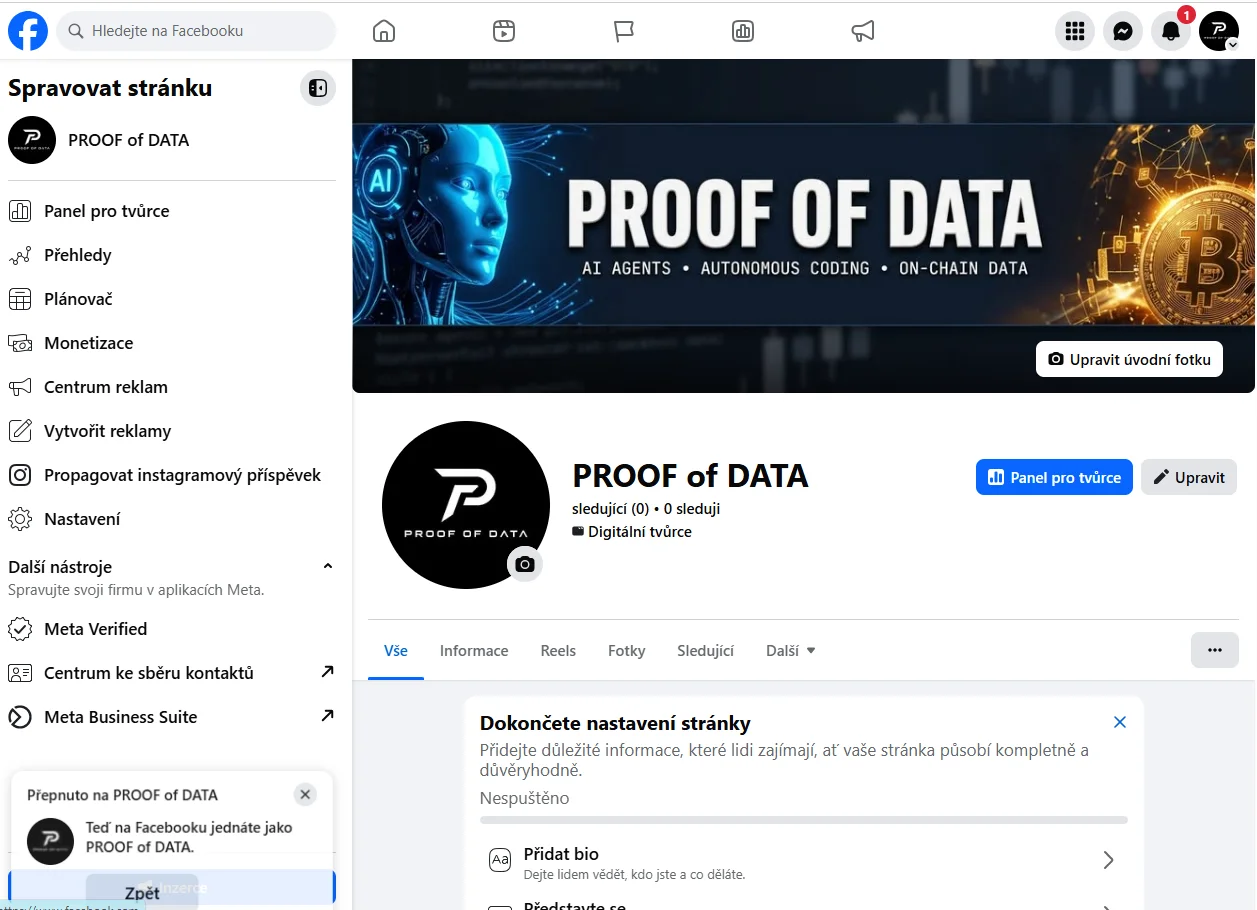
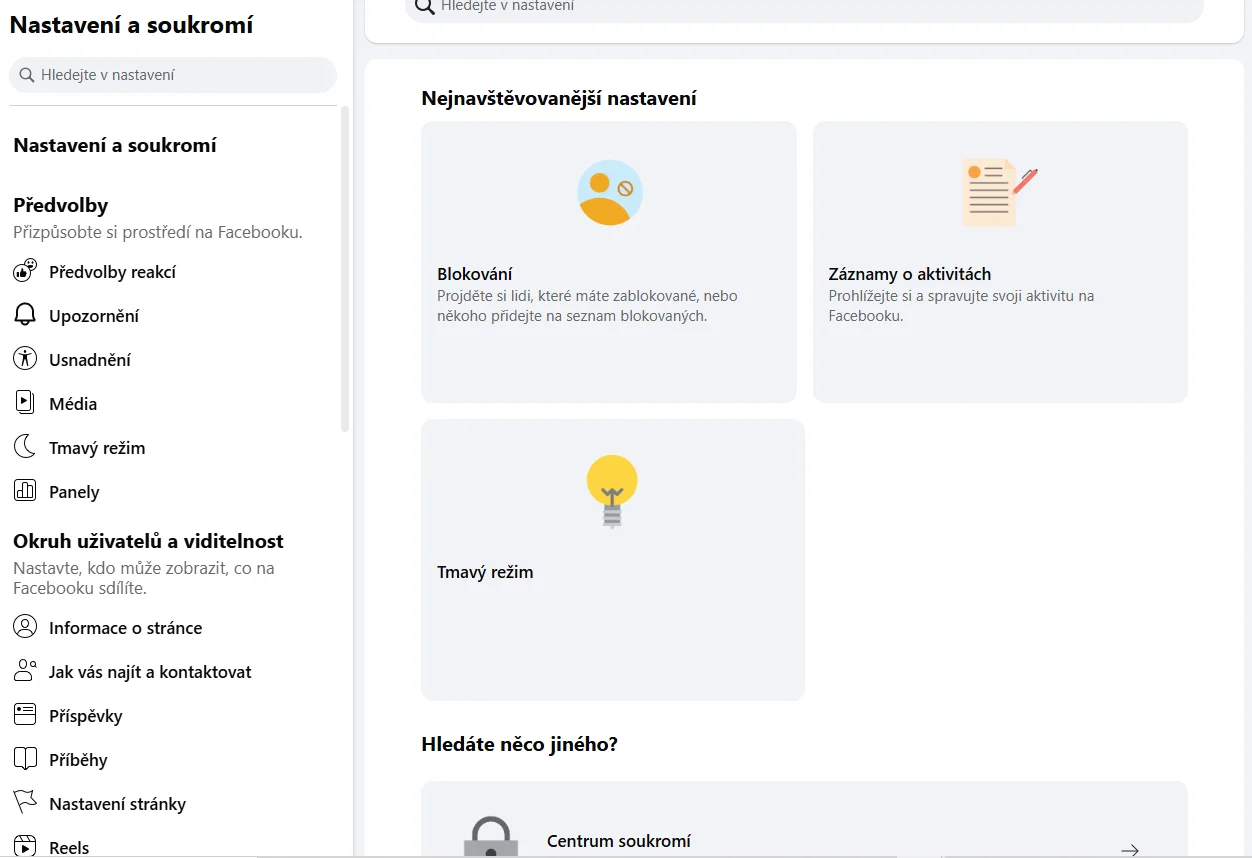
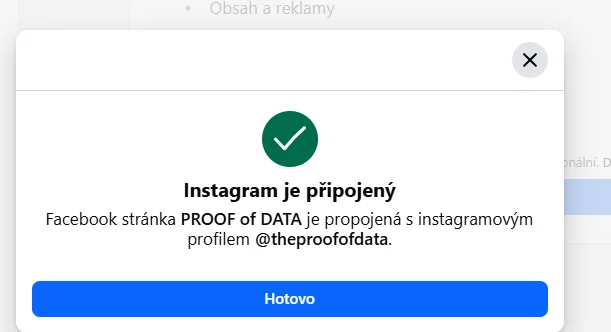
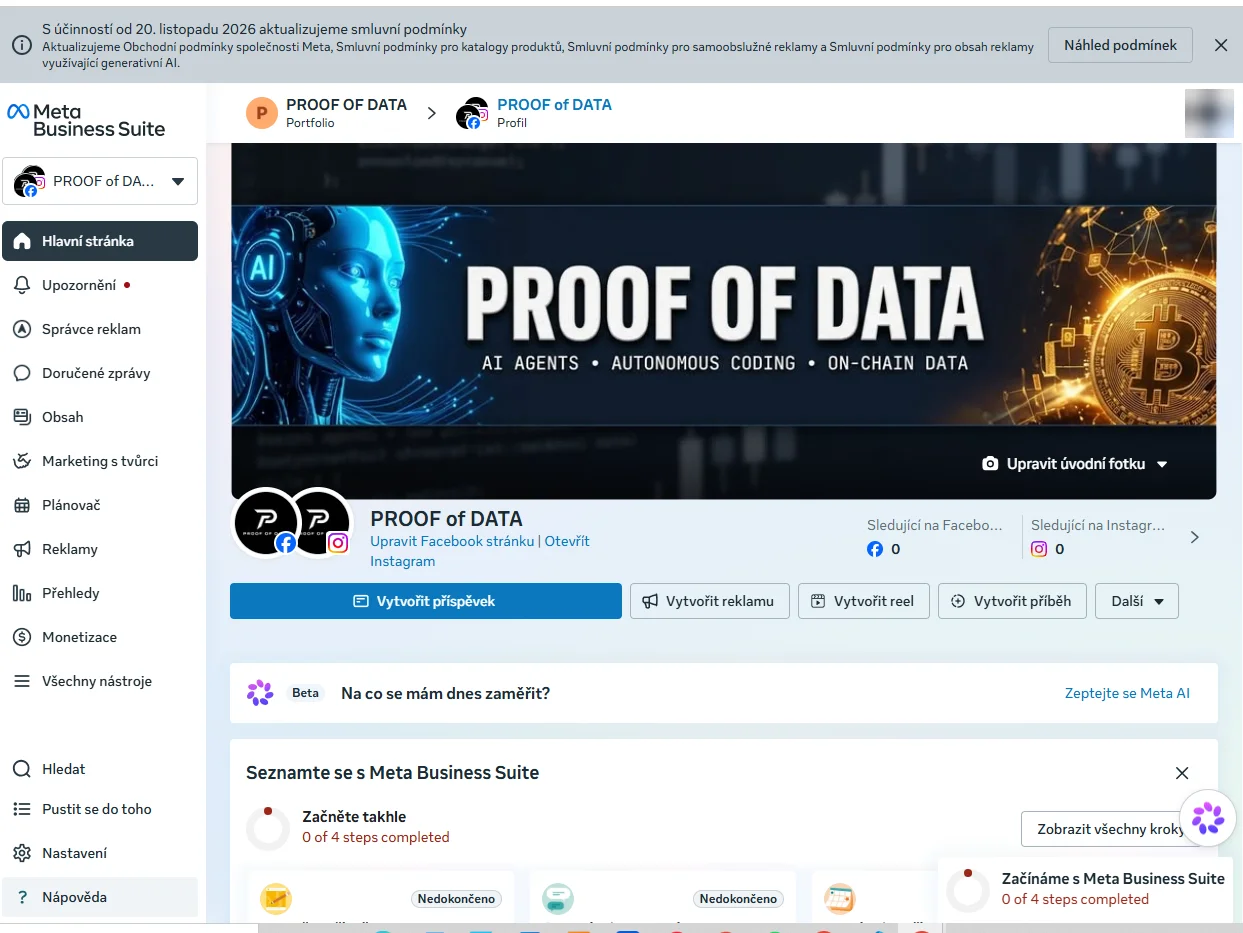
Screenshot in Czech. The button names in the text are the English ones.
The breadcrumb at the top shows your portfolio and your Page, and the profile picture has both a Facebook and an Instagram badge.
💡
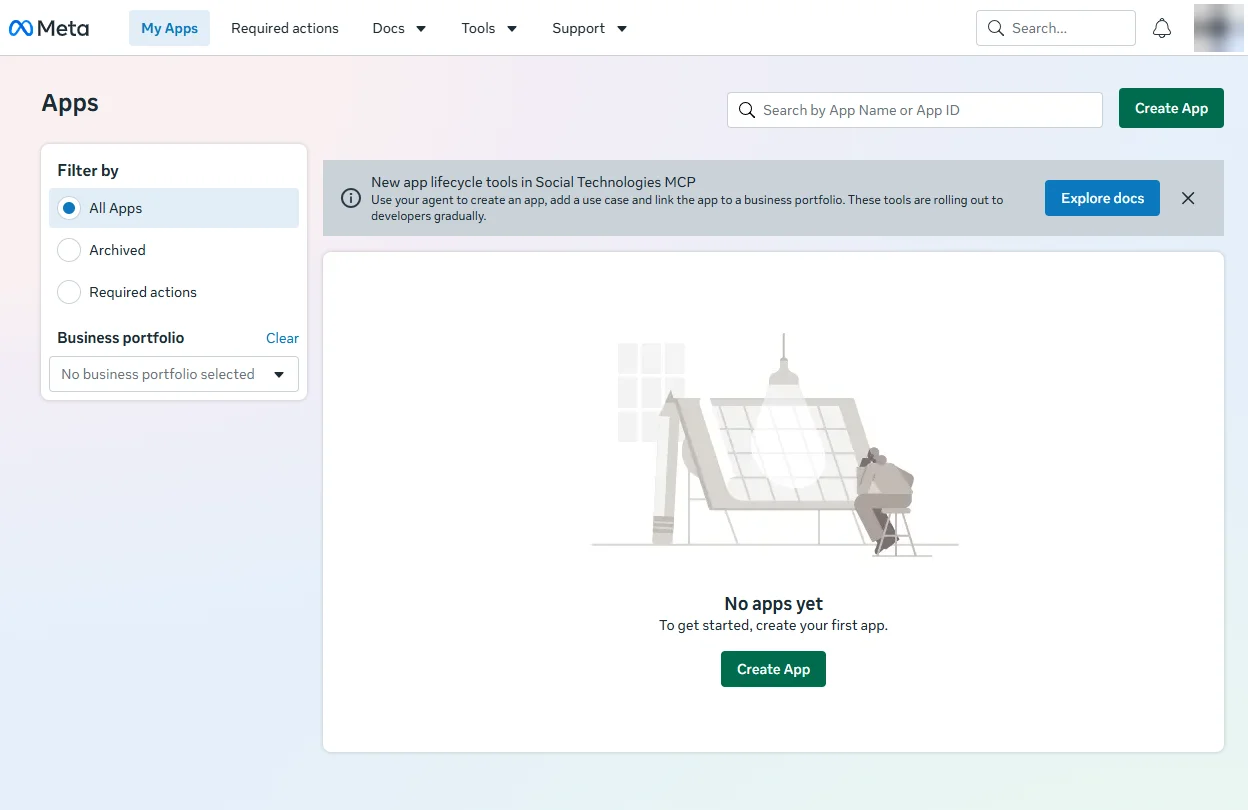
Creating the Page usually creates the portfolio automatically. If it's missing, create one named after your channel and add the Page and the Instagram account.
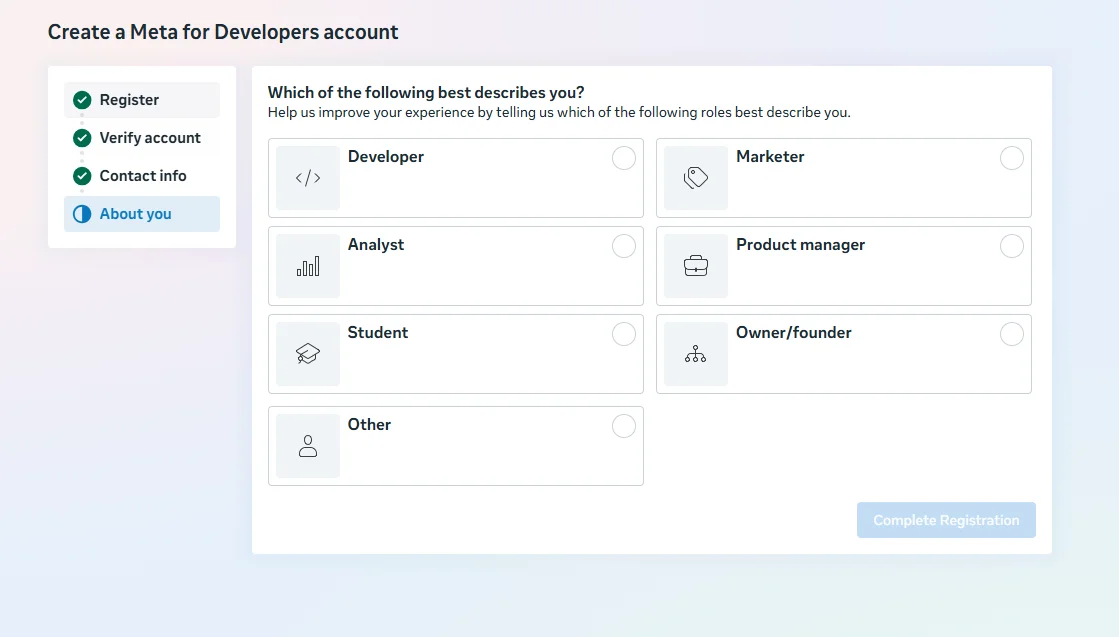
About you: pick any card (e.g. Owner/founder) → Complete Registration.
💡
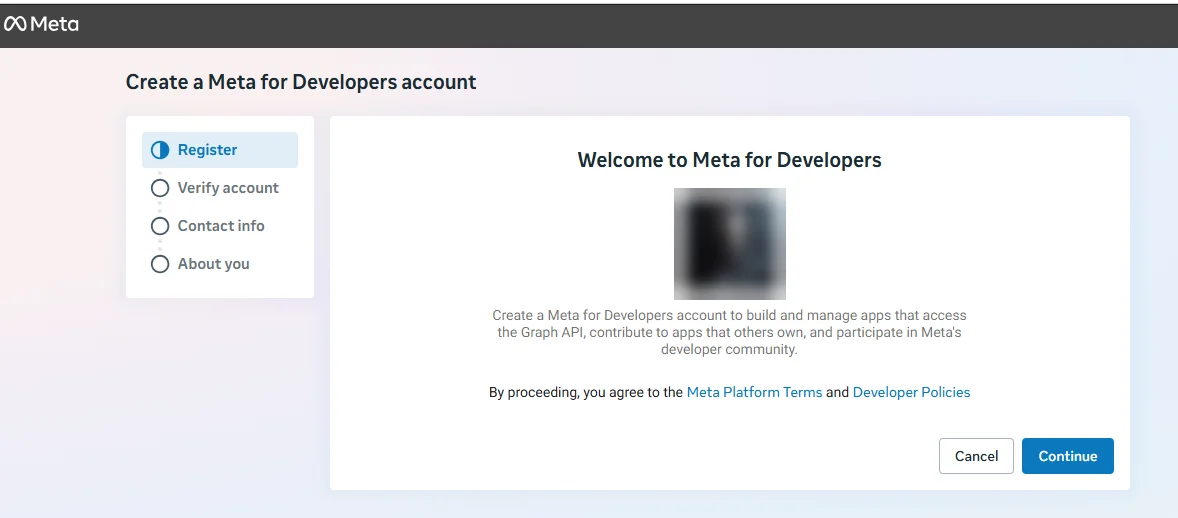
The developer account is tied to your personal profile, but it isn't public, and the automation later runs on a robot token, not on you.
9.3
Create App
Click Create App.
9.4
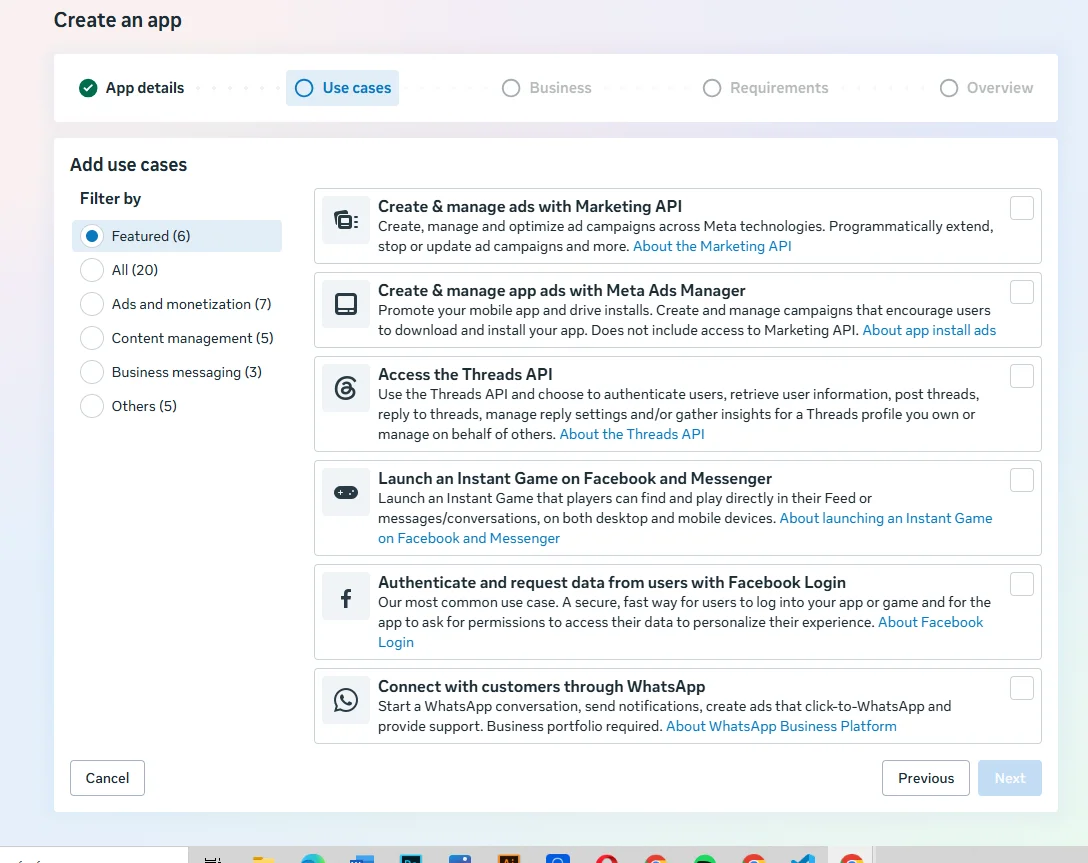
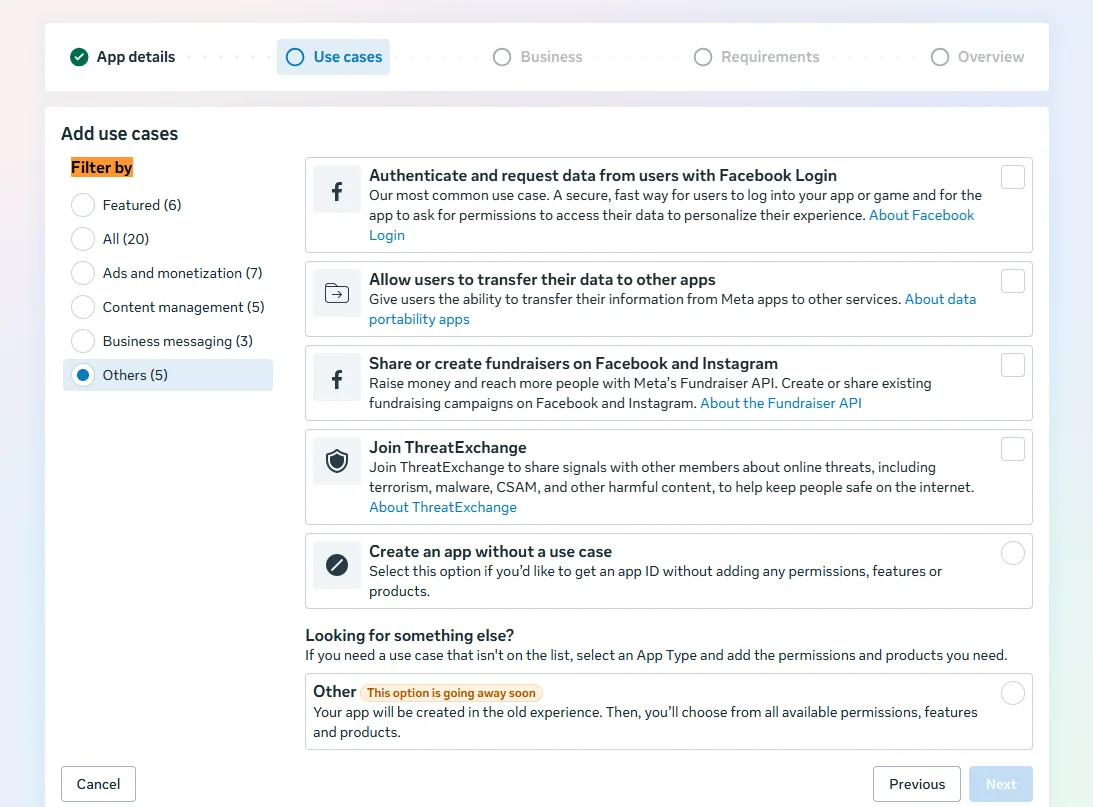
Use case: Other
Enter an app name if asked (Reels Studio).
None of the Featured use cases fits. In Filter by on the left click Others.
Scroll to the bottom, select Other (the very last option, not Create an app without a use case) → Next.
💡
Meta marks Other as going away soon. If it's gone, try Content management → Manage messaging & content on Instagram (we haven't tested that path yet; tell us in the comments how it went).
9.5
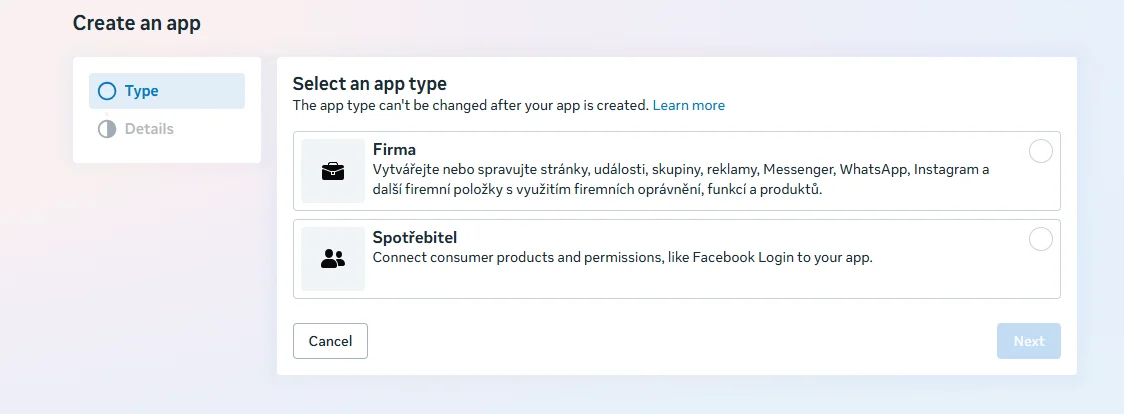
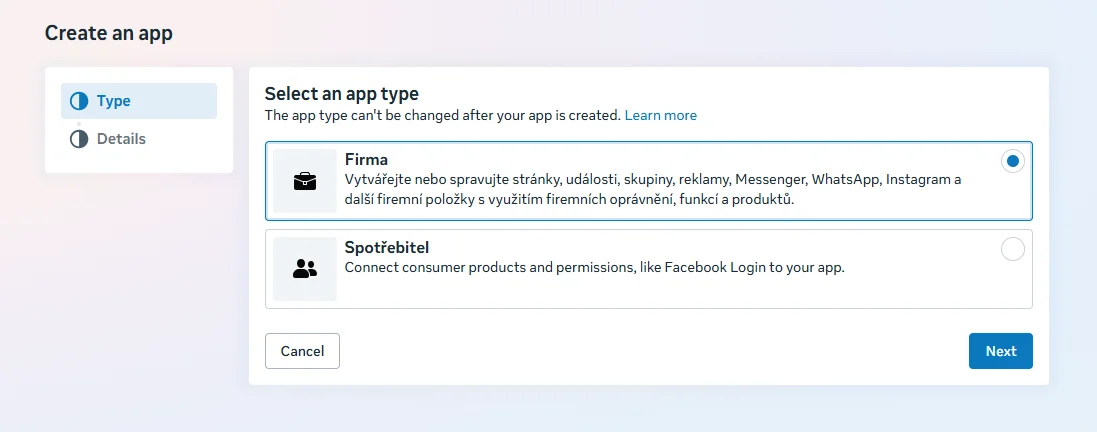
App type: Business
Screenshot in Czech. The button names in the text are the English ones.
Select Business (briefcase icon) → Next.
Details: app name Reels Studio, your contact e-mail, and Business portfolio = your channel's portfolio. Click Create app.
⚠
The type can't be changed later.
⚠
Don't leave the business portfolio empty, or you can't give the app to the system user later.
9.6
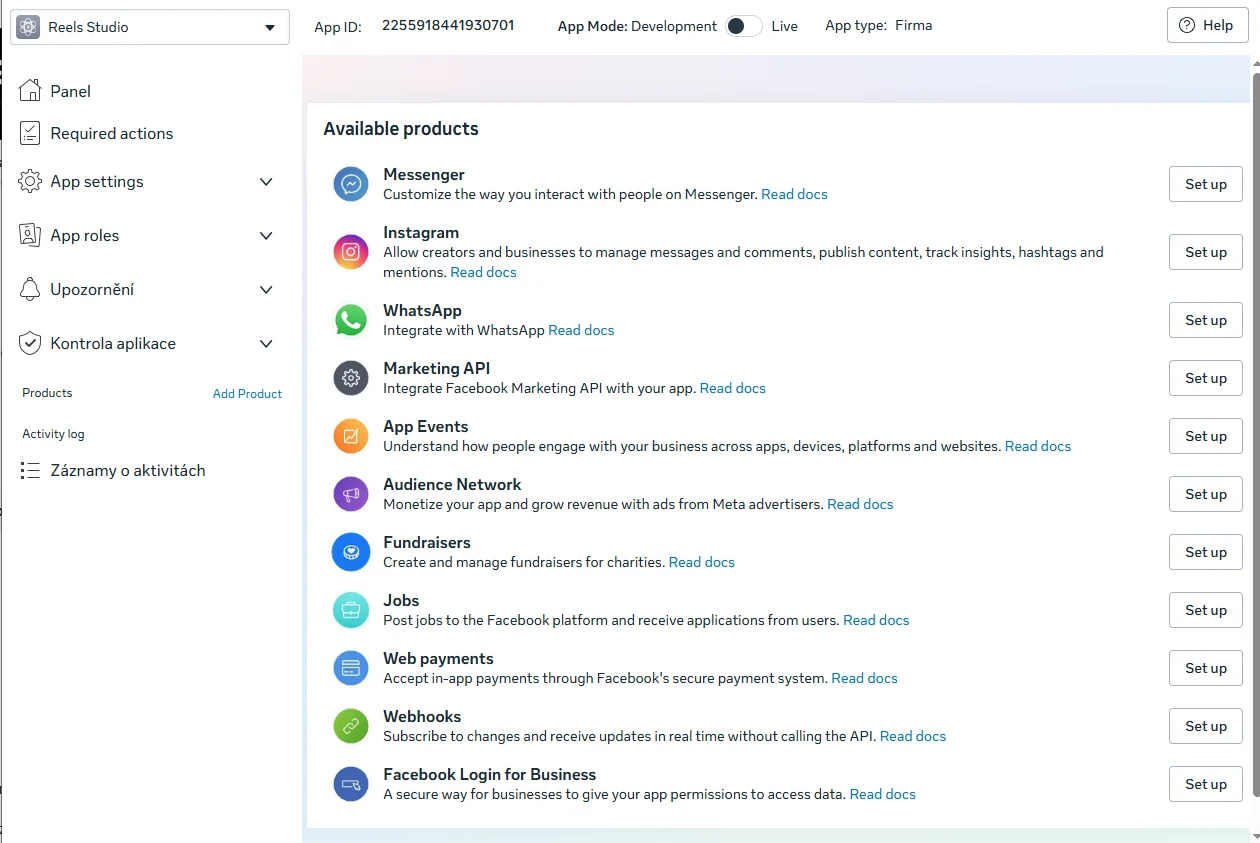
Add the Instagram product
Screenshot in Czech. The button names in the text are the English ones.
The dashboard shows App Mode: Development. Leave it like that.
Under Available products find Instagram and click Set up. Nothing else.
9.7
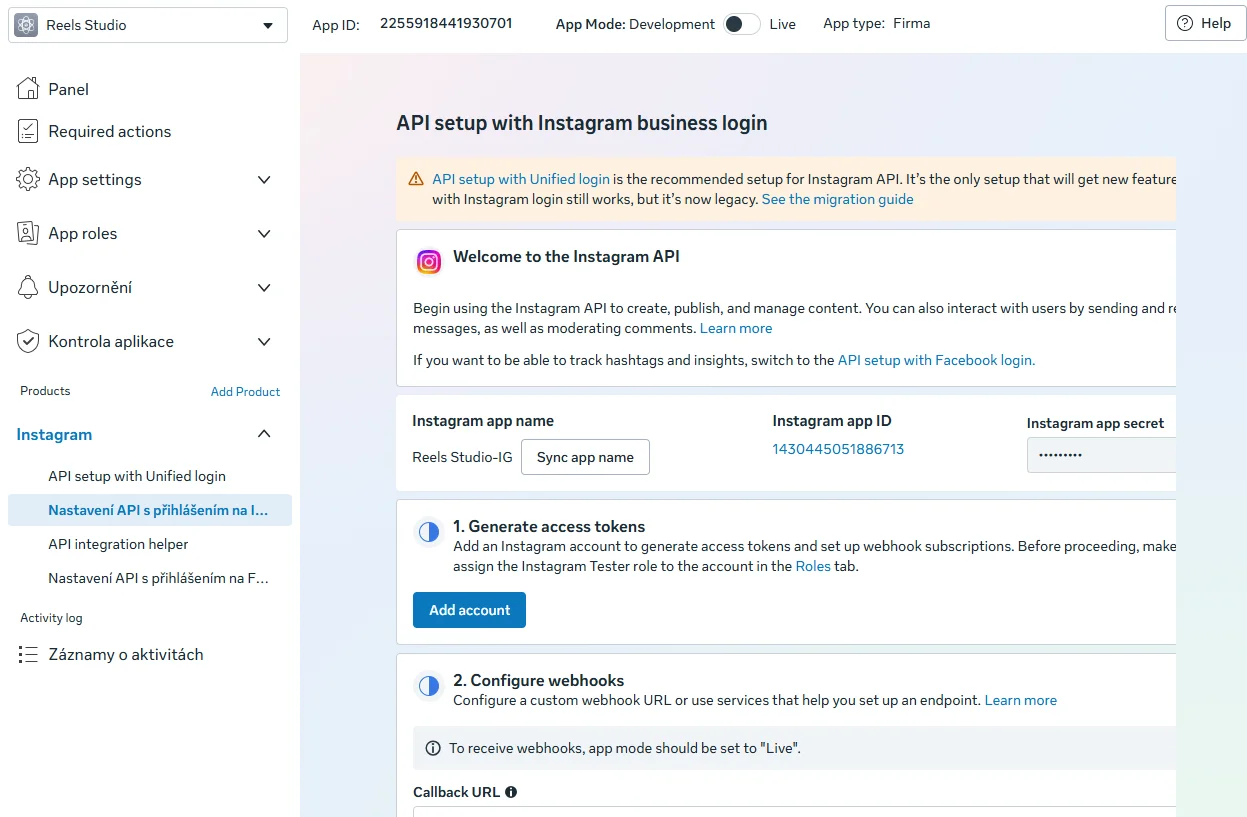
That's all on this page
Screenshot in Czech. The button names in the text are the English ones.
Instagram now appears in the left menu. You don't need anything else here.
⚠
Don't click Add account here. That creates tokens that expire after 60 days. We make a never-expiring one next.
Part 10
Create a system user
⏱ 4 min
A system user is a robot account inside your business portfolio. Its token never expires, unlike your personal one.
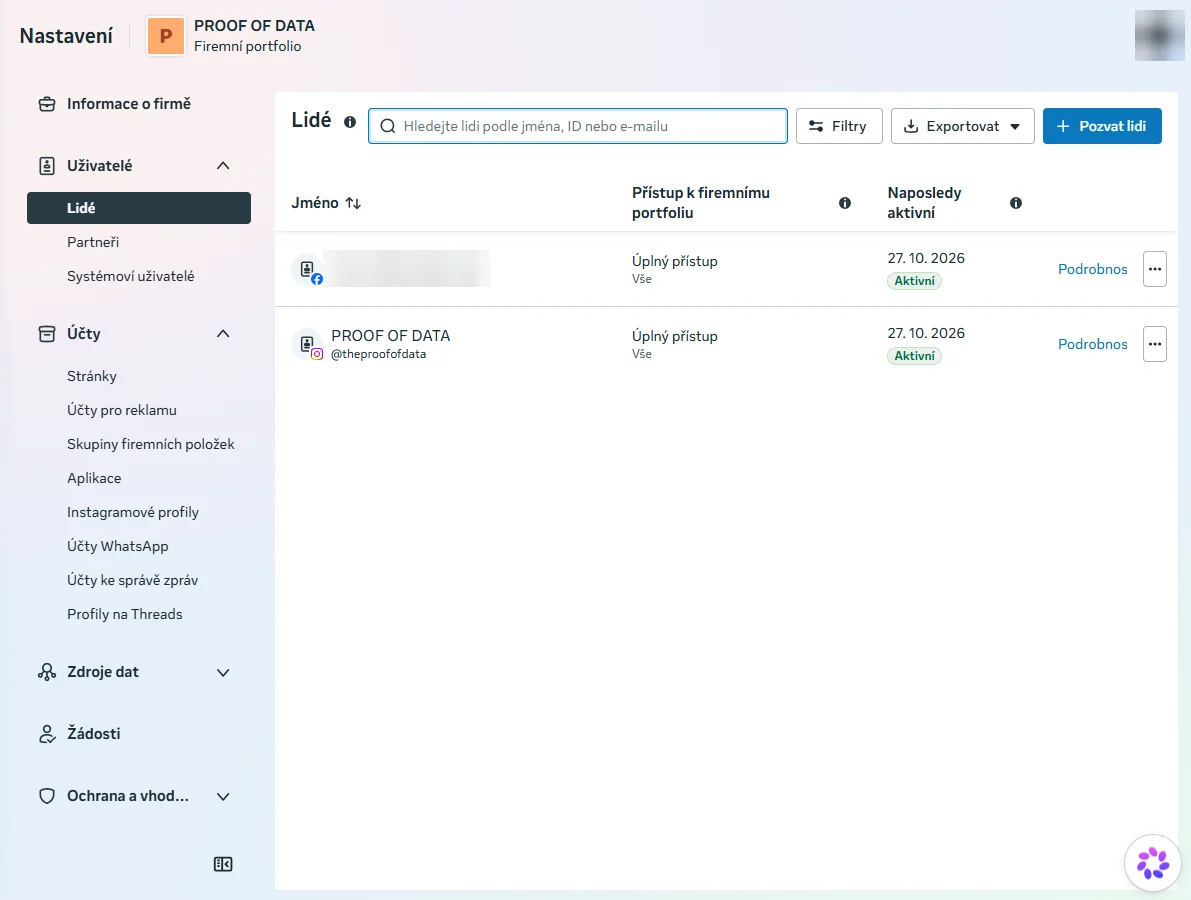
10.1
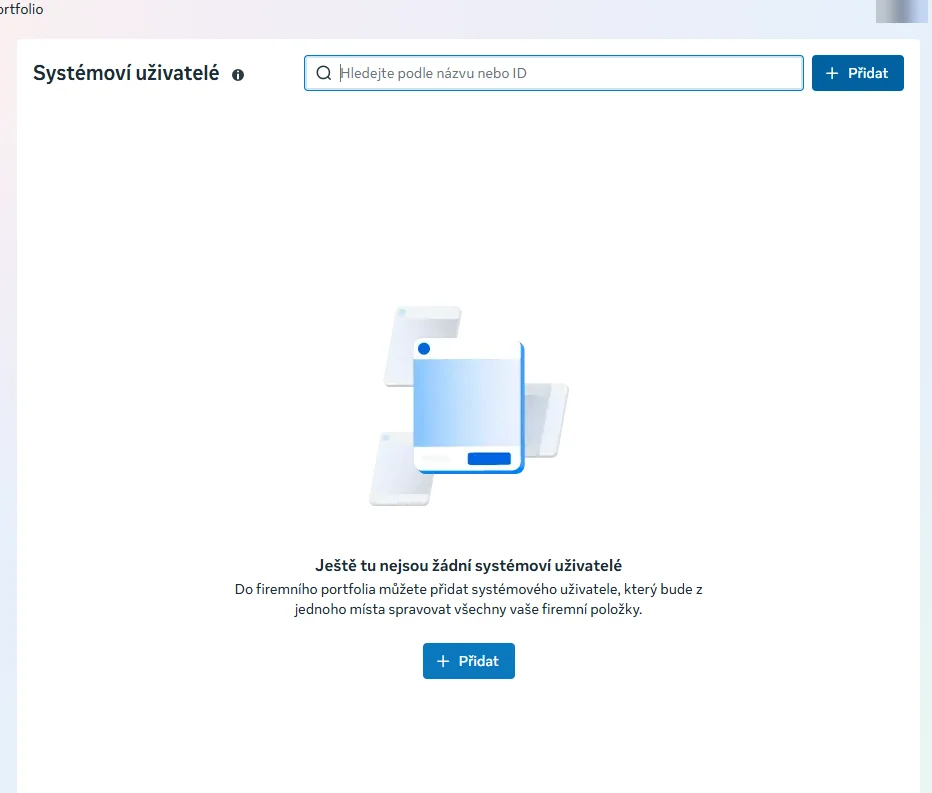
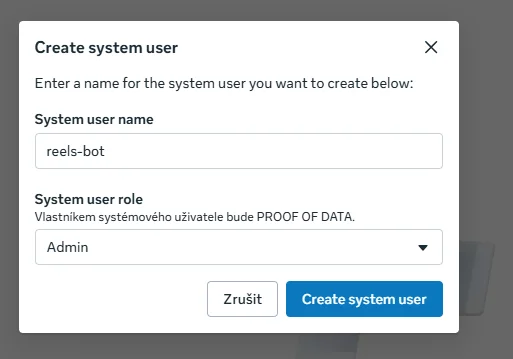
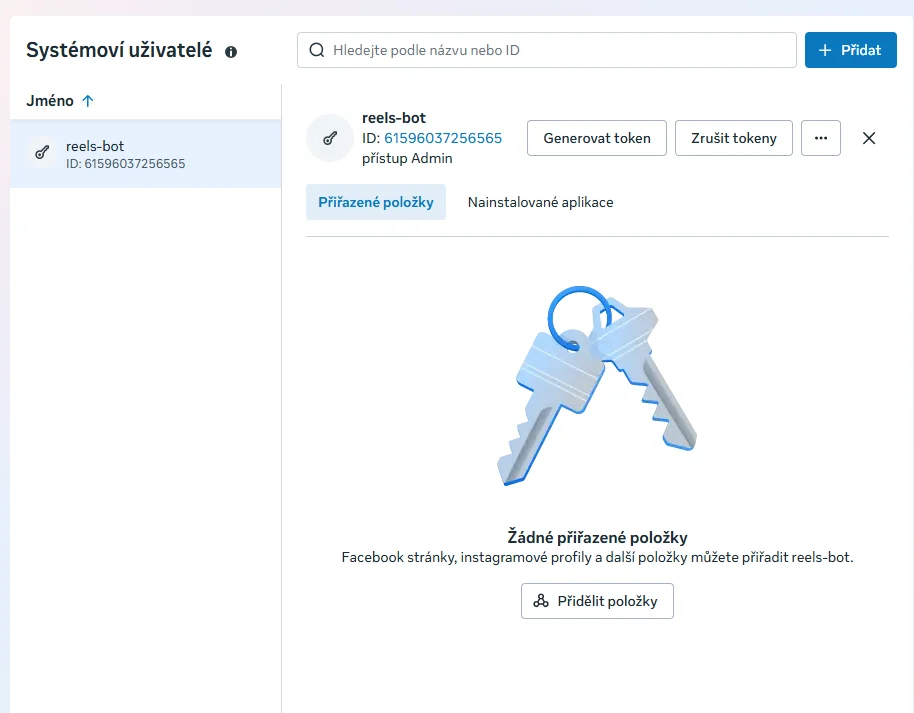
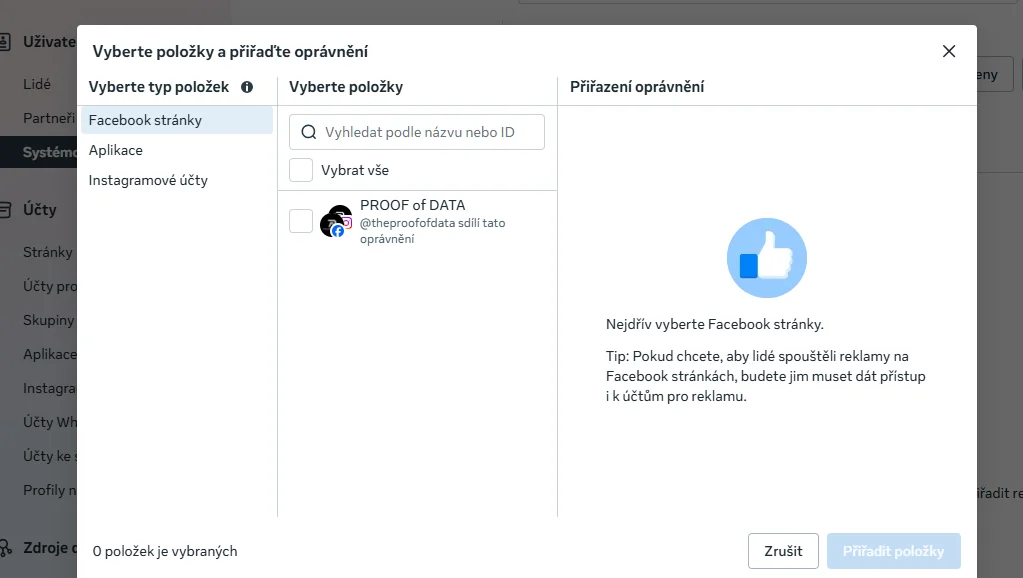
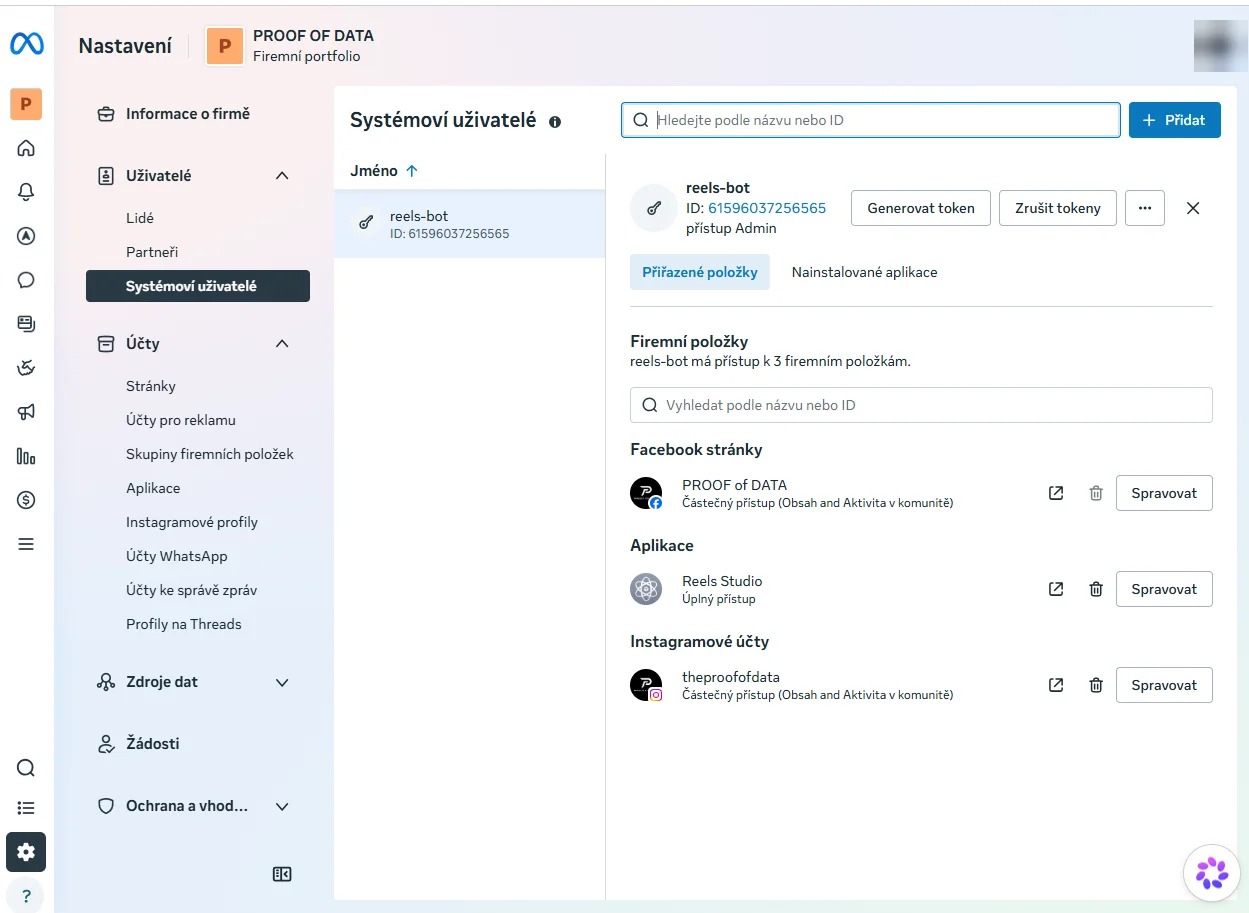
Business settings → System users
Screenshot in Czech. The button names in the text are the English ones.
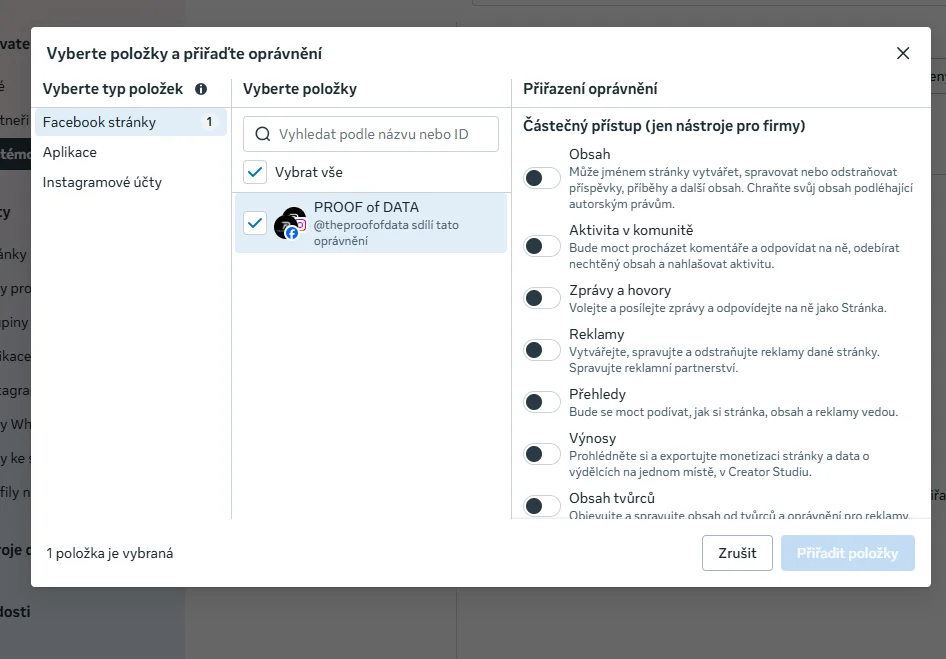
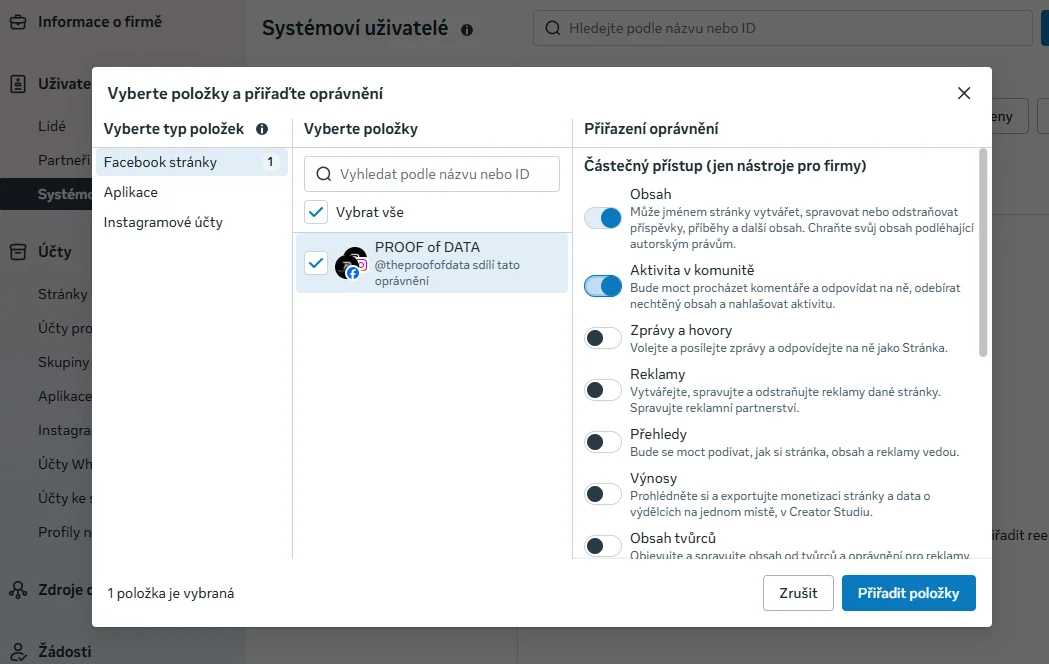
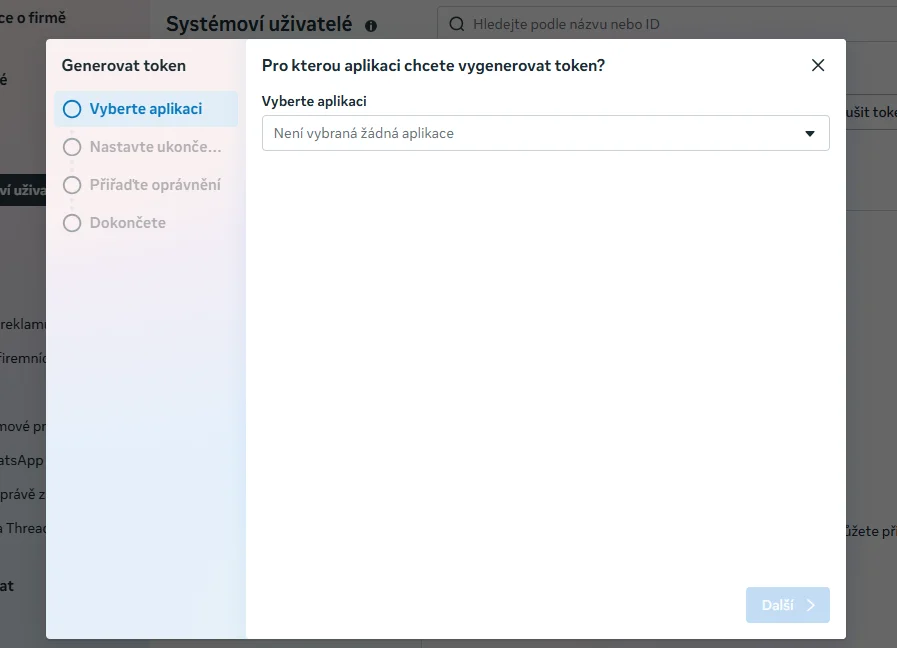
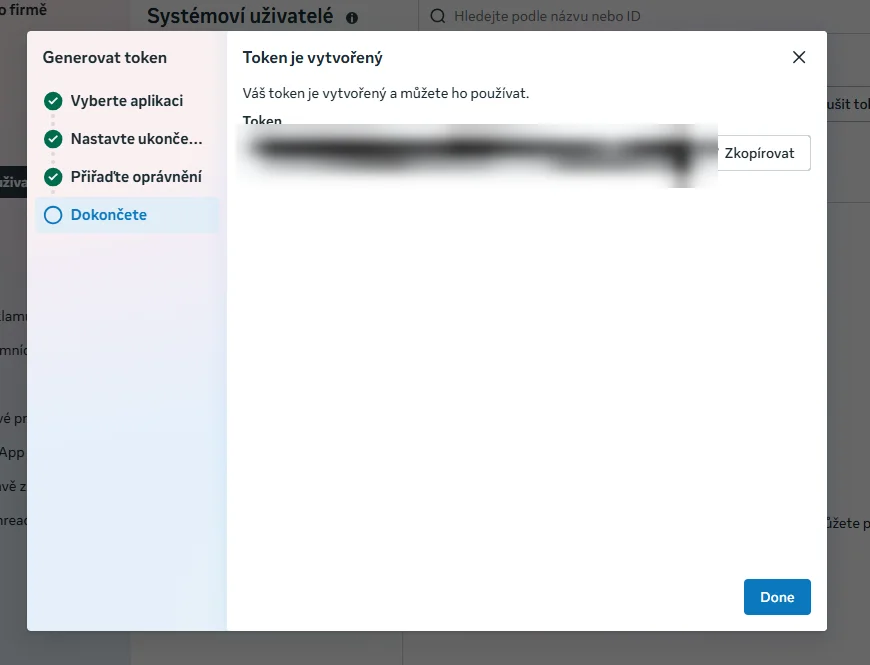
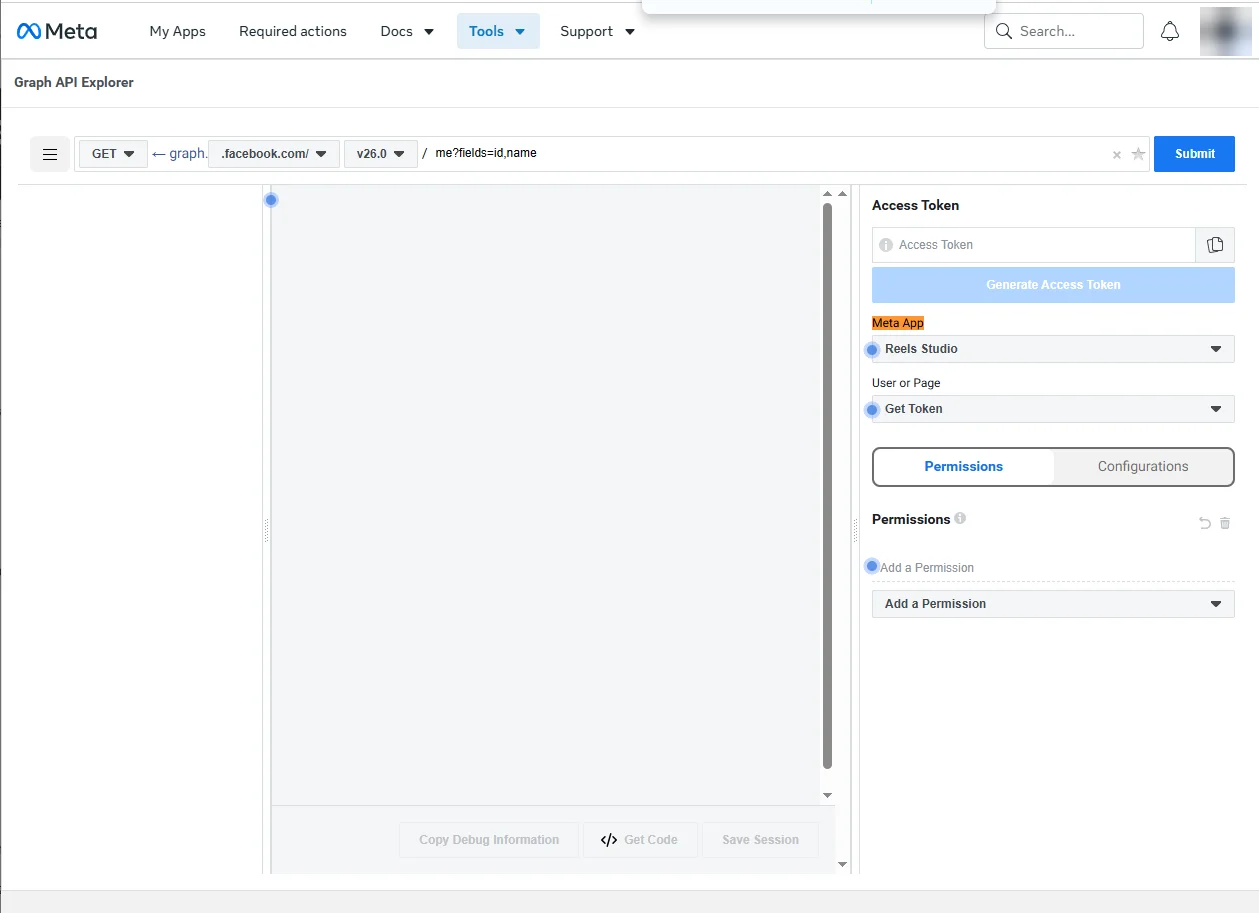
Don't click Generate Access Token. That makes a short-lived personal token.
12.2
Optional: check the token
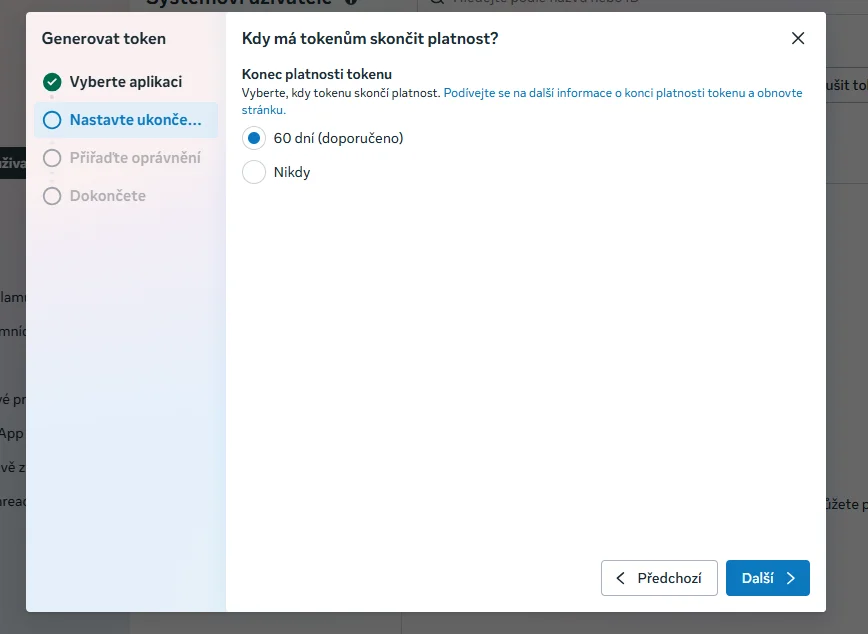
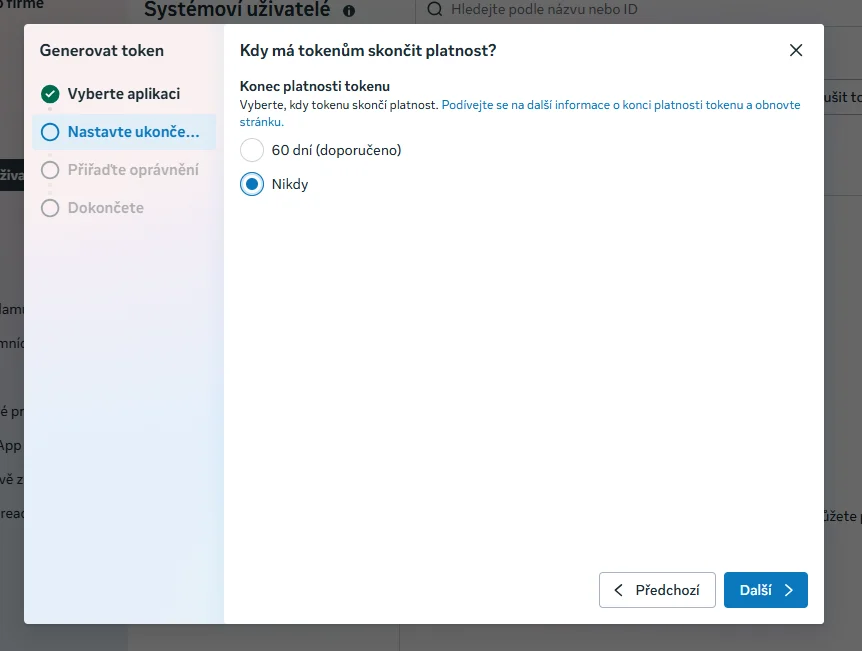
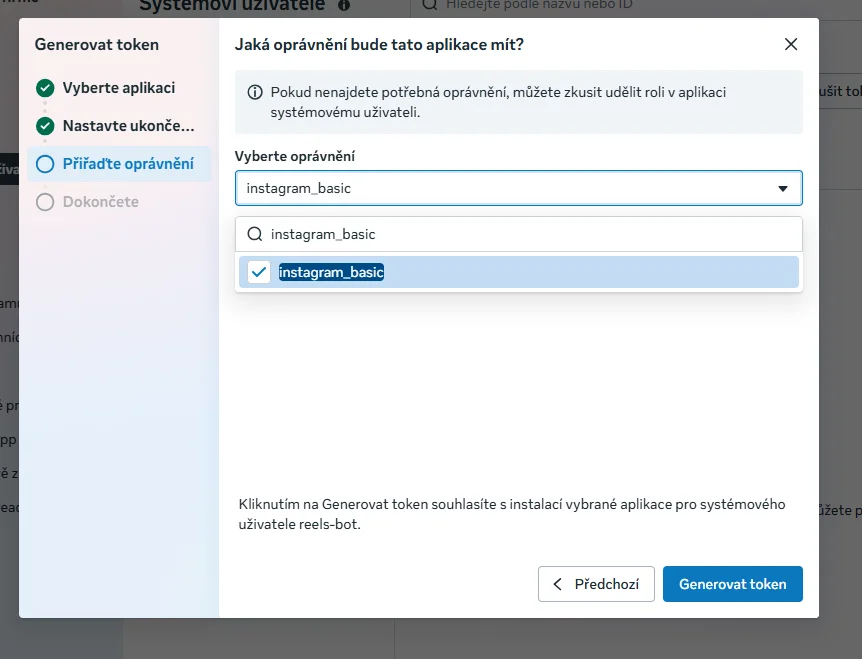
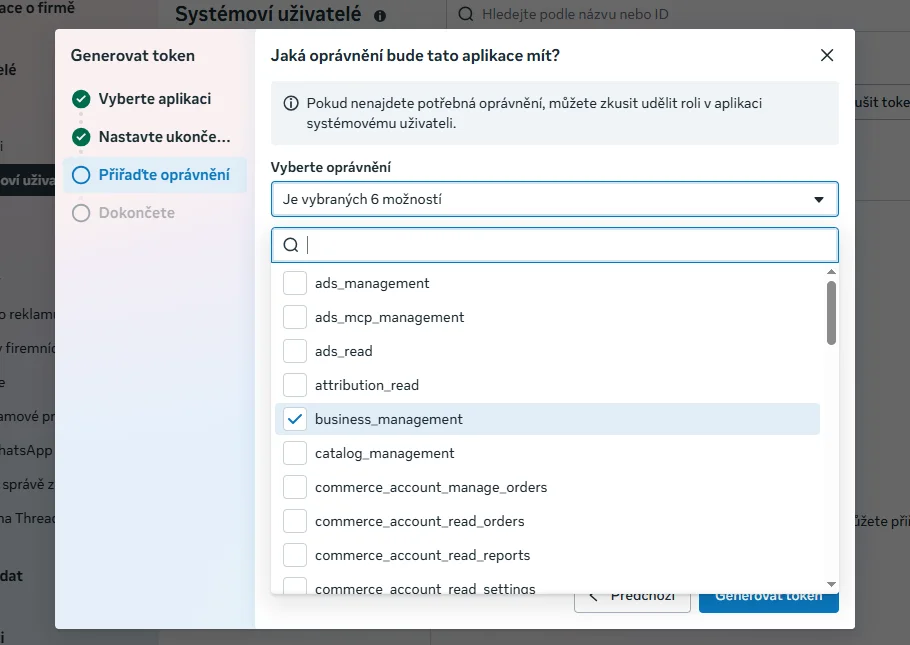
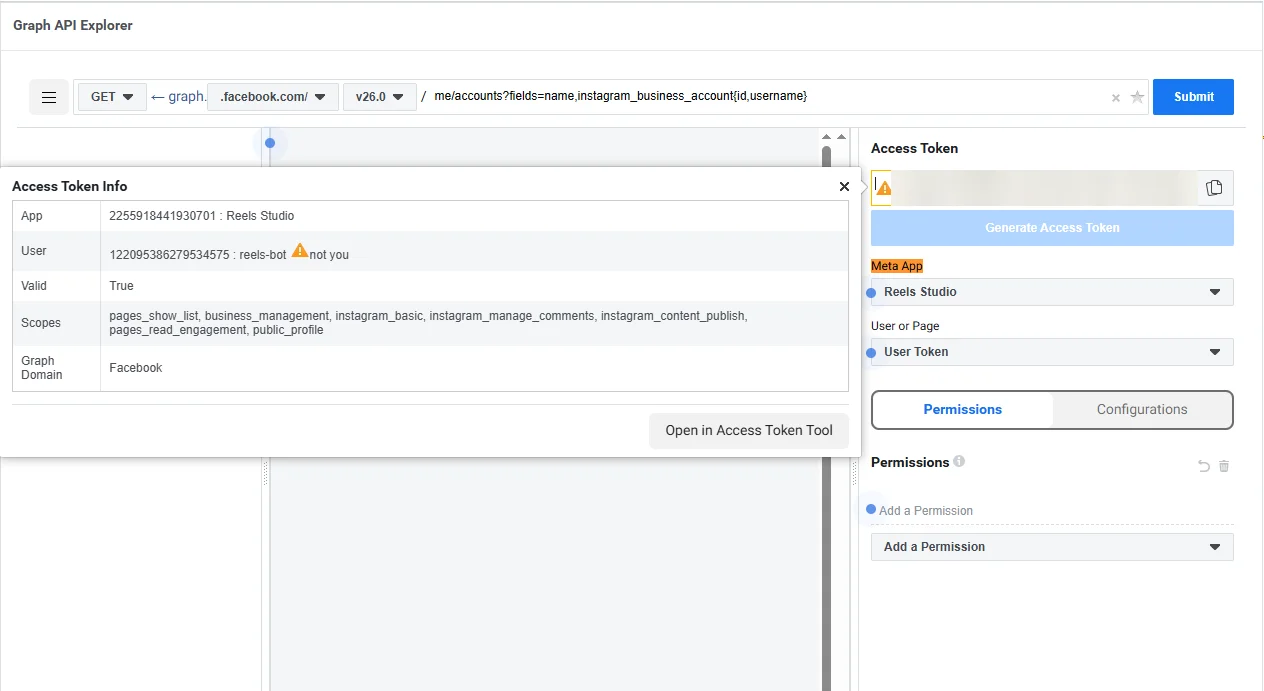
Click the ⓘ / ⚠ icon in the Access Token field: App Reels Studio, User reels-bot, Valid True, and the six permissions under Scopes.
💡
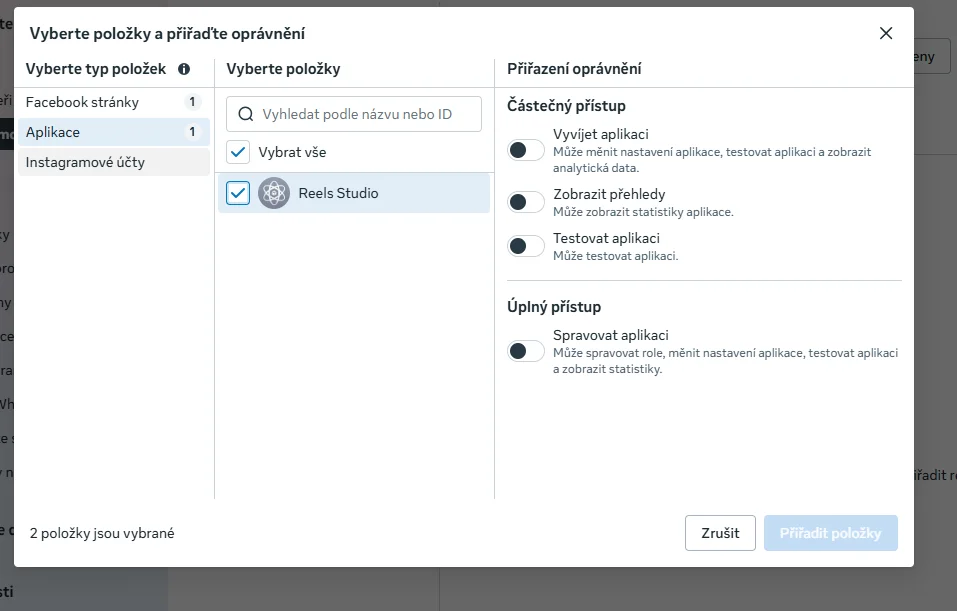
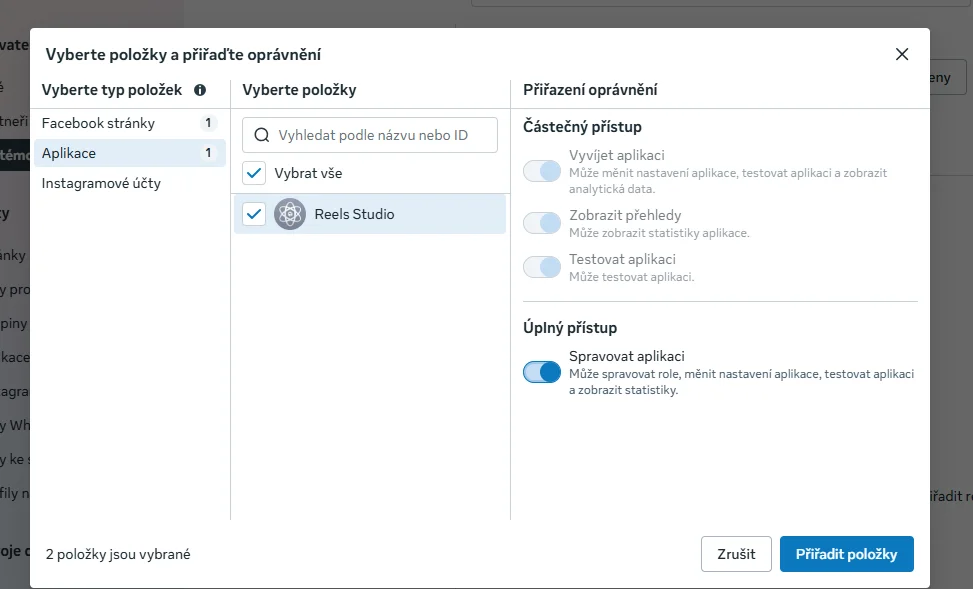
not you is expected: the token belongs to the robot user, not to you.
12.3
Submit and copy the ID
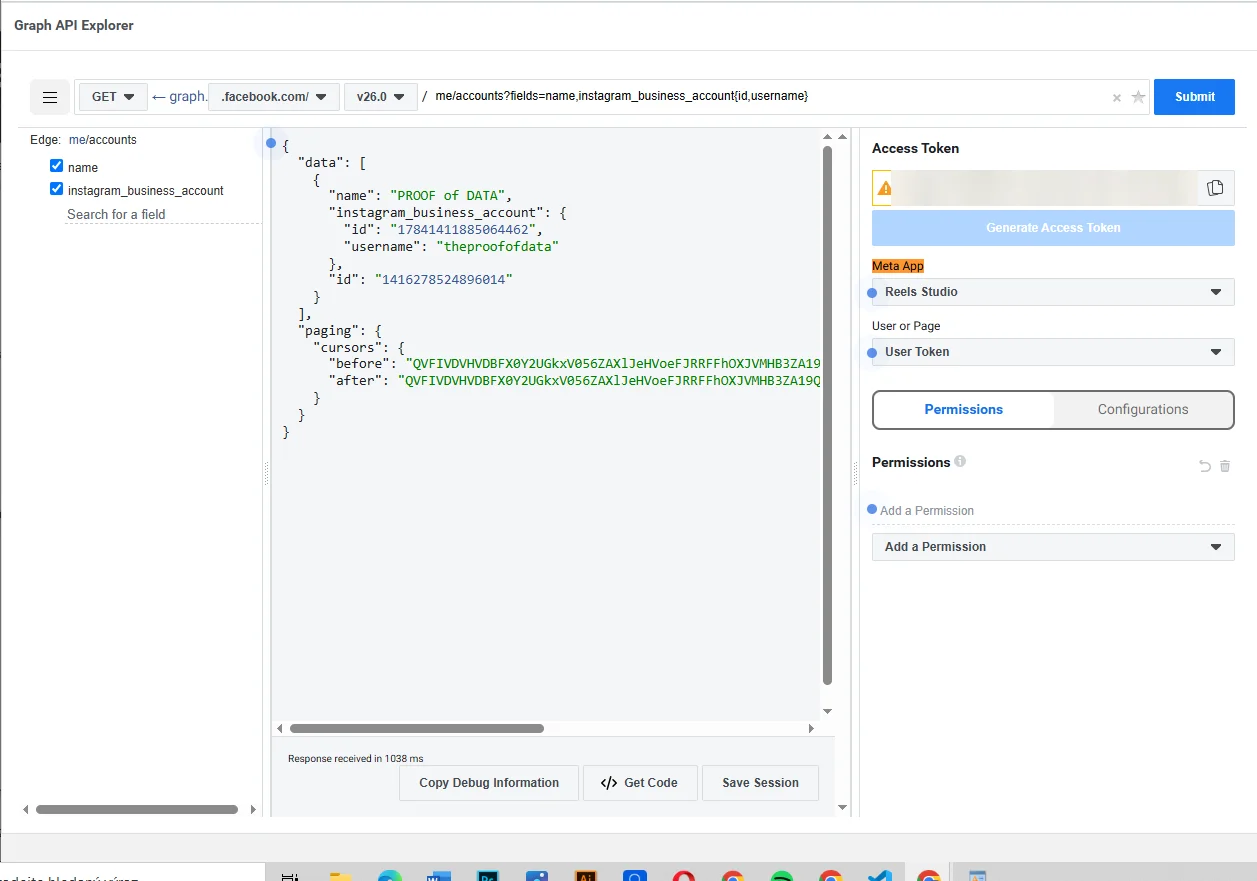
Click Submit.
Copy the id inside instagram_business_account (a long number starting with 17841).
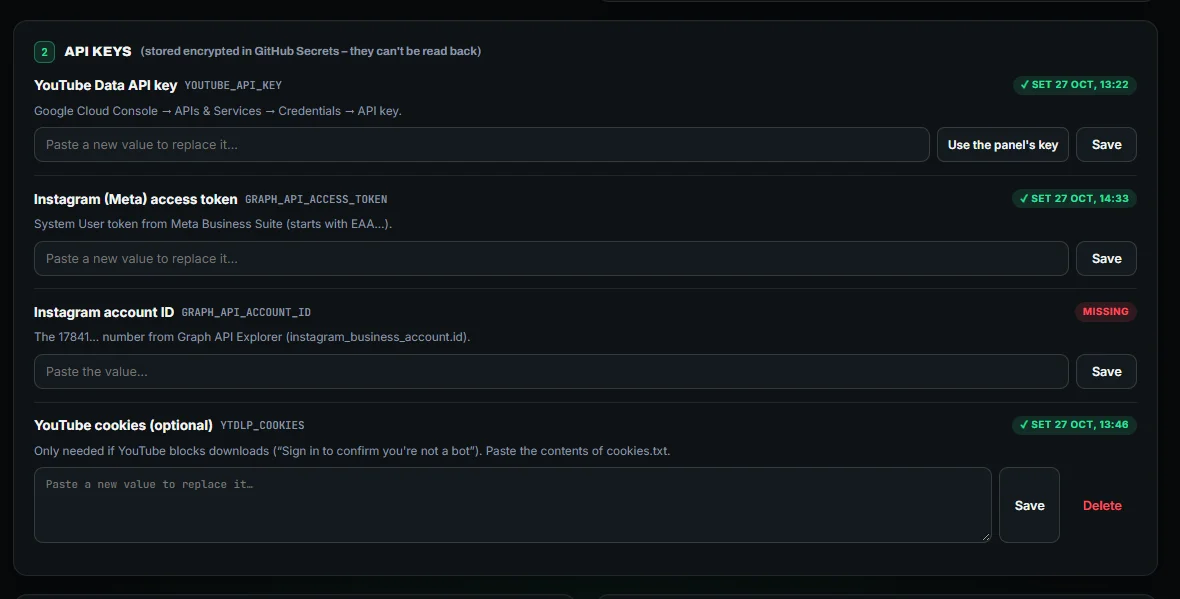
Paste it into Settings → API keys → Instagram account ID → Save.
⚠
There are two IDs. The one belowinstagram_business_account is your Facebook Page ID. Wrong one.
💡
Empty data? The token has no access to your Page. Check the system user's assets.
12.4
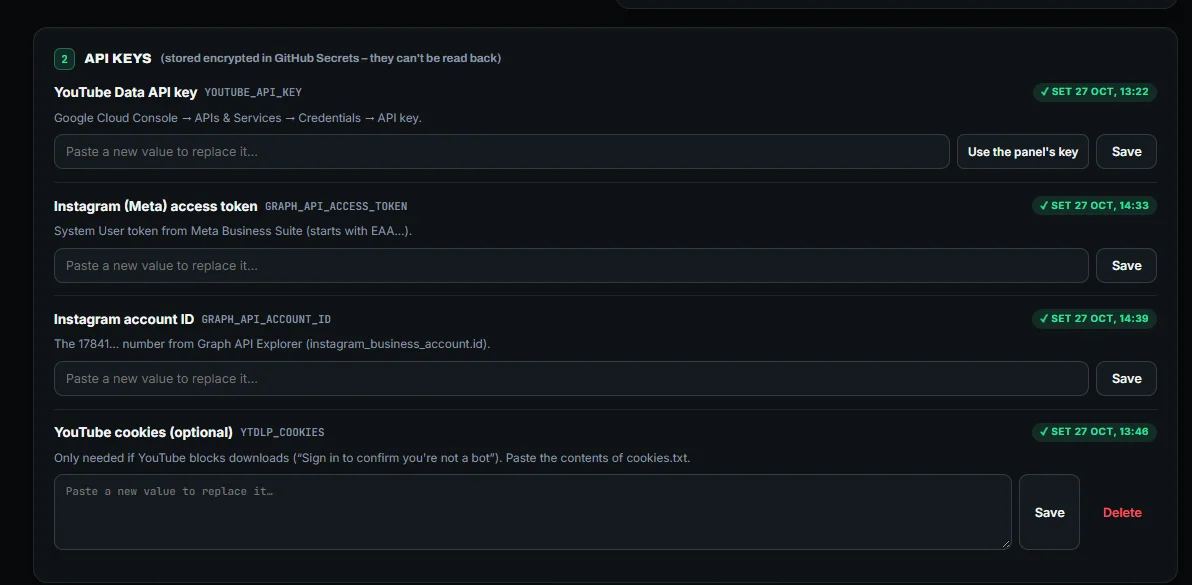
All keys set
Every key shows a green ✓ Set. (YouTube cookies is optional. You can leave it empty.)
Part 13
Run the access test
⏱ 1 min
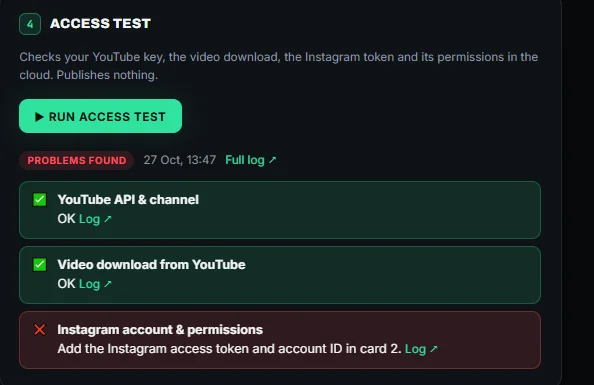
The test runs in the cloud, checks every key and publishes nothing.
13.1
Run it
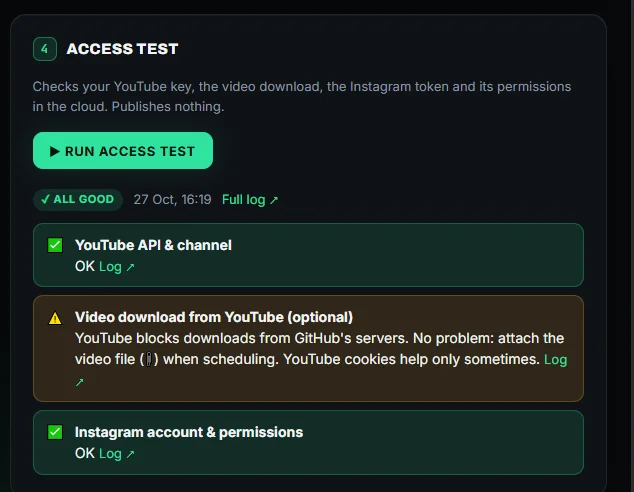
Settings → 4 Access test → ▶ Run access test and wait about a minute.
You want ✓ All good: green for YouTube API & channel and Instagram account & permissions.
Something red? Click Log ↗ next to it, and see Troubleshooting.
💡
A yellow ⚠ on Video download from YouTube (optional) is expected. YouTube blocks downloads from GitHub's servers, so the desktop app attaches your video file instead (Part 15).
Part 14
Options: cover, AI label, comment
⏱ 2 min
14.1
Recommended options
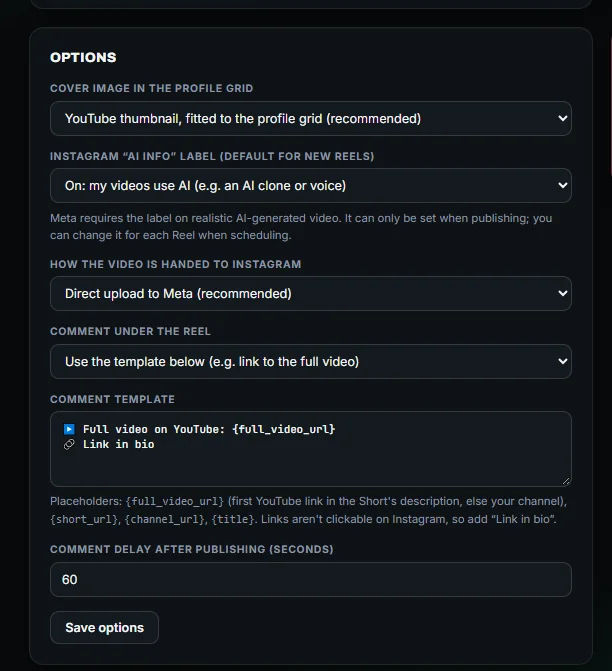
Cover image in the profile grid:YouTube thumbnail, fitted to the profile grid (recommended).
Instagram “AI info” label:On only if your videos use realistic AI (an AI clone, an AI voice). Otherwise Off. You can change it for each Reel.
How the video is handed to Instagram:Direct upload to Meta (recommended).
Comment under the Reel:Copy my comment from under the Short, or Use the template below, for example:
▶️ Full video on YouTube: {full_video_url} and on a new line 🔗 Link in bio
Comment delay:60 seconds. Click Save options.
💡
Links on Instagram aren't clickable. Put your YouTube link in your Instagram bio and write Link in bio.
💡
{full_video_url} = the first YouTube link in the Short's description (else your channel).
14.2
Why “fitted to the profile grid”
Screenshot in Czech. The button names in the text are the English ones.
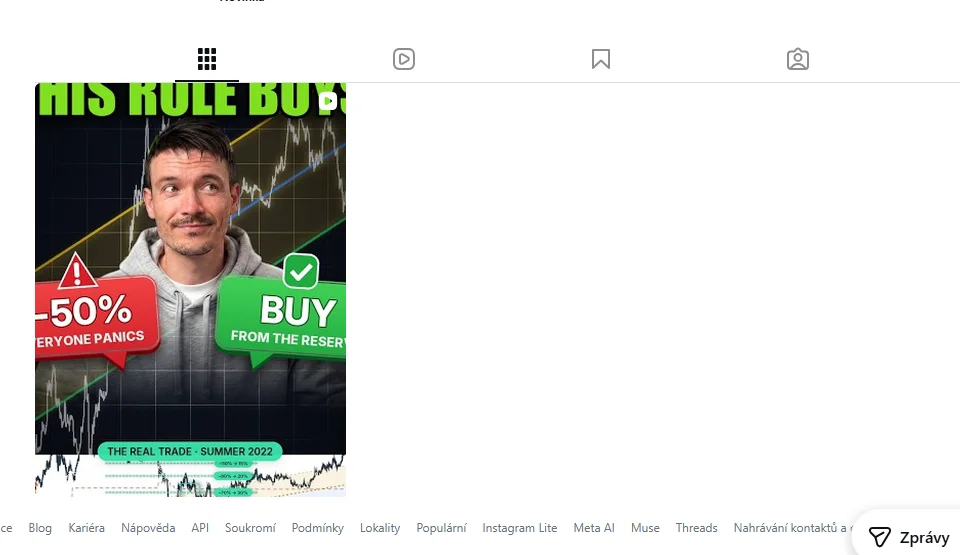
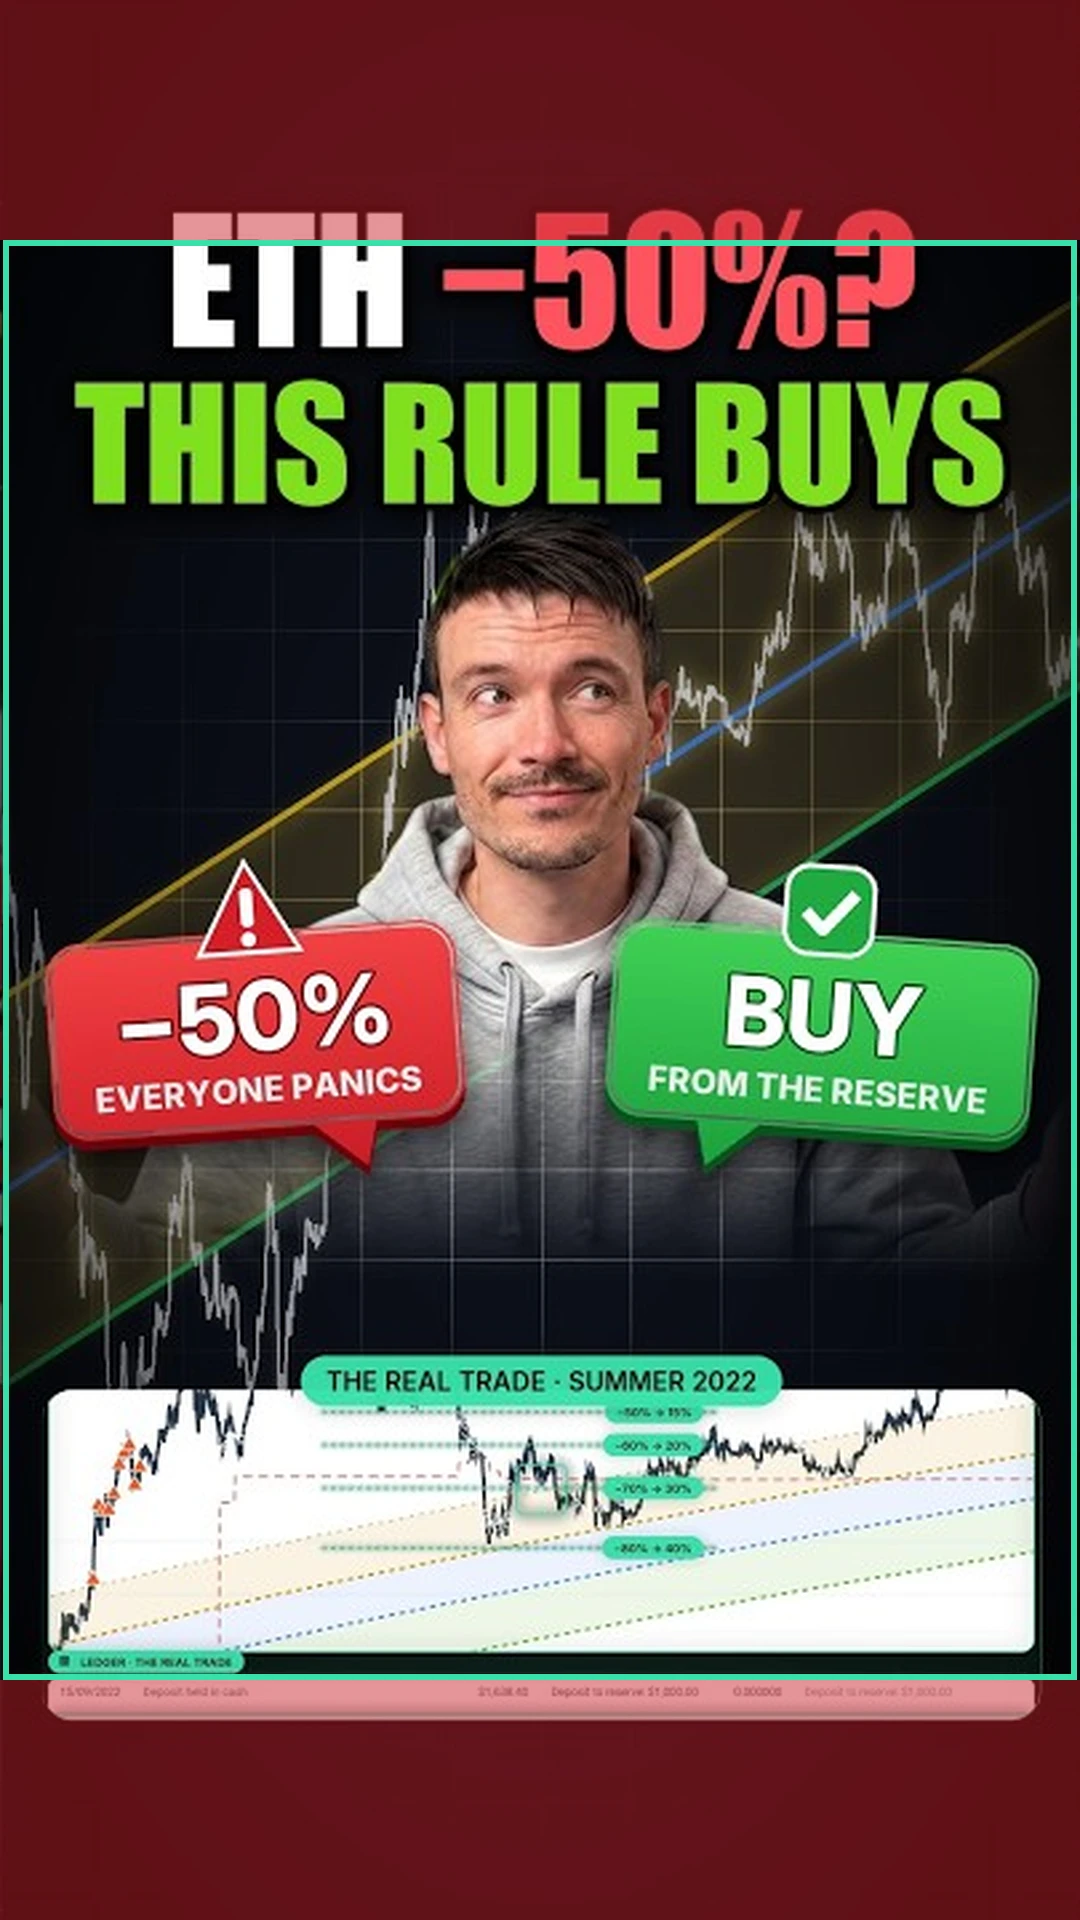
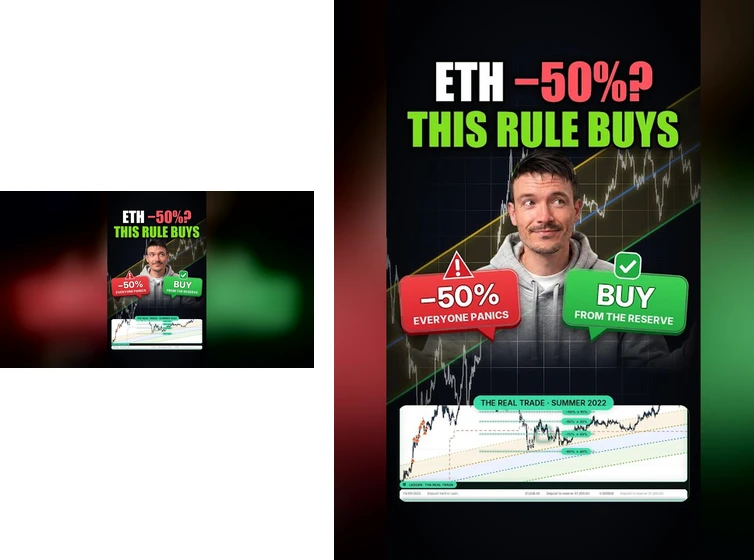
Your profile grid shows only the middle of a tall Reel cover. A headline at the top gets cut off.
With the recommended option the tool puts your whole design at full height on a landscape cover, with a blurred fill on the sides.
Grid: the whole thumbnail. Reels tab: the full cover.
Part 15
Schedule your first Reels
⏱ 1 min a week
Setup is done. From now on this is all you do.
15.1
Open the Planner
Start Reels Studio from the desktop shortcut. It downloads your newest Shorts to Downloads\Shorts automatically.
A 💾 on a Short means its video file is on your PC.
15.2
Pick a Short and a day
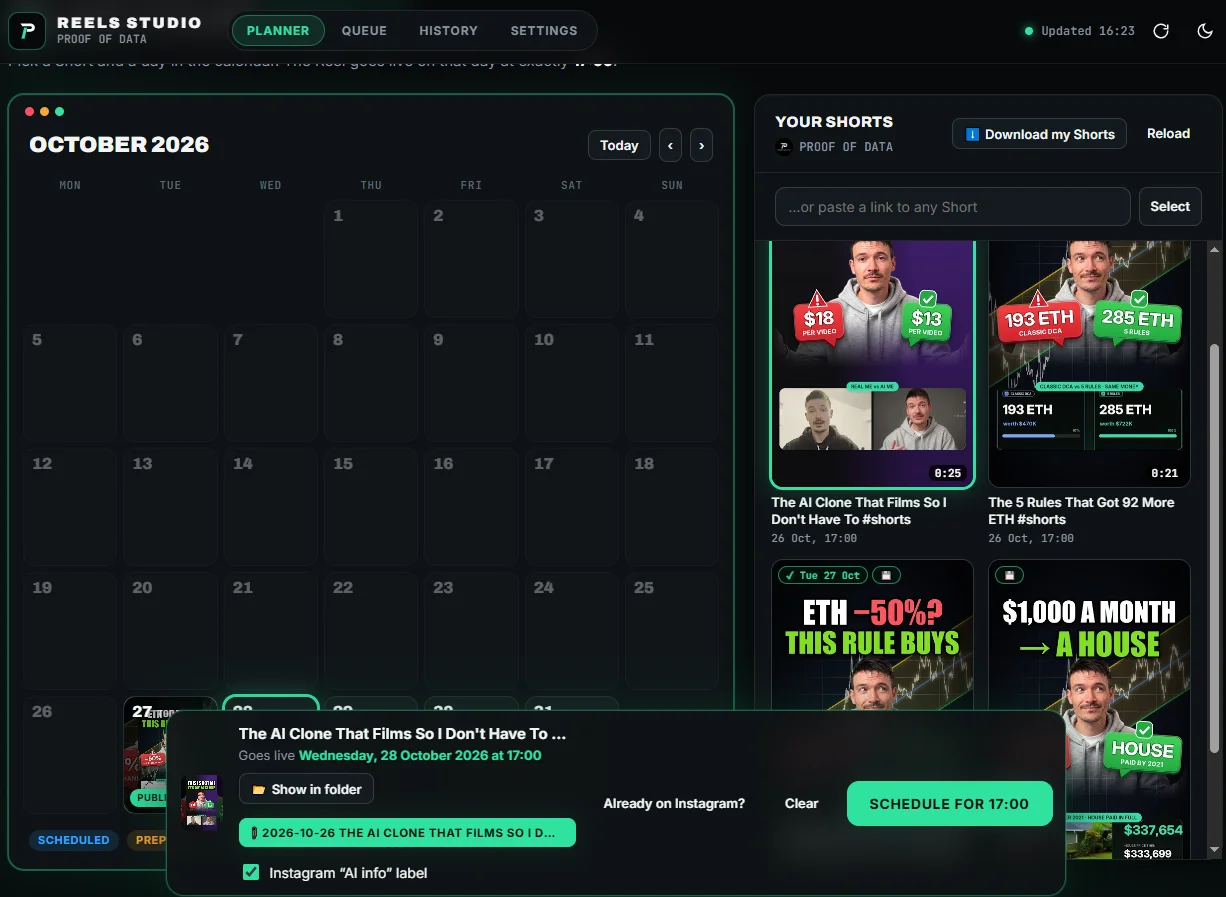
Click a Short on the right, then a day in the calendar.
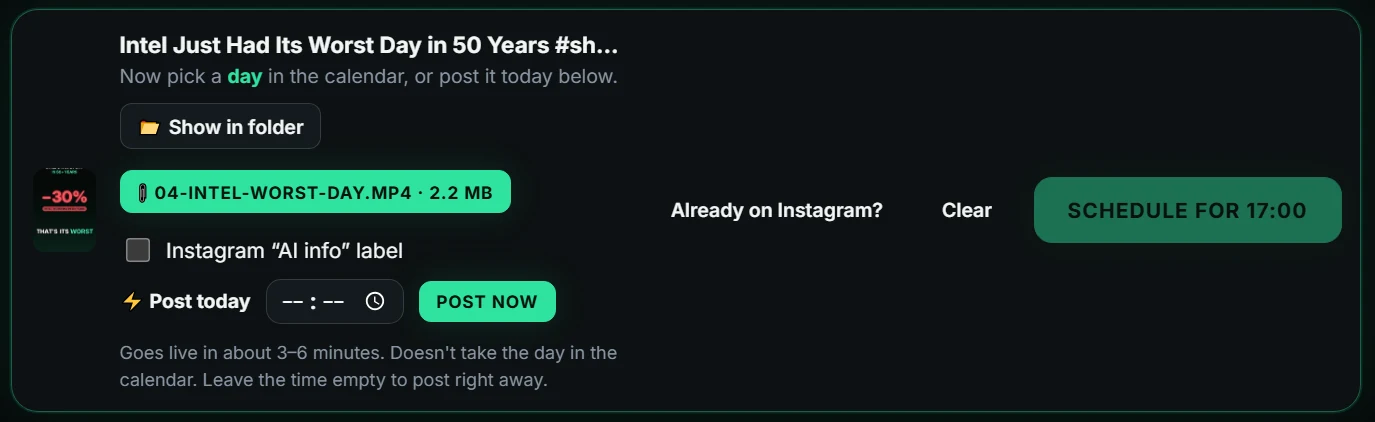
The bottom bar shows when it goes live, and the video file is attached automatically (green button). Show in folder opens it.
Tick or untick Instagram “AI info” label for this Reel.
Click Schedule for 17:00 (your publish time).
⚠
Already on Instagram? is only for Shorts you posted by hand. It marks them so they're never posted again.
15.3
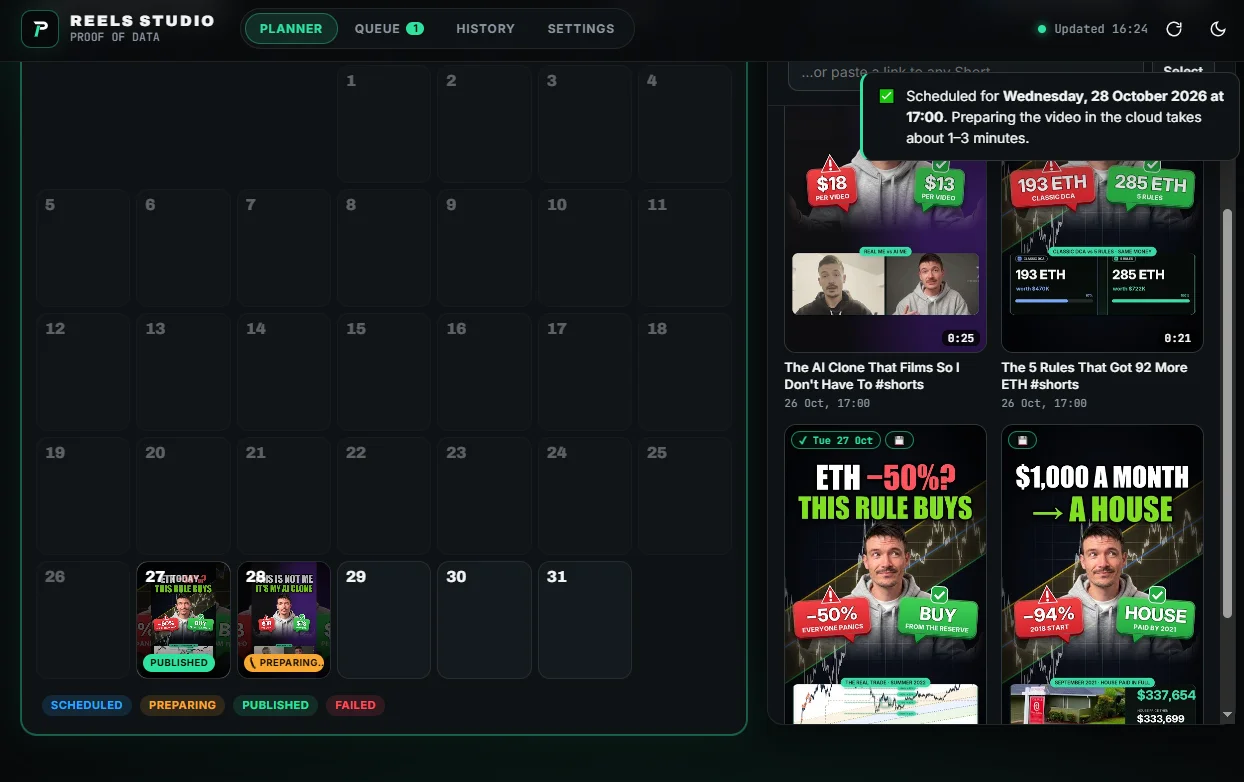
Preparing → Scheduled
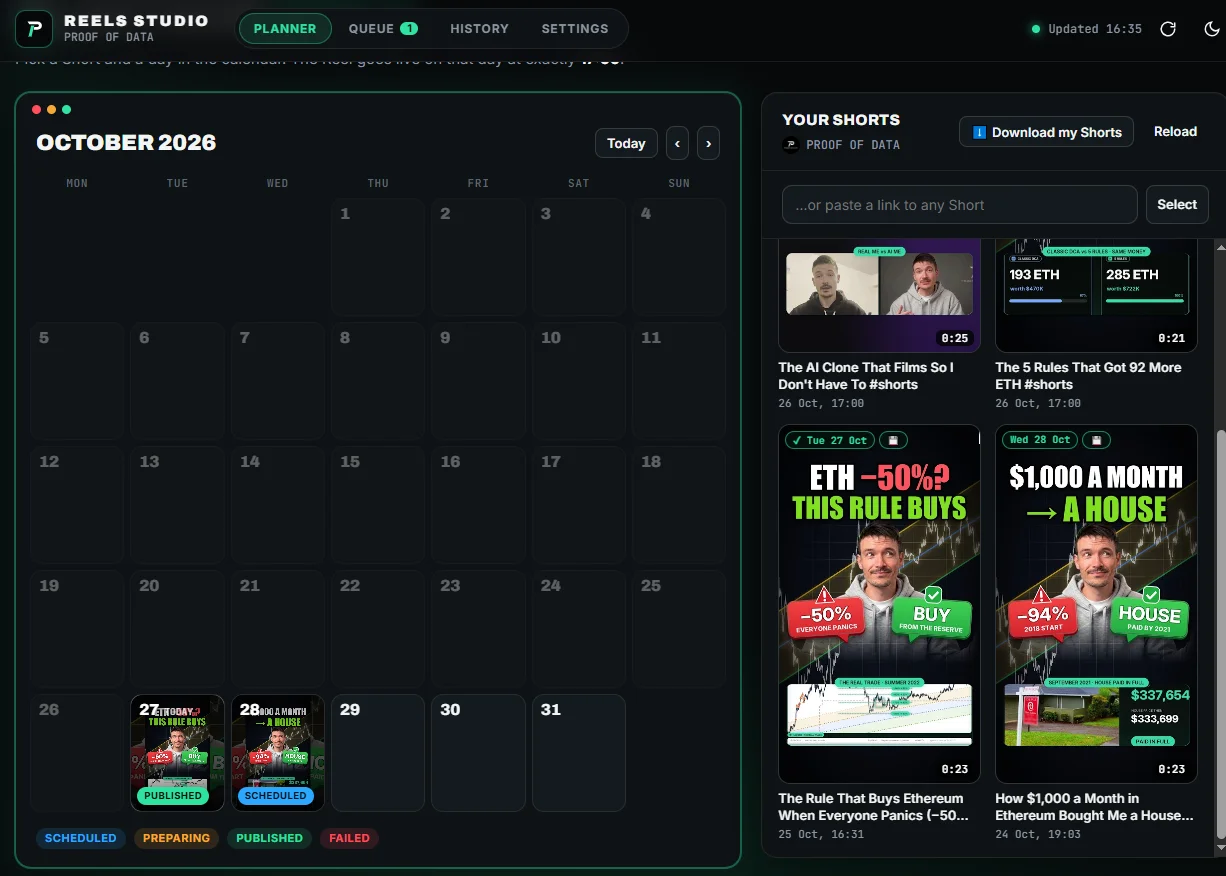
The day shows Preparing… for 1–3 minutes, then Scheduled. It's also listed under Queue.
Once it says Scheduled, everything is in the cloud. Your PC can be off at publish time.
15.4
Swap a day
Click another Short, the same day, tick Replace … → Replace & schedule. The old Short is free again.
Possible until 35 minutes before the publish time.
15.5
A whole week
Repeat for each day. Every Short can only be used once, the app blocks duplicates.
15.6
Posted something by hand?
Click that Short → Already on Instagram?. The calendar shows it as Published and it can never be scheduled again.
💡
Even without this, the tool checks your whole Instagram profile for the same caption right before posting.
Part 16
Post today, without planning
⏱ 1 min
Don't want to plan? Post a Short the same day, right away or at a time you pick, as many as you like. This doesn't need cron-job.org, and your calendar stays free.
16.1
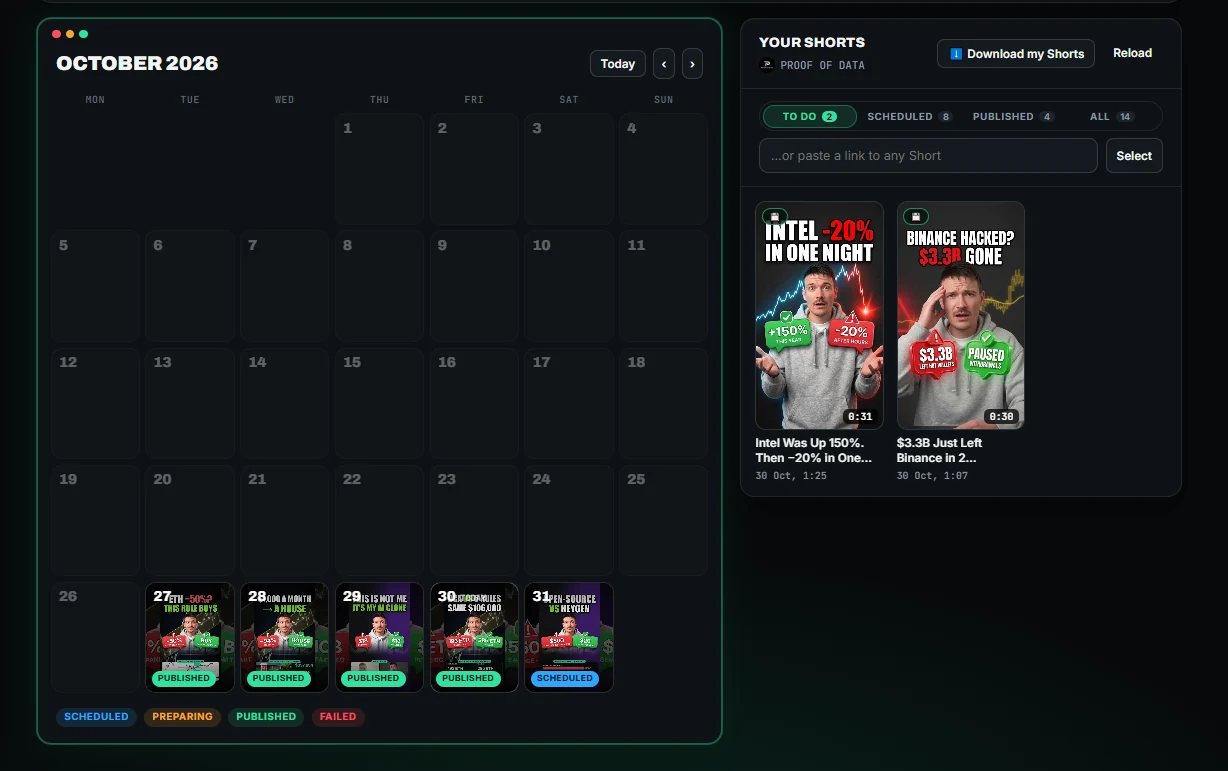
Find your Shorts with the filter
The tabs above your Shorts show To do (not used yet), Scheduled, Published and All, each with a count.
16.2
Post now, or at a time today
Click a Short. The video file is attached automatically.
Under ⚡ Post today, click Post now. It goes live in about 3–6 minutes.
Or type a time today, up to 5 hours ahead, and click Post at ….
⚠
Waiting for a later time uses your free GitHub minutes one to one (2,000 a month on a private repository). Post now is the cheapest.
16.3
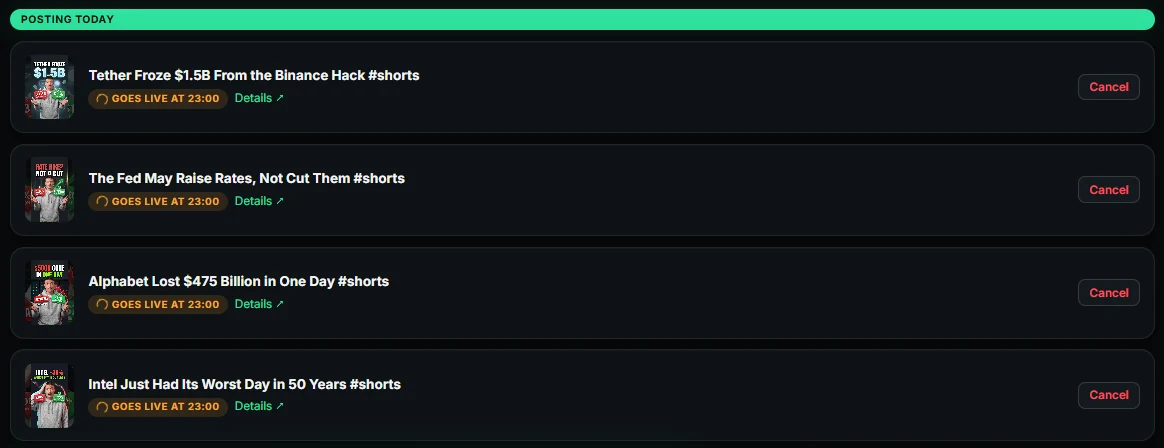
Follow it under Posting today
The Reel shows up under Posting today at the top of the Planner. While it waits, you can Cancel it.
Once it's out you'll see ✓ Posted. The same Short can never be posted twice.
Part 17
Optional: on-time publishing with cron-job.org
⏱ 5 min
GitHub's own timer is best-effort: on busy days it runs late or skips. A free outside timer starts the publish job on time. GitHub's timer stays on as a backup, and the never-twice guard makes extra runs harmless.
17.1
A second, tiny GitHub token
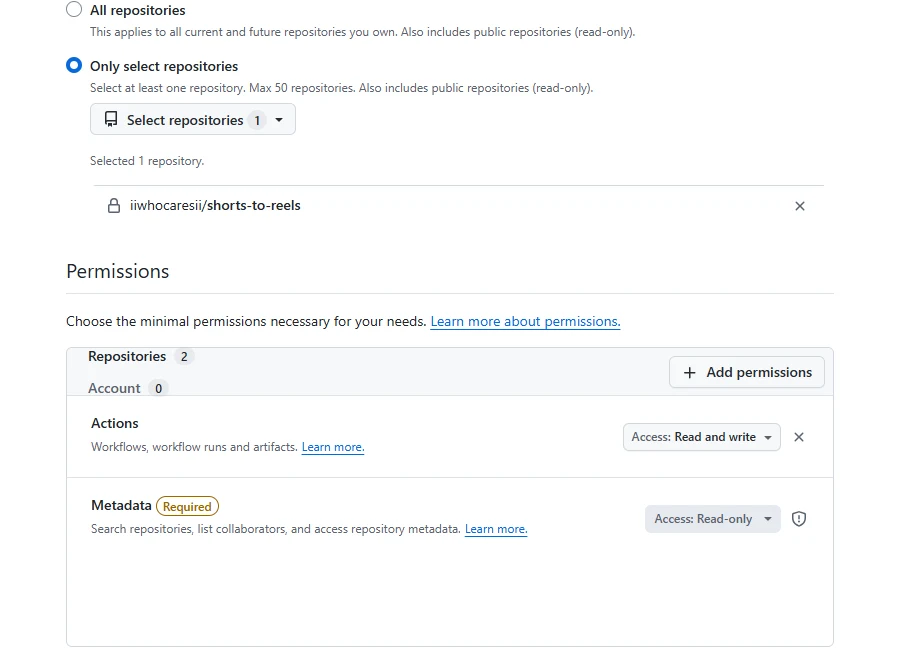
Create one more fine-grained token (same page as before): name cron-job.org, only your shorts-to-reels repository, permission Actions: Read and write, nothing else.
Copy it.
17.2
Create the cron job
Sign up free at cron-job.org → Cronjobs → Create cronjob. Title:Reels publish.
URL:https://api.github.com/repos/OWNER/REPO/actions/workflows/publish.yml/dispatches (replace OWNER/REPO with yours, e.g. your-name/shorts-to-reels).
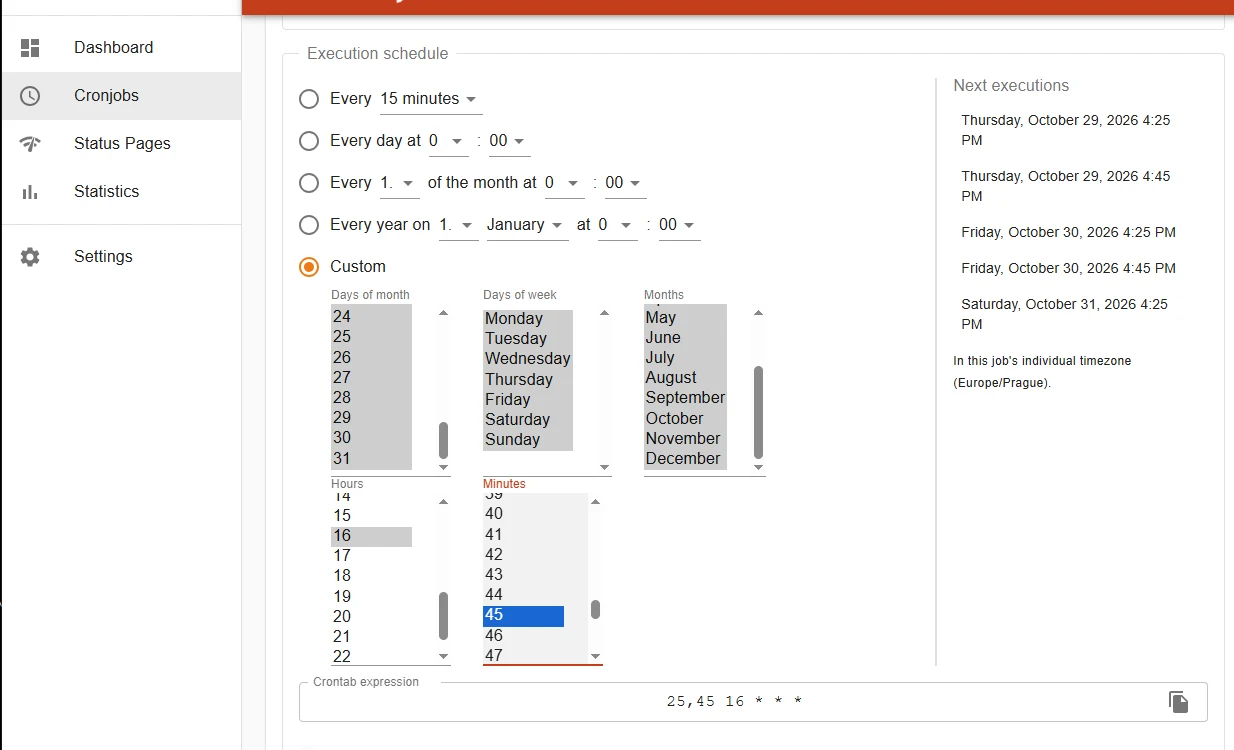
Schedule: custom, every day, at your publish time minus 35 and minus 15 minutes. For 17:00: hours 16, minutes 25 and 45 (Ctrl + click to select the second minute). The crontab line must read 25,45 16 *.
Time zone: the same as in Reels Studio (shown under Next executions).
17.3
Advanced tab
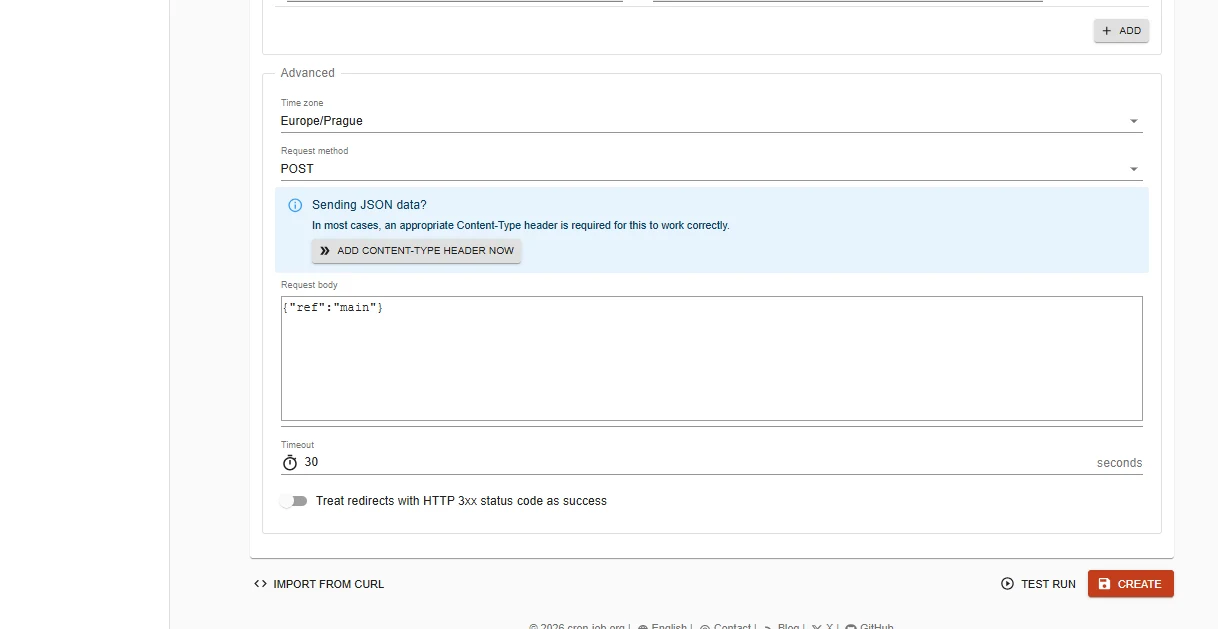
Headers:Accept = application/vnd.github+json · Authorization = Bearer + your new token · X-GitHub-Api-Version = 2022-11-28.
Request method:POST, then click Add Content-Type header now.
Request body:{"ref":"main"}.
17.4
Test run, then Create
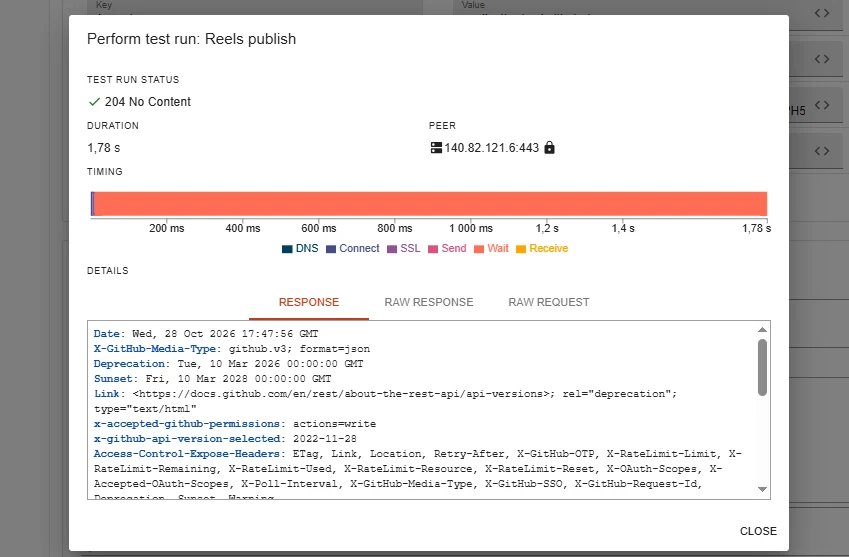
Click Test run → Start test run. Status 204 No Content = it works.
Close → Create.
💡
401 or 403? The Authorization header is wrong: it must be Bearer, one space, then the whole token.
17.5
Check on GitHub
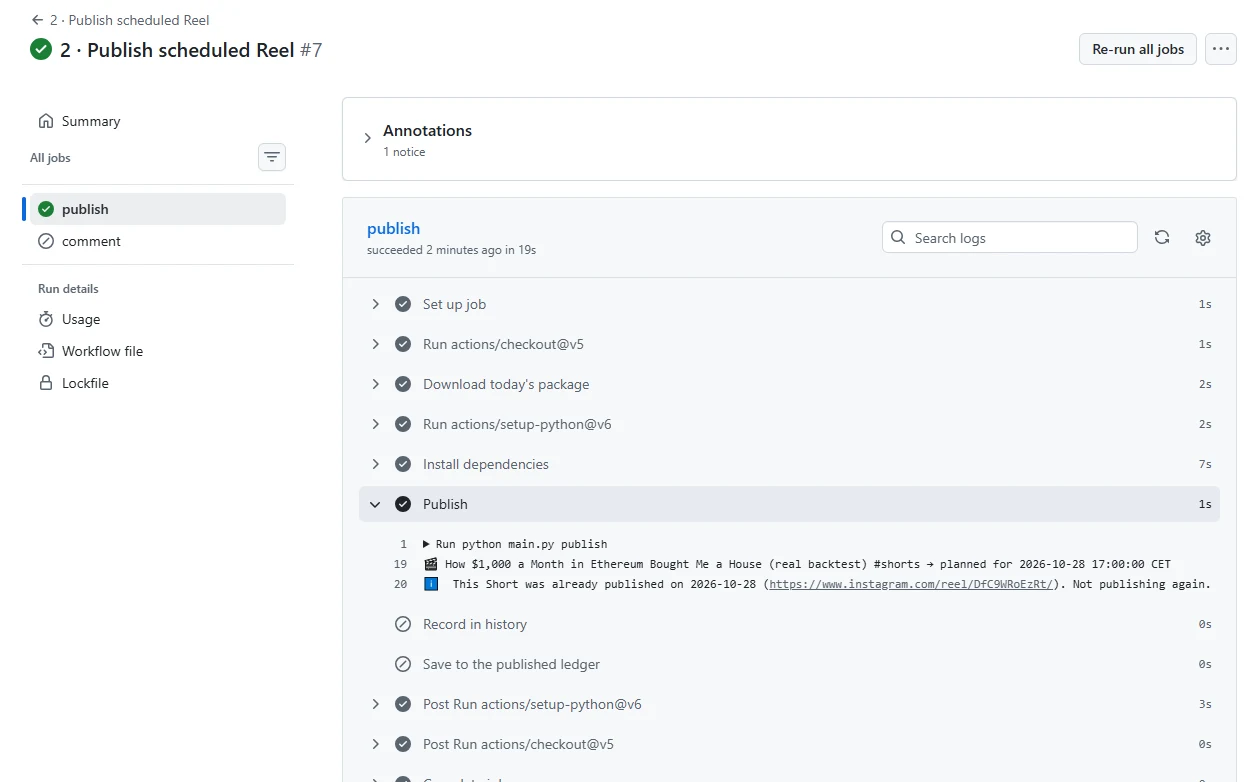
Actions → 2 · Publish scheduled Reel: a new run appears (Manually run by you, because it uses your token).
If today's Reel is already out, the run stops with already published … Not publishing again. That's the never-twice guard doing its job.
💡
Changed your publish time in the app? Change the cron-job.org times too. The app shows them in Settings → Channel & schedule.
Part 18
Appendix: YouTube cookies (optional, not recommended)
⏱ 5 min
Only if you can't use the desktop app and want the cloud to download videos from YouTube itself. YouTube keeps invalidating cookies used from servers, so this stops working every few hours to weeks.
18.1
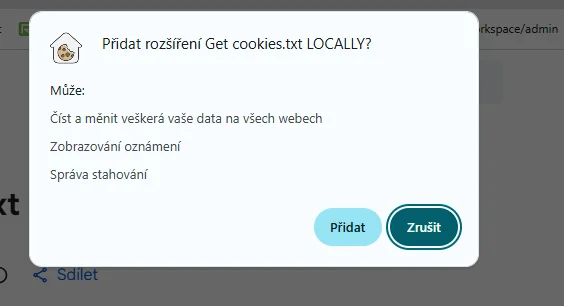
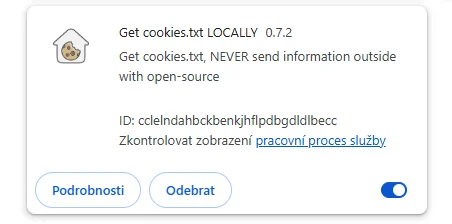
Install Get cookies.txt LOCALLY
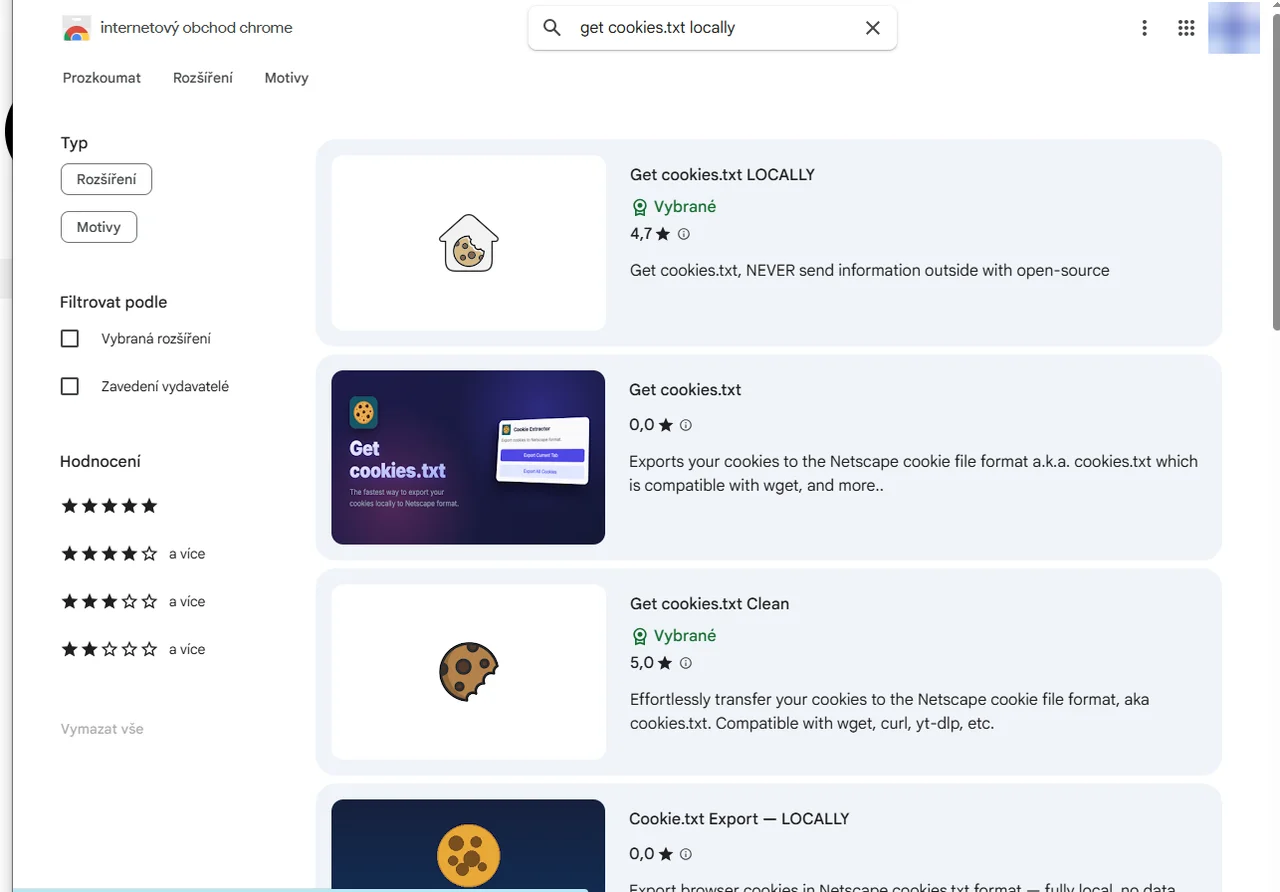
Screenshot in Czech. The button names in the text are the English ones.
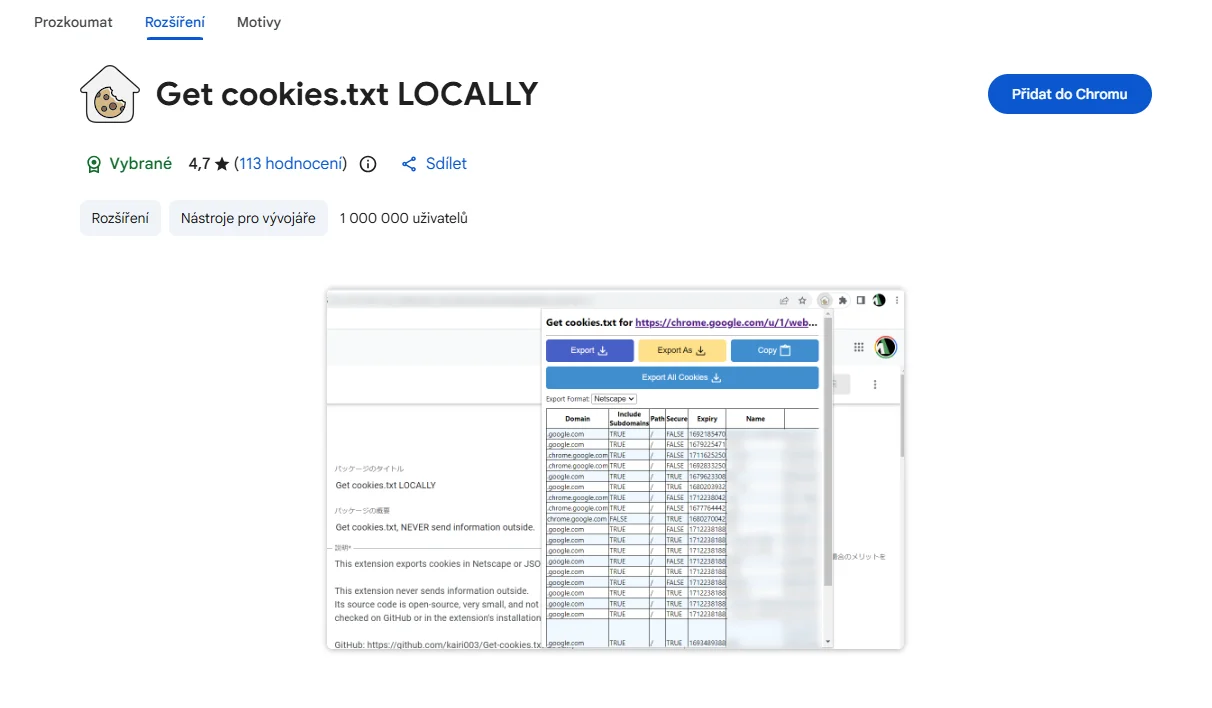
In the Chrome Web Store search get cookies.txt locally and open the result called exactly Get cookies.txt LOCALLY (Featured, ~1,000,000 users).
Add to Chrome → Add extension.
⚠
Avoid look-alikes with 0 ratings. A cookie extension can see your logins.
18.2
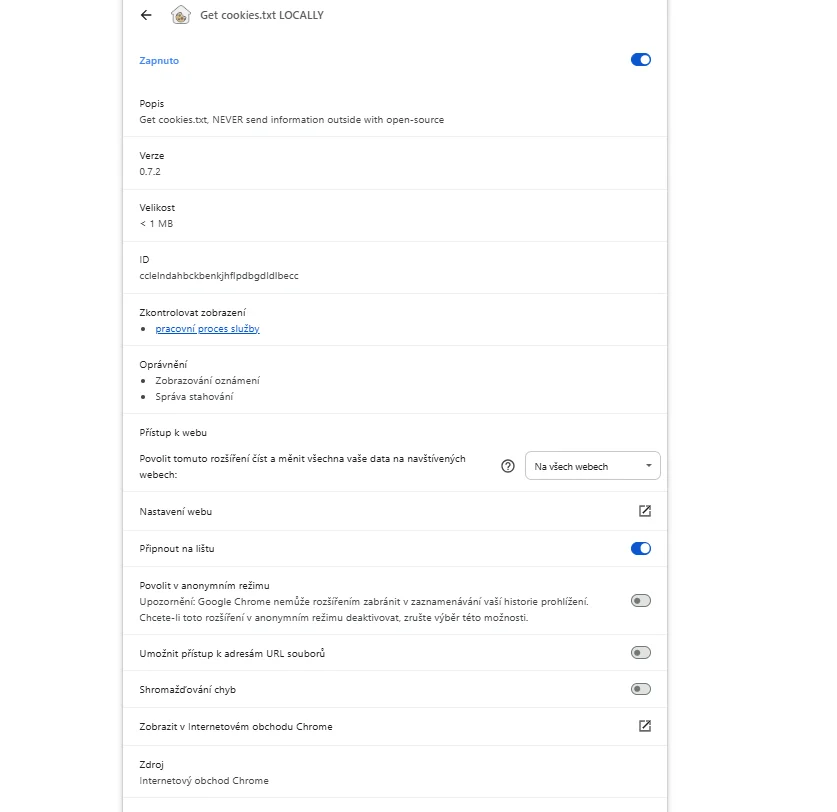
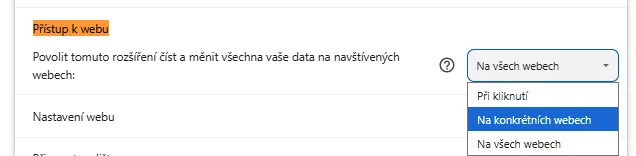
Limit it to YouTube and allow Incognito
Screenshot in Czech. The button names in the text are the English ones.
chrome://extensions → the extension → Details.
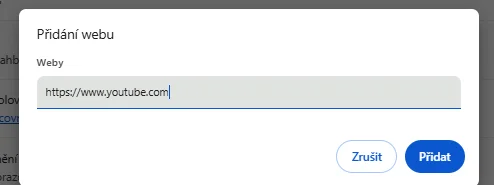
Site access:On specific sites → add https://www.youtube.com.
Switch on Allow in Incognito.
💡
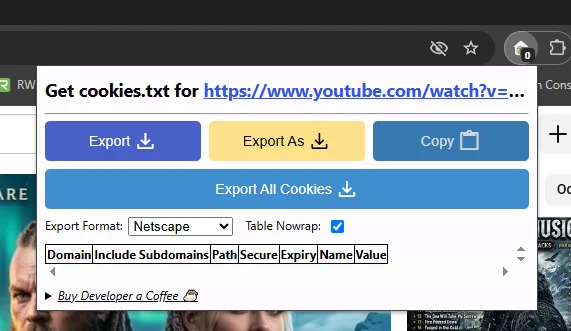
Empty table later? Temporarily set Site access to On all sites, export, then switch it back or remove the extension.
18.3
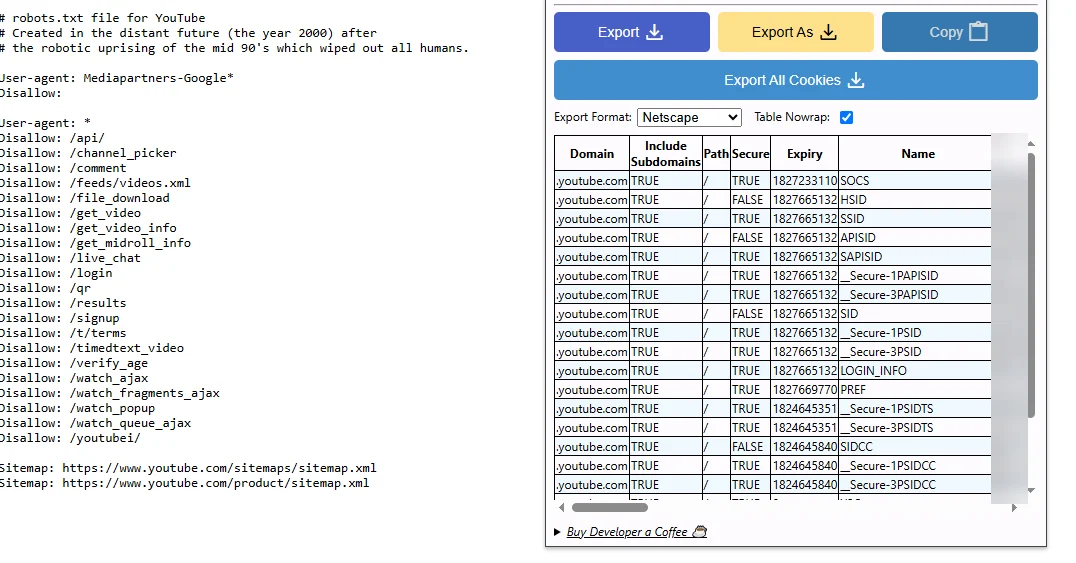
Export from robots.txt
Open an Incognito window (Ctrl + Shift + N), go to youtube.com and sign in (ideally a secondary Google account).
In the same window open a new tab with https://www.youtube.com/robots.txt, then close the YouTube tab.
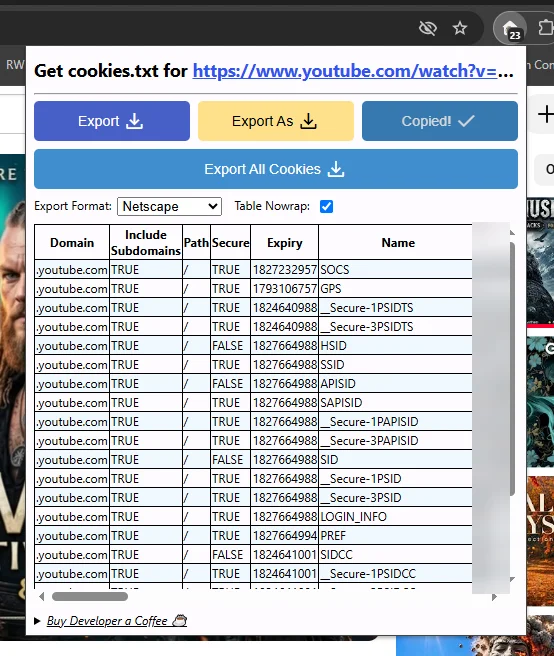
On the robots.txt tab click the extension → Copy (format Netscape). The list must include LOGIN_INFO and SID.
Close the Incognito window. Don't sign out, that kills the cookies.
⚠
The copied text works like a login to your Google account. Paste it only into Reels Studio.
💡
YouTube replaces cookies while a YouTube tab is open. Exporting from robots.txt avoids that.
18.4
Save and test
Settings → API keys → YouTube cookies (optional) → paste → Save → Run access test.
Video download from YouTube should be OK. When it fails again later, repeat the export.
Help
Troubleshooting
“Your Shorts” is empty
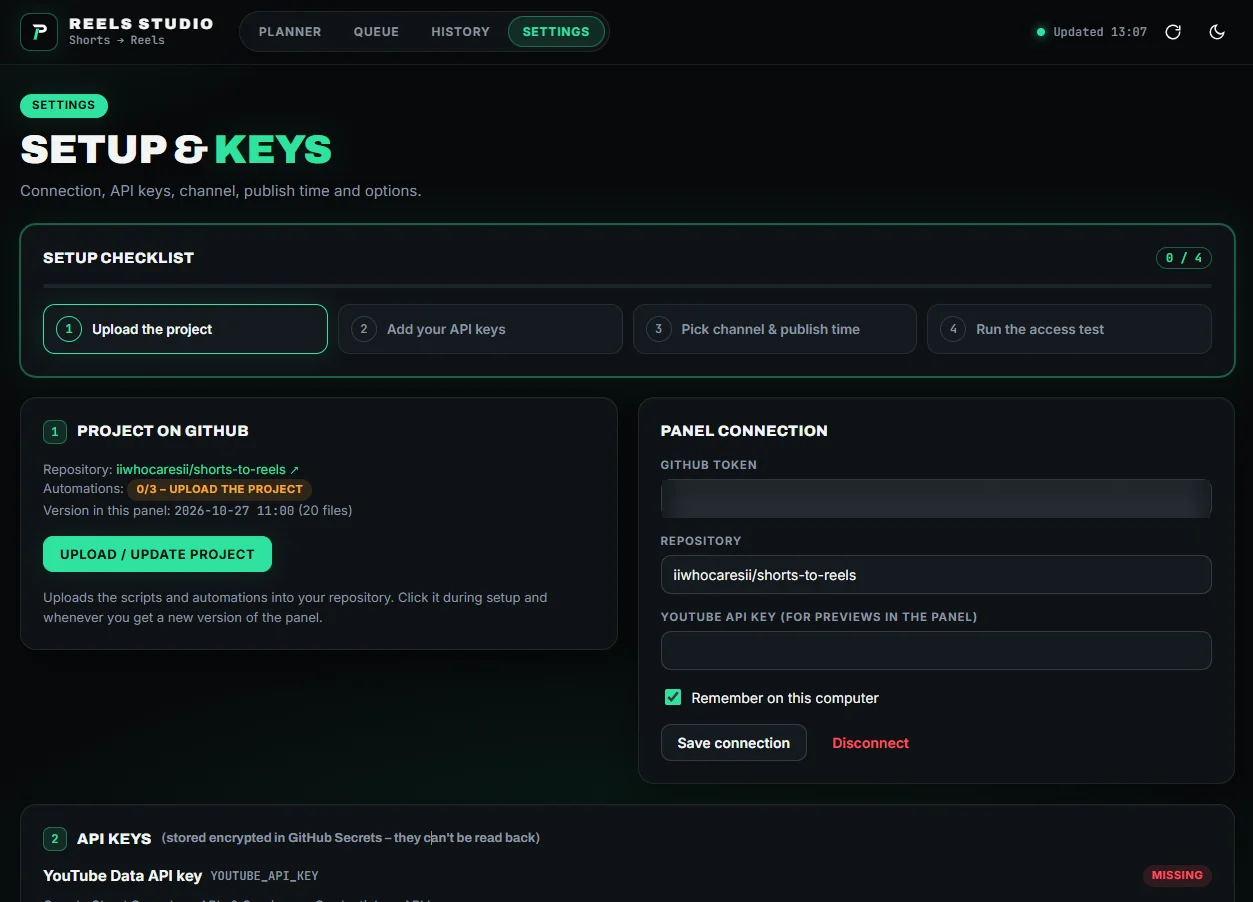
Paste the YouTube key into Settings → Panel connection (not only into API keys) and save your channel. Then click Reload.
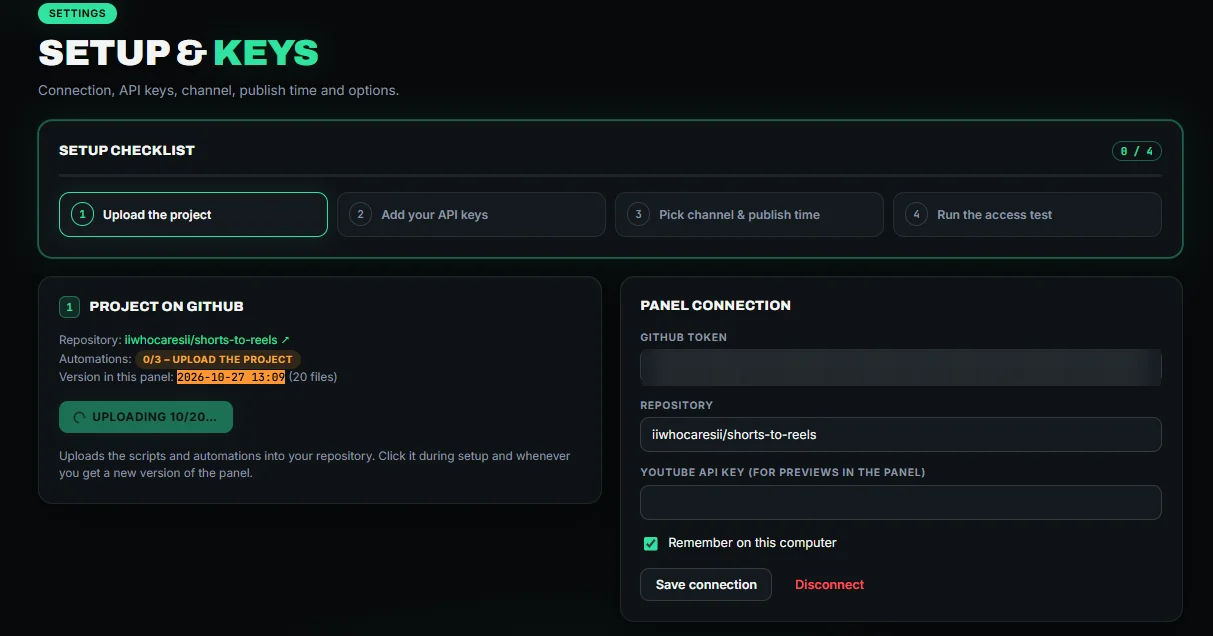
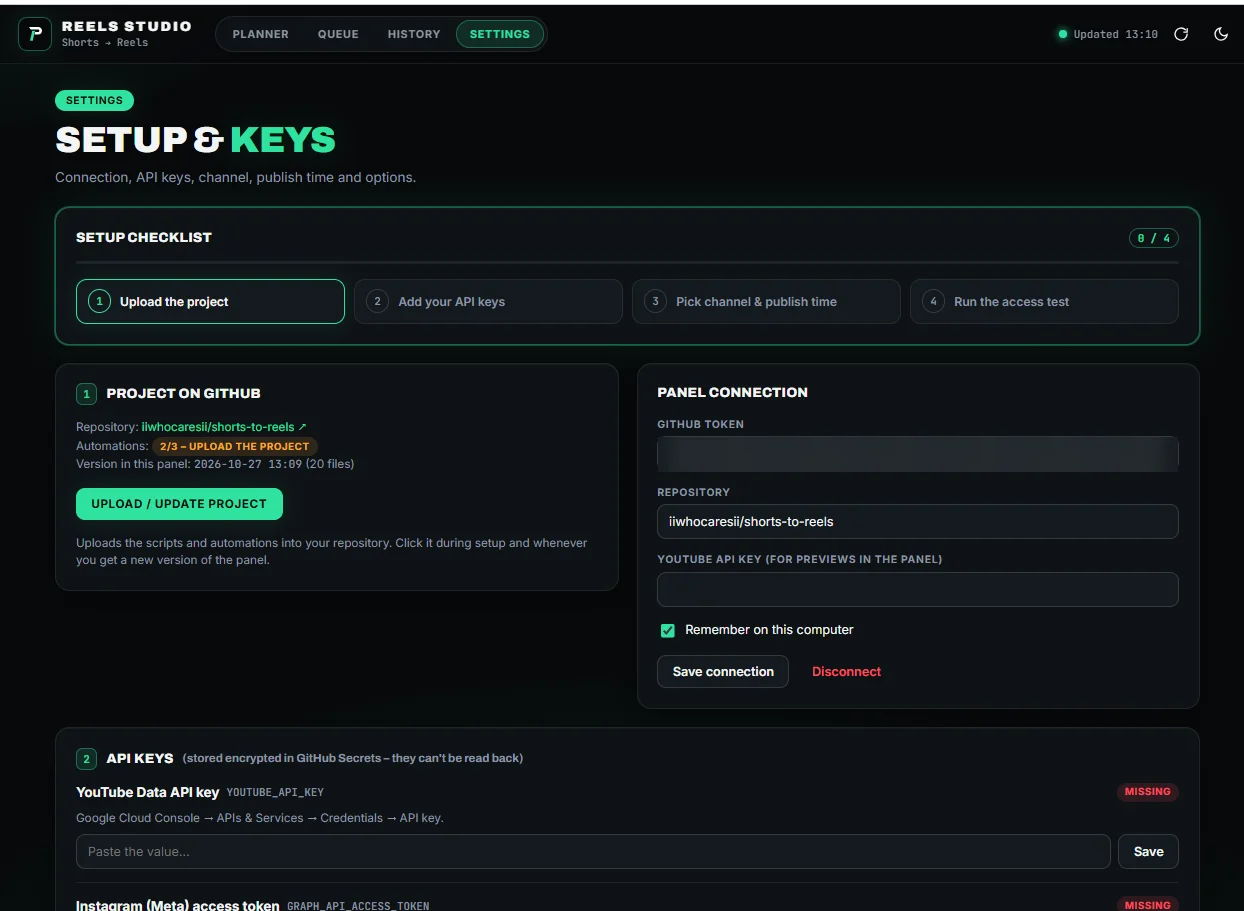
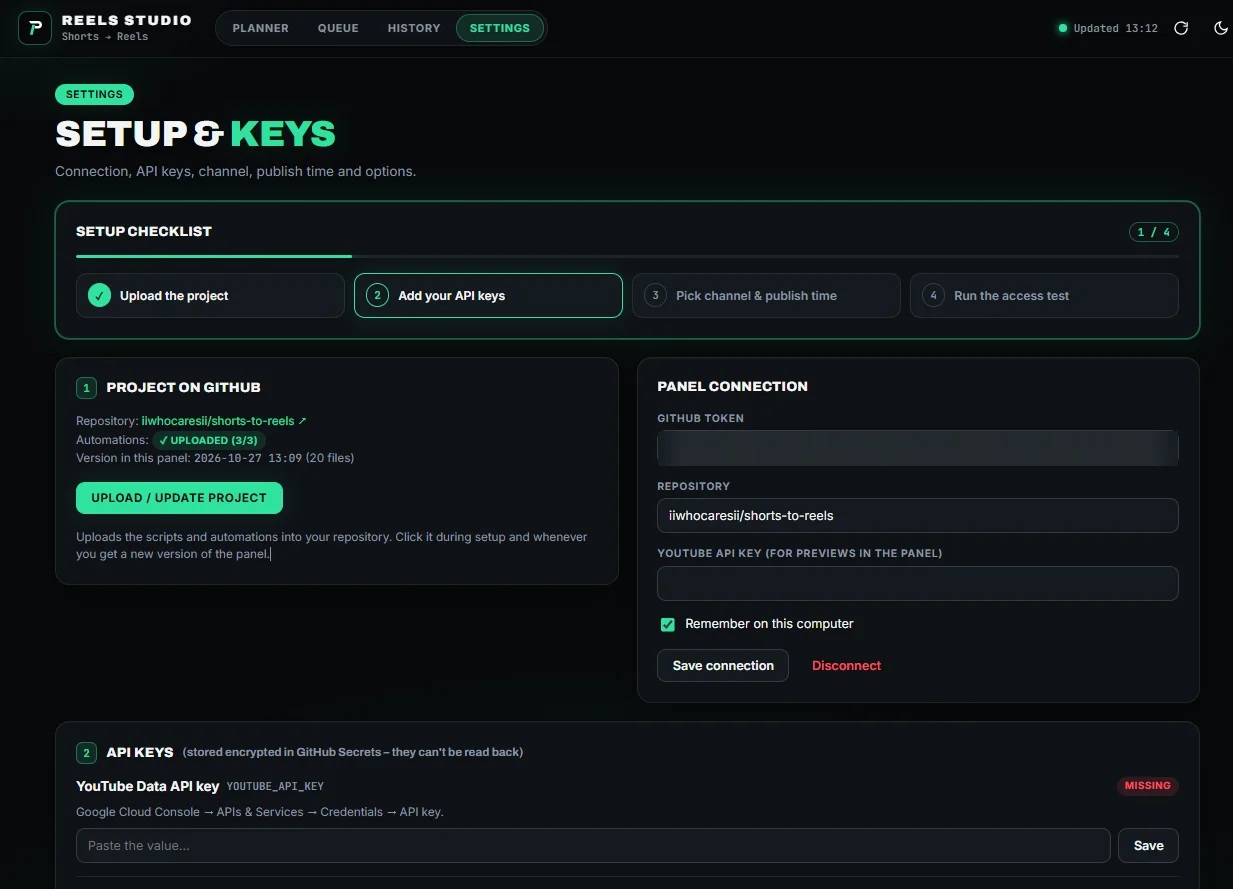
Automations stay at 2/3
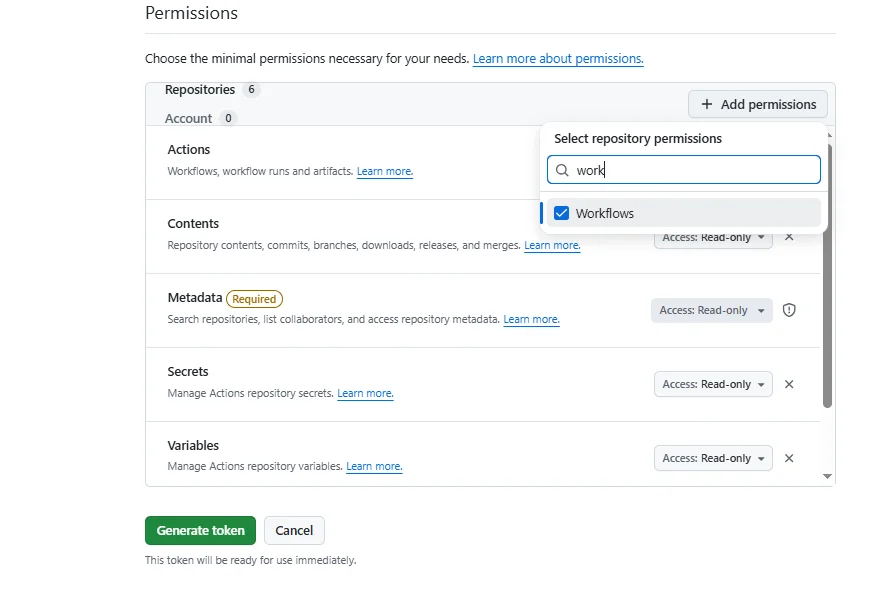
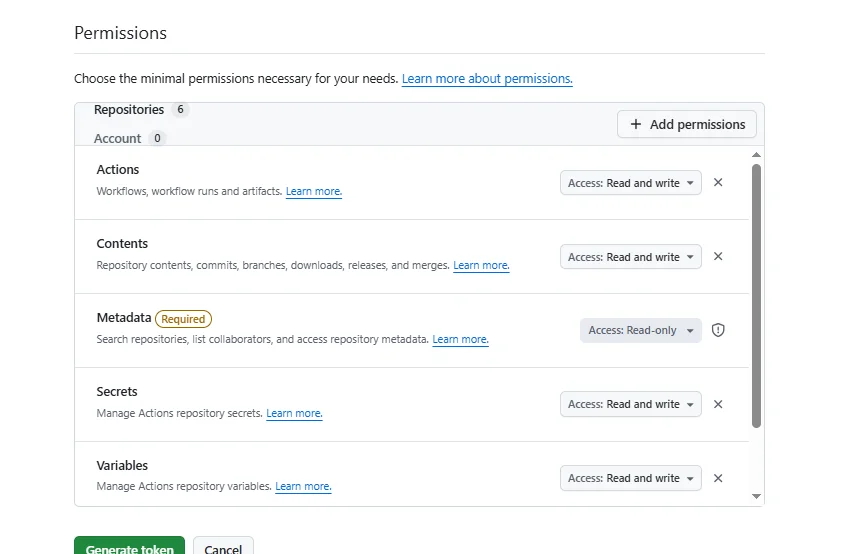
Wait a minute and click ↻. Still stuck? Click Upload / update project again. Check the token has Workflows: Read and write.
Access test: Instagram is red
Open its log. Usual causes: a missing permission (code 10 or 200 → generate the token again with all six), the Page ID instead of the Instagram ID (Part 12), or a token that expired because it was set to 60 days.
“Sign in to confirm you're not a bot”
Expected. YouTube blocks downloads from GitHub's servers. Schedule from the desktop app, it attaches the file from your PC.
A Reel didn't go out on time
GitHub's timer can be late or skip a day. Set up cron-job.org (Part 17). To rescue today's Reel (up to 3 hours after the publish time): GitHub → your repository → Actions → 2 · Publish scheduled Reel → Run workflow with Publish today's package right away ticked, or Settings → Manual override → Publish today's Reel now in the app.
Does it cost anything?
No. A private GitHub repository gets 2,000 free Actions minutes a month; a publishing day uses about 40, a day without a Reel about 4. The YouTube API allows 10,000 units a day; one Reel uses 5–10.
Another computer
Copy the folder (without .venv and work) and run Install Reels Studio.bat there. Keys, channel and queue live on GitHub, so the app only asks for a GitHub token and the YouTube key for previews.
My GitHub token expired
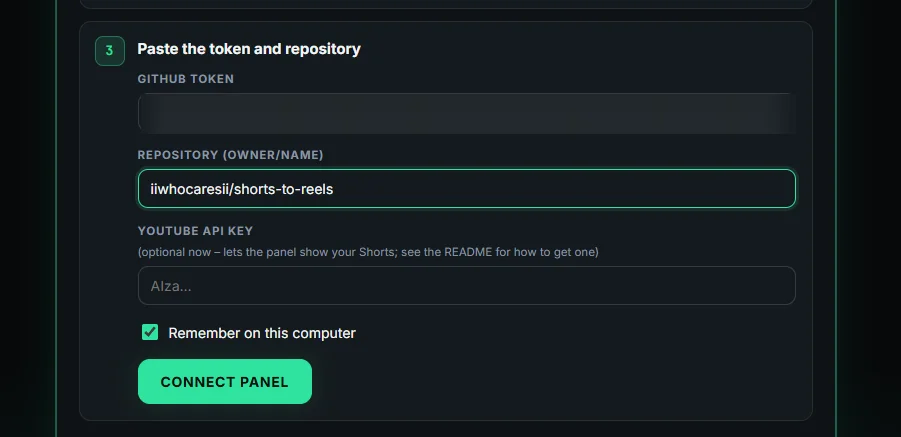
Create a new one exactly like in Part 3 and paste it into Settings → Panel connection → Save connection.
Is it safe?
Your keys are encrypted in your browser and stored as GitHub Secrets in your own private repository. Nobody else, including me, ever sees them. The GitHub token works only for that one repository.
Still stuck? Comment under the video with the step number (e.g. “10.4”) and what you see.